Ever been mid-shoot, wobbling camera rig in hand, and felt that gut-wrenching dread of everything about your shot going south? I remember the exact moment on a bustling street in Tokyo when my entire setup teetered, almost toppling over—heart pounding, hands shaking—I realized I was missing a simple tweak that could have saved the day. That lightbulb moment led me down a rabbit hole of rig balancing tricks that are so straightforward, yet so underrated. If you’ve ever faced that sinking feeling of shaky footage or unstable rigs, you’re in the right place.
Why Proper Balance Can Transform Your Travel Vlogs
Balancing your camera rig isn’t just about preventing slips and falls. It directly influences the quality of your footage, your shooting efficiency, and even your back pain after a long day on the move. A well-balanced rig ensures smooth pans, steady shots, and less fatigue—crucial when capturing those fleeting cinematic moments during your travels. In fact, studies show that stabilizing gear can improve footage quality significantly, saving hours in post-production. Plus, mastering these tweaks lets you focus on storytelling instead of wrestling with your equipment.
Is It Really Necessary to Tweak Your Rig for Every Shoot?
Initially, I shrugged off the importance of minor adjustments, thinking they’d waste time. But I learned early on that overlooking small balance tweaks often leads to bigger problems—shaky footage, increased setup time, or even gear damage. One rememberable mistake I made was neglecting to tighten a counterweight properly, which caused a camera slip that cost me precious shooting minutes. Trust me, these tiny tweaks are worth your attention—your footage will thank you.
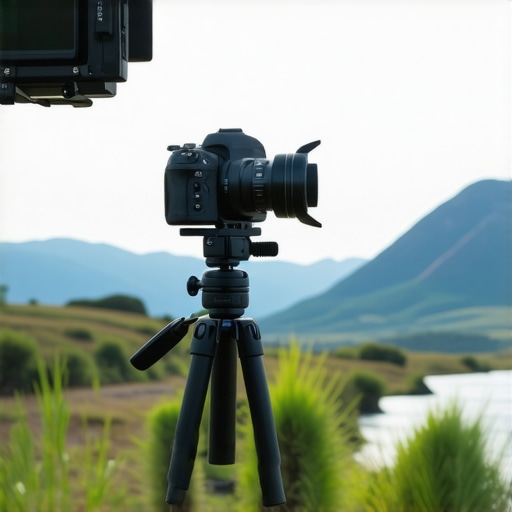
Set Your Primary Support Firmly
Begin with a stable foundation—your tripod or C-stand—by ensuring it’s on a level surface. Use a bubble spirit level or the built-in spirit level on your tripod head to confirm. Tighten all locks securely, paying attention to the center column and tripod legs. A loose base translates directly to shaky footage. When I set up on uneven terrain during a mountain shoot, I always used a portable leveling base, which made all the difference in maintaining stability.
Distribute Weight Evenly Across Components
Think of your rig as a balanced scale. Attach heavier accessories close to the support center and lighter ones farther out. Use counterweights on the rear or bottom of your rig to offset front-heavy gear. For instance, when mounting a large zoom lens, I added a small counterweight on the rig’s rear handle to keep the center of gravity low and centered. This simple act prevents the rig from pitching forward due to imbalance.
Adjust Counterweights Precisely
Counterweights must be about 10-20% of your overall rig weight, positioned carefully. Secure them tightly using quick-release or adjustable clamps. During a recent documentary shoot, I used small sandbags as counterweights on my C-stand’s legs, which prevented tipping in gusty conditions. Proper placement and securement of weights avoid shifts during movement, maintaining steadiness.
Balance the Camera Horizontally and Vertically
Use your camera’s tilt and pan adjustments to achieve perfect balance. Loosen the camera mounting plate and slide it forward or backward until the rig remains level without support. Engage the friction locks once set. I recall a shoot where my camera kept drifting downward; I fixed this by re-balancing the tripod head’s pan and tilt axes, which instantly eliminated drift and improved shot stability.

Optimize Support Arms and Accessories
Extend arms or booms should be adjusted to distribute weight optimally. Check the tension screws on your boom arm, making sure they’re neither too tight nor too loose. Use light stand accessories like arm grips and cable clips to tidy cables and prevent sudden pulls that can destabilize your setup. For heavy audio mics on boom arms, I frequently inspect tension screws and cable routing to avoid sag and sway, referencing guides like this comprehensive setup guide.
Fine-Tune Before Shooting
Always do a final check by gently nudging your setup and observing any movement. Tackling minor oscillations early prevents bigger issues during critical shots. For example, before capturing a runaway drone chase scene, I gently pushed the camera rig and readjusted weights until it held perfectly steady. Small realignments in the moment save hours of post-stabilization work and grant confidence in your shot quality.
Many filmmakers assume that choosing high-quality support gear guarantees perfect stability, but in my experience, most get the nuances wrong. For example, a frequent mistake is relying solely on the weight of C-stands or tripods without considering the distribution of that weight or the setup’s friction points. These oversights can lead to subtle but damaging issues like creeping, swaying, or even catastrophic falls during critical shoots. One myth I often hear is that heavier gear always equals better stability; in reality, improper anchoring and overlooked adjustments can negate that advantage. Advanced professionals often perform a series of fine-tuning routines, such as checking the tension of boom arms or the tightness of grip-heads, to prevent sag and drift—these tiny details make a dramatic difference in maintaining shot consistency.
Another common trap is neglecting the importance of ground contact and surface friction. A support stand on slick or uneven surfaces can slip unexpectedly, even if the equipment appears stable from a distance. For instance, using sandbags or weight plates improperly or ignoring the use of anti-slip pads can compromise your setup unexpectedly. Referencing expert guides like [mastering tripod stability](https://stands.creatorrigreviews.com/mastering-tripod-stability-expert-tips-to-elevate-your-shots) reveals that the devil is in the details, especially in dynamic shooting environments.
What does it really take to ensure your gear remains steady under stress?
In high-stakes shoots—think windy outdoor environments or heavy lighting rigs—advanced rigging techniques are essential. Securely locking every support point, evenly distributing weights, and routinely testing stability during a shoot are critical. For example, I have found that re-evaluating support angles after set adjustments prevents unexpected shifts. External factors, such as vibrations from nearby heavy equipment, can subtly transfer to your setup, causing micro-movements that ruin the shot. To prevent this, techniques like using counterweights creatively or employing vibration dampers are standard among professionals. Your setup’s stability hinges on these meticulous, often overlooked, details—not just on the gear quality but on the rigging discipline.
When setting up complex rigs with multiple accessories, many overlook the significance of cable management and accessory placement. Tangled cables or uneven weight distribution can create imbalance and sway, especially during camera movement or environmental disturbances. To master such setups, it’s advantageous to understand how to build a custom rig that balances all components seamlessly. For comprehensive strategies, check out [how to build a custom camera rig for professional results](https://stands.creatorrigreviews.com/how-to-build-a-custom-camera-rig-for-professional-results).
Finally, avoid the trap of static configurations. Regularly revisit and adjust your gear, especially before critical shots. Flexibility and repeatability are the hallmarks of seasoned professionals. Have you ever fallen into this trap? Let me know in the comments and share your experiences or questions about rig stability.Maintaining your camera support equipment isn’t just about prolonging their lifespan; it’s about ensuring consistent reliability that can make or break your shoot. Regular checks and proper tools form the backbone of a professional setup. First, invest in a high-quality Allen wrench set specifically designed for quick adjustments on support stands and booms. These are crucial for tightening grip heads and tension screws, especially on gear like your boom arm, which is prone to sag over time. Personally, I keep a compact set from Bondhus in my kit because of their durability and precision.
How do I maintain my support tools over time?
To keep your tools in top shape, clean them after exposure to dust and moisture, and store them in a dedicated toolbox away from humidity. This prevents rusting, especially for steel components used broadly across stands and clamps. For support equipment like C-stands, regular lubrication of moving parts with silicone spray helps maintain smooth operation, avoiding sticking or squeaking during critical moments.
Long-term results come from consistent care
By routinely inspecting and maintaining components, you’ll avoid unexpected failures during shoots, which can be costly and time-consuming. For example, I schedule monthly checks on my light stand’s locking mechanisms and boom clamp tension to identify wear early. This habit has saved me numerous last-minute repairs. Incorporating preventive maintenance ensures your gear remains ready for demanding outdoor shoots or high-wind studio setups.
Scaling your support setup intelligently
As your projects grow, so should your toolkit. Adding specialized tools, like digital torque meters for precise clamp tensioning, ensures your support equipment functions safely under increased load. It also helps in fine-tuning support arms for heavier lighting or microphones, as detailed in this comprehensive guide. Remember, scaling isn’t just about buying bigger gear—it’s about optimizing existing equipment and maintaining it properly. Also, establishing a routine for checking and adjusting your gear before every shoot can prevent sagging, slips, or even catastrophic collapses. Regular calibrations using proper tools are how pros keep their support systems rock-solid. Invest in a sturdy torque wrench and tension gauge, and make it part of your weekly gear audit. This discipline not only improves safety but also enhances the quality of your shots. So, next time you set up, take a moment to calibrate your stands and arms meticulously. Your future self will thank you for the reliability and peace of mind.
The Hardest Lessons I Learned About Camera Rigs and Support Gear
Over years of filming on varied terrains and conditions, I’ve discovered that the smallest overlooked detail can lead to the biggest issues—be it a shaky shot or a toppling support. One core lesson is the importance of routine checks, especially on fast-moving shoots. Never assume your gear is ‘set and forget’; a quick shake test or a glance at the tension screws can save hours of post-production headaches and avoid costly equipment damage.
My Go-To Tools That Keep My Support Systems Steady
From high-quality torque wrenches to anti-slip pads, I’ve curated a toolkit that ensures optimal stability. My trusted light stand essentials have saved me on outdoor shoots during windy days. Investing in a reliable spirit level and a set of quick-release clamps means rapid adjustments and peace of mind regardless of the environment.
Taking Support Setup to the Next Level
As you expand your kit, think beyond just buying sturdy gear. Implement custom rigging solutions like weighted bases or innovative cable management systems to prevent sway. Remember that a well-balanced setup isn’t merely about heavy equipment but about thoughtful placement and secure connections. Check out the ultimate guide on boom arm setup for advanced techniques. A disciplined routine of recalibrating and inspecting your support gear before each shoot transforms average setups into professional-grade stability.
An Unexpected Insight That Changed My Approach
One lesson that caught me off guard was the significance of surface friction. Support stands on slick or uneven ground are prone to slipping, even if everything appears secure. Using anti-slip pads or sandbags strategically saved me from accidental topples during critical moments. The myth that heavier always equals better stability is broken when you realize proper weight distribution, surface grip, and quick adjustments outperform sheer mass. The devil truly is in the details—tightening grip heads, adjusting tension screws, and ensuring even weight spread empower you to tackle unpredictable outdoor scenarios confidently.
How Consistent Maintenance Becomes Your Secret Weapon
Keeping your gear in top shape means more than just avoiding wear—it prepares you for spontaneous opportunities. Regularly inspecting and lubricating clamps, tightening screws, and replacing worn parts like grip-heads or quick-release plates ensure your setup remains reliable. I recommend creating a maintenance schedule that includes checking all support joints and tension settings, especially before demanding shoots. This discipline elevates your support system from a set of tools to a trusted partner on set, preventing surprises that could derail your project.
Your Next Step in Perfect Support
Now, it’s time to assess your current setup. Are your support stands, booms, and rigs genuinely optimized for stability under real-world conditions? Small upgrades—like integrating adjustable counterweights or implementing smarter cable routing—can make a profound difference. Remember, mastery is in the details. Combine this with continuous learning by exploring expert resources and asking for peer feedback. Your journey to flawless rig stability starts with mindful adjustments today.
Have you ever faced unexpected rig instability during a shoot? Share your experience below and let’s troubleshoot together!