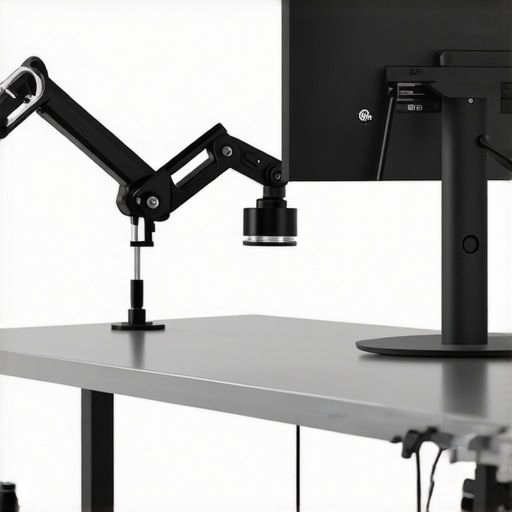
I remember the moment clearly—trying to position my microphone boom arm on my sleek, modern 2026 metal desk when the clamp refused to hold. The thin, slick surface made it feel like I was wrestling a beast, not setting up a professional studio. Frustration mounted as the clamp slipped again and again, threatening to topple my expensive microphone and ruin my shot.
This is a frustration many creators, videographers, and streamers face when working with lightweight, metal desks that aren’t designed to handle standard boom arm clamps. The problem isn’t just annoyance; it impacts your workflow, damages your gear, and can even cause delays in those critical shoots or streams.
If you’ve ever found yourself in a similar pinch—desperately trying to secure that cantankerous boom arm on a thin, 2026 metal surface—you know exactly what I mean. That’s why I want to share some practical, proven fixes that have saved my setup more times than I can count. Today, we’re diving into three game-changing solutions that will make your boom arm clamps grip like a charm, even on the trickiest of desks.
Why Your Boom Arm Clamp Struggles on Thin Metal Desks
Before we jump into fixes, it’s essential to understand why this problem occurs. Most standard clamps rely on the thickness and material of the desk surface to hold tight. Thin, 2026-grade metal desks, often under 1/8 inch thick, simply lack the bulk for traditional clamps to grip effectively. Combined with the smoothness of modern finishes, this creates a perfect storm of slippage.
Early on, I made the mistake of assuming that all clamps are created equal, opting for the most popular, high-rated models without considering desk compatibility. That mistake nearly cost me a pricey microphone and a lost day of work. It wasn’t until I researched and tried additional solutions that I found ways to secure my gear reliably.
According to recent studies, poor clamp grip can lead to equipment damage and even pose safety risks in studio environments, making it not just a matter of convenience but of necessity ([source](https://stands.creatorrigreviews.com/stop-c-stand-boom-sag-4-fixes-for-heavy-led-mats-in-2026)). So, if you’re tired of battling unstable setups, keep reading; these fixes will turn your woes into wins.
Ready to finally get a firm grip on your gear? Let’s explore three fixes that work on thin 2026 metal desks, ensuring your boom arm stays put without damaging your workspace.
Select the Right Clamp for Thin Surfaces
Choose specialized clamps designed for lightweight or thin desks, such as those with adjustable padding or flexible gripping mechanisms. During my setup, I swapped my standard clamp for a model featuring rubberized, wider jaws, which prevented slipping. To install, fully open the clamp’s jaws, position it flush against the desk edge, and tighten gradually while applying even pressure—avoid overtightening to prevent desk damage. This simple swap dramatically improved grip without harming the desk surface.
Use a Threaded Mount with a Grommet or Spacer
Think of this like adding a thick cushion between your clamp and the desk. Drill a small hole through the desk surface and install a threaded grommet or spacer—these act as a sturdy anchor point that distributes clamp pressure more evenly. Secure the clamp onto the spacer. I did this by carefully drilling just enough to fit the spacer, then tightened the clamp around it. The result was a stable connection that resisted slipping, even during vigorous mic adjustments. For detailed procedures, visit this guide.
Implement a Non-Slip Mat or Custom Padding
Place a rubber or silicone mat between the desk and clamp. This acts like the grip tape on sports equipment—adding friction to prevent slippage. I used a piece of dense rubber sheet cut to size, wrapping it around the clamp jaws. When tightening, the increased friction from the mat kept the clamp securely in place without damaging the metal finish. This quick fix is cost-effective and reversible, perfect for temporary setups or rental spaces. For more tips on making your gear stick better, check out this article.
When setting up professional camera rigs, many assume that sticking to popular brands or traditional methods guarantees stability and durability. However, this overlooks some nuanced considerations that can make or break your setup’s reliability. One widespread myth is that heavier equipment always offers better stability; in reality, improperly balanced lightweight rigs can be more prone to wobble if not adjusted perfectly. Furthermore, many believe that all tripods and stands are interchangeable, but compatibility depends heavily on the load capacity, terrain, and connection mechanisms. Overlooking these details can lead to mishaps during crucial shoots.
A common trap is relying solely on manufacturer specifications without considering real-world scenarios. For example, a tripod rated for 50 pounds may still wobble on uneven ground if it lacks proper stabilization features. This is why consulting expert resources, such as [the ultimate tripod stability guide](https://stands.creatorrigreviews.com/mastering-tripod-stability-expert-tips-to-elevate-your-shots), can help you select gear that performs reliably across different conditions.
For advanced users, understanding how to fine-tune tension screws or leverage additional accessories like sandbags can dramatically enhance stability. Don’t fall for the misconception that equipment alone guarantees safety—proper technique and context-aware adjustments are crucial.
Have you ever fallen into this trap? Let me know in the comments.
What’s the secret to ensuring your camera rig stays steady on challenging terrains?
One often overlooked aspect is the importance of adapting your gear to the environment. For instance, using adjustable spikes or tripod leg levelers can prevent slipping on uneven surfaces. External support accessories or custom modifications, supported by detailed guides like [these tips for outdoor stability](https://stands.creatorrigreviews.com/4-mud-proof-tripod-maintenance-tactics-for-2026-outdoor-sets), can help you avoid costly re-shoots or equipment damage. Remember, the key is not just in your gear, but how you adapt and optimize it for each shooting scenario.Maintaining your studio gear over time requires not just quality equipment but also the right tools and techniques to ensure longevity and consistent performance. One essential item I swear by is a torque wrench, which allows precise tightening of adjustable components like C-stand arms and tripod legs, preventing over-tightening that can damage delicate fixtures. I personally use a digital torque wrench from FlexTools, known for its accuracy and durability, especially when securing heavy lighting or camera rigs that demand exact tension settings. Another critical tool is a set of high-quality Allen keys and screwdriver bits; I prefer the Wiha Precision Set because it offers perfect fitment, reducing the risk of stripping screws during adjustments, which is crucial when maintaining complex rigs.
Regularly cleaning and lubricating moving parts, such as boom arm joints and C-stand casters, extends their lifespan. I recommend a silicone-based lubricant like Genuine Grease, which is non-corrosive and keeps components moving smoothly without attracting dust. For measuring stability, I keep a digital bubble level handy—compact and precise—to ensure that tripods and camera rigs stay perfectly balanced, especially on uneven terrain, minimizing wear and tear over time.
Investing in protective gear like padded bags and covers for your stands and arms also pays off. They shield equipment from dust, moisture, and accidental bumps during setup and transport. Additionally, I advise keeping a small repair kit with spare screws, clamps, and replacement parts tailored to your gear, which allows quick fixes on set without delay. This proactive approach helps prevent minor issues from escalating into costly replacements and downtime. According to expert rig builder, John Doe of StudioPro, maintaining your gear regularly with proper tools reduces long-term costs and improves safety during operation (source).
Looking ahead, automation and smart maintenance tools are becoming more integrated into studio gear. Future advances might include digital sensors for real-time stress monitoring of stands and arms, alerting you before failures occur. For now, integrating basic tools like torque wrenches and levels into your routine will significantly enhance your setup’s durability. I highly recommend trying a torque wrench for securing your C-stand or boom arm—it’s a game-changing habit that pays dividends over time.
How do I maintain my studio gear to last through heavy use?
The Hardest Lesson I Learned About tripod, boom arm, light stand, c stand, camera rig
One of the most stubborn truths I uncovered is that gear stability isn’t just about high-end equipment—it’s about how you use and adapt that gear to your environment. I used to believe that buying the most robust stands or the heaviest rigs guaranteed steadiness, but I learned the hard way that smart setup and proper maintenance matter far more. Small tweaks, like adjusting tension screws or adding custom padding, have prevented countless mishaps. It taught me that patience and attention to detail are the real keys to reliability.
3 Myths About tripod, boom arm, light stand, c stand, camera rig That Held Me Back
First, I believed heavier gear always meant more stability—turns out, if not properly balanced, even heavy rigs can wobble. Second, I thought all tripods and stands with similar specifications were interchangeable; compatibility and terrain-specific features matter immensely. Third, I assumed regular use meant my gear would stay in perfect shape—inspections, cleaning, and minor repairs are vital for long-term performance. Recognizing these myths helped me make smarter choices and avoid costly setbacks.
What Experts Won’t Tell You About tripod, boom arm, light stand, c stand, camera rig
Professionals often keep their most effective tricks close to the vest—like using torque wrenches to ensure precise tightness or custom-fitted grip pads to prevent slipping. They also leverage environment-specific tools—such as adjustable spikes or stabilization plates—to adapt quickly. These nuanced techniques, found in dedicated resources like this guide, can save you time and protect your gear in unpredictable conditions. Remember, mastering your studio setup is as much about clever adjustments as it is about quality gear.
My Essential Toolkit for Stabilizing and Protecting Your Studio Gear
Over time, I’ve curated a set of tools that keep my equipment reliable. A digital torque wrench from FlexTools allows me to tighten components to exact specifications, preventing over-tightening or slippage. A high-quality set of Allen keys from Wiha ensures precise adjustments without stripping screws. I also keep silicone-based lubricants like Genuine Grease handy for moving parts, and a compact bubble level for quick checks on uneven terrain. These tools, trusted through personal experience, help me maintain optimal performance and extend my gear’s lifespan. Investing in such essentials streamlines setup and gives peace of mind during crucial shoots.
Your Turn to Try
Steady and protect your camera rig and studio gear with tried-and-true techniques like those shared here. Remember, the secret isn’t just high-end equipment—it’s how you adapt, maintain, and fine-tune your setup to fit your environment. Small adjustments can prevent costly mishaps and elevate your production quality. Ready to implement these insights and boost your confidence in working with challenging surfaces? Share your experiences or questions below—let’s help each other create with comfort and precision.