Imagine this: you’re in the middle of a crucial shoot, scene set, lights perfectly positioned, camera just about to roll, and suddenly, your tripod slips. Not just a little wobble—I’m talking about a sudden, jittery movement that ruins your shot and throws your entire session into chaos. I remember the first time it happened to me; I was stunned. My equipment, designed for stability, betrayed me because I was working on a polished floor without thinking about the grip. That lightbulb moment made me realize just how common this issue is, especially with the sleek, smooth surfaces we often work on today.
Why Tripod Stability on Smooth Floors Matters More Than Ever
In 2026, the filmmaking and photography landscape has shifted towards cleaner, more minimalist studio spaces and outdoor locations with polished surfaces. As professionals, we need our gear to keep up. A slipping tripod isn’t just a minor annoyance—it can lead to blurry images, shaky footage, or even costly equipment damage. According to recent industry reports, instability issues are among the top reasons for post-production delays and re-shoots. That’s why mastering how to keep your tripod steady on smooth floors is essential. If you’re tired of frustrating slips that waste your time and ruin your shots, you’re in the right place. Over the years, I’ve experimented with countless solutions, learning which methods work best in real-world scenarios. Today, I want to share those tried-and-true strategies that will give you confidence on even the glossiest floors.
Is Tripod Leg Slipping a Myth, or Is It Really a Big Deal?
Early in my career, I made a common mistake—ignoring the importance of proper footing for my support gear. I thought just a sturdy tripod was enough. But when I overlooked simple solutions like rubber feet or weight distribution, I found myself battling instability constantly. It took a few costly mishaps before I realized that securing your tripod properly is not optional; it’s fundamental to professional-quality results. And no, this isn’t just a minor concern—stability directly impacts your work’s quality and safety. If you’ve found yourself scrambling to stabilize gear during shoots, I’d love to hear your experience. Drop a comment or reach out via our contact page. Now, let’s dive into the five key ways to prevent your tripod from slipping on those slick surfaces and keep your shots rock solid.
Secure Your Tripod with Weighted Bases
Start by adding weights to your tripod’s center column or using a dedicated weighted base. I once used a backpack filled with sand as a quick fix during outdoor shoot on a polished patio. The added weight prevented accidental slips and kept my shots steady. Ensure the weights are evenly distributed to prevent imbalance.
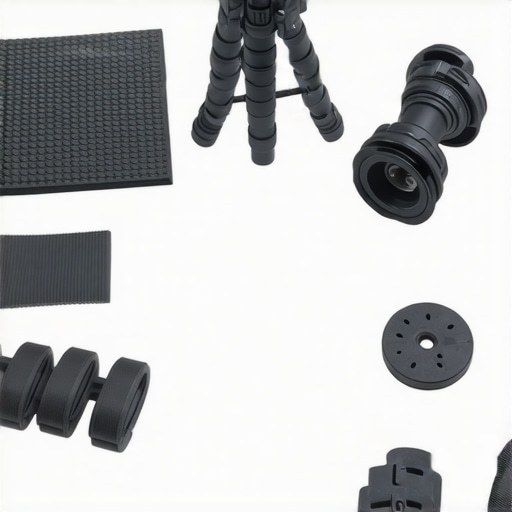
Use Non-Slip Feet and Surfaces
Equip your tripod with rubber or silicone feet designed for smooth surfaces. For instance, I replaced my tripod’s standard rubber feet with heavy-duty non-slip pads before my studio shoot, which dramatically improved grip on the glossy floor. These rubber pads create friction, reducing the chances of slipping when you press down or adjust the tripod.
Apply Rubber Pads or Grip Tape to Legs
For extra grip, wrap rubber grip tape around the tripod legs. During a shoot in a lobby with slick marble floors, I wrapped tape on each leg for added friction. It’s a simple, cost-effective way to keep your support stable without heavy modifications.
Adjust Leg Positions for Better Balance
Spread tripod legs wider and lower the center of gravity. I remember during a music video shoot, I widened the tripod stance, which made it more resistant to side pushes from crew. Keep the legs on uneven surfaces level by adjusting their lengths manually, which helps distribute weight evenly and keeps the head from wobbling.
Set Up on Firm, Level Ground
Always check the ground where you place your gear. I once positioned my camera rig on a slight incline, causing instability. Using a bubble level or app on your phone can help ensure a flat setup. For uneven floors, consider adding small shims or wooden wedges under tripod feet for stability.
#IMAGE_PLACEHOLDER_B#
Use a high-quality, heavy-duty tripod with robust, non-slip feet for optimal grip on smooth surfaces. For detailed recommendations, see our light stand essentials guide.
Leverage Support Accessories
Implement support gear like sandbags or C-stands with grip arms. During a studio shoot, I clipped a sandbag to the tripod’s central column—this added stability and prevented accidental tipping, especially when adjusting heavy lights or cameras. Always place support gear strategically to prevent shifting during movement.
Maximize Friction with Anti-Slip Mats
Place anti-slip mats under tripod legs when working on especially slick floors. I encountered a challenge working outside on a polished terrace; placing a rubber mat under each foot drastically enhanced grip. This tip is particularly useful when environmental conditions vary or when working on tiled, polished surfaces that can’t be altered permanently.
To learn more about specialized support gear, explore our articles on camera rig stability and other essentials for professional shoots. Properly implementing these methods guarantees steady footage and sharp images, saving you time and frustration on set.Many filmmakers and photographers operate under misconceptions that can lead to equipment failures or compromised shots. One prevalent myth is that investing in expensive gear guarantees stability; in reality, proper setup techniques are far more crucial than price tags. For example, a sturdy C-stand or light stand won’t perform well if it’s not correctly balanced or secured. This misconception often causes users to overlook simple safety measures, risking accidents or equipment damage. Another trap is assuming that all tripods are equal—yet, many focus solely on weight capacity and forget about the importance of weight distribution and environment compatibility. Advanced setups, like camera rigs or boom arms, require nuanced understanding of load balancing and the center of gravity. Overlooking such details can result in unwanted vibrations or tipping, especially during dynamic shoots. Here’s a nuanced point that often escapes even experienced operators: the difference between load capacity and actual stability. Experts like those at CreatorRigReviews emphasize that exceeding a tripod’s rated capacity doesn’t just risk damage—it also compromises stability due to flexing and stress. Therefore, selecting and configuring your gear with room to spare is vital. Now, a question for the sophisticated reader: how can understanding the physics of support structures help prevent unforeseen collapses during critical moments? The answer lies in principles of weight distribution, center of mass management, and dynamic load analysis—concepts thoroughly discussed in industry publications and essential for professional setups. Never assume that gear alone makes your shot stable; how you set it up matters immensely. Always double-check your supports, weight placement, and environmental conditions before rolling camera. Have you ever fallen into this trap? Let me know in the comments or reach out for personalized advice. Mastery of these nuances elevates not just your equipment’s performance but also the safety and professionalism of your shoots.
To keep your c-stands, camera rigs, light stands, tripods, and boom arms performing at their best, regular maintenance is essential. Daily checks for loose bolts, grime, or corrosion can prevent sudden failures. Using a microfiber cloth to wipe down metal surfaces after each session helps avoid corrosion, especially in humid environments. Applying a light coat of lubricant like silicone spray to moving parts ensures smooth operation and reduces wear over time. I personally favor silicone-based lubricants because they don’t attract dust and are less likely to gunk up joints, maintaining flexibility without corrosion risk.
Investing in specialized tools like a hex key set tailored to your gear’s fasteners makes tightening or adjusting components more precise and efficient. Always keep spare parts such as rubber feet, mounting screws, and clamps in your kit—being prepared minimizes downtime during critical shoots.
Additionally, consider visually inspecting your gear periodically for hairline cracks or bent components, which might compromise stability. Many professionals set up a dedicated maintenance schedule every few months to thoroughly examine and service their equipment, extending longevity and ensuring safety.
Looking ahead, advancements in materials science, such as the introduction of carbon fiber components, promise lighter yet more durable gear that requires less maintenance. Embracing these innovations now can be a game-changer for future projects.
How do I maintain my support gear over time? Implementing a routine that combines cleaning, lubrication, and regular inspections is the key to long-term reliability. Don’t forget to document your maintenance schedule and keep track of replacements—this proactive strategy reduces surprises on set. Want a proven method? Try using a silicone spray regularly on your support joints; it’s a simple habit that preserves flexibility and prevents dust accumulation. For more advanced tips, check out our expert insights on tripod maintenance. Keeping your gear in top shape ensures every shoot runs smoothly and safely—invest in it consistently.
What I Wish I Knew About Supporting Gear Before I Started
One of the toughest lessons I learned was that even the most expensive tripod can fail if not set up properly. Relying solely on its weight capacity or brand is a mistake; understanding weight distribution and environmental factors truly makes the difference. Early on, I overlooked simple adjustments like spreading out the legs wider or ensuring the feet grip well on smooth surfaces, and it cost me several shots. Now, I realize that each shoot teaches something new about stability, and every setup is a chance to perfect my approach.
Tools That Changed How I Approach Stability
For reliable support, I swear by adjustable support accessories like heavy-duty grip pads, water-filled weights, and support arms that balance loads effectively. Brands like CreatorRigReviews offer insightful guides that helped me select gear tailored to different surfaces. Investing in quality support gear and maintaining it regularly has transformed my workflow, giving me the confidence to push creative boundaries without fear of collapse or shake.
Take the Leap and Trust Your Setup Now
Building confidence in your support system is a game-changer for professional filmmaking or photography. Don’t wait for a mishap to reveal a weakness—get proactive and fine-tune your setup today. Remember, stable footage is the foundation of compelling visual stories; mastering it elevates your entire craft. So, challenge yourself to try new stability techniques on your next shoot and see how much smoother your shots become. Your camera deserves the best support—are you ready to give it that edge? Share your experiences or questions below, and let’s keep learning together!