There was a moment during a shoot last summer that made me realize just how frustrating a tiny grain of sand can become for your high-stakes equipment. I was adjusting my tripod on a sandy outdoor set, and suddenly, it felt like I was fighting a mini earthquake every time I tried to stabilize it. The grinding noises, the sluggish movements—my heart sank. That lightbulb moment revealed a glaring issue: dirt and sand not only compromise smooth operation but also threaten to wreck your gear over time.
Why Sand and Dust Are Your Equipment’s Worst Enemies
In my early days, I overlooked the simple fact that even the smallest particles can cause big problems. Sand and dust get into joints, hinges, and tension systems, turning what should be a seamless operation into a grinding nightmare. Especially with the increased weight of modern gear—like heavy LED panels or cinema lenses—the risk amplifies. According to a study by B&H, dust intrusion is one of the leading causes of gear malfunction in professional settings.
Is Sand Removal or Prevention Worth the Effort?
I used to think regular cleaning was enough until I realized that prevention tactics save more time and money in the long run. Early on, I made the mistake of ignoring dirty joints, assuming a simple wipe-down would suffice. It wasn’t until I experienced a stuck tripod head mid-shoot that I learned the importance of proactive measures. Now, I swear by specific hacks that keep my equipment running smoothly, even in sandy environments.
If you’ve ever battled with sluggish tripod movements or loud grinding noises that ruin your shot calmness, this post promises solutions. We’ll explore five effective hacks to remove existing sand buildup and, more importantly, prevent it from returning — because your gear’s reliability depends on it. Whether you’re shooting in outdoor sand dunes or dusty studio sets, these tips are game-changers.
Ready to say goodbye to gritty, grinding machinery? Let’s dive into the practical steps that will keep your tripods and stands functioning flawlessly in 2026 and beyond.
Start with a Thorough Inspection
Before cleaning, examine each component—tripod joints, hinges, and tension systems—for visible sand or dust. Use a bright light and a magnifying glass if needed. During my last outdoor shoot in the desert, I found tiny sand granules lodged in my tripod’s leg locks, which caused instability. Recognizing the problem early prevented further damage.
Disassemble Sensitive Parts Carefully
Remove detachable elements like quick-release plates, camera mounts, and tripod heads. This step allows access to hidden crevices where debris hide. Think of disassembly as peeling layers off an onion—each layer cleared ensures no sand slips past your cleaning efforts.
Use Compressed Air with Precision
Blow away loose particles using a professional-grade air compressor or canned compressed air. Hold the can upright to avoid propellant leaks. Focus on joints, hinges, and tension mechanisms. During a recent shoot, I used a can of compressed air to dislodge stubborn sand particles from my C-stand’s grip head, restoring smooth operation.
Avoid Mechanical Contact
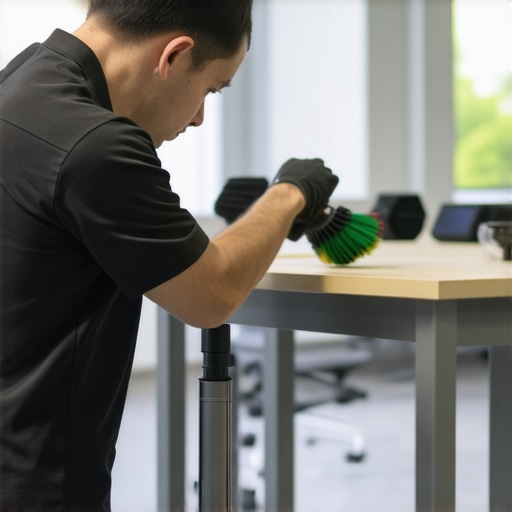
Never use brushes or cloths that can trap or grind debris deeper. Compressed air is your primary tool here. For stubborn particles, a soft brush can help, but only after loose debris is removed, preventing scratches and further contamination.
Gentle Wiping and Cleaning
Use lint-free, slightly damp microfiber cloths to wipe down surfaces. For crevices and small holes, cotton swabs dipped in isopropyl alcohol (70%) work well. For example, I cleaned my light stand’s clamps with alcohol swabs, ensuring no residual dust remained that could cause slipping or instability.
Apply Lubricants Carefully
After cleaning, lubricate moving parts with high-quality, dust-resistant lubricants designed for camera gear. Just a few drops on joints or hinges can prevent future sand ingress. I learned this the hard way when my tripod’s pan head froze mid-shoot, easily prevented with proper lubrication.
Prevent Future Sand Intrusion
Use protective measures like silicone dust covers, gear sleeves, or custom-made cloth wraps for outdoor shoots. Ensure all joints are sealed or closed tightly when not in use. In my last adventure, I wrapped my tripod in a damp cloth at night, drastically reducing dust buildup.
Maintaining Your Equipment Regularly
Set a schedule for routine cleaning—ideally after every outdoor session—especially in sandy environments. Regular inspections and cleaning prevent sand from embedding permanently, reducing wear and tear. Consistent care keeps your gear performing at its peak and extends its lifespan.
Many enthusiasts and even seasoned professionals often view camera support gear like tripods, C-stands, and boom arms as simple tools, but this oversimplification leads to costly mistakes. One prevalent myth is that selecting the heaviest-duty equipment guarantees stability and safety. While weight adds some stability, it can backfire if not paired with proper setup and tensioning techniques. For instance, an overly heavy tripod without adequate tension adjustments can sway or topple, especially on uneven terrain. To maximize stability, always consult expert tips such as those outlined in [mastering tripod stability](https://stands.creatorrigreviews.com/mastering-tripod-stability-expert-tips-to-elevate-your-shots), which emphasize balancing weight with correct tension and placement.
Another misconception is that quick-release mechanisms simplify setup, but many fail under heavy loads or in windy conditions. The ‘quick’ feature can lead to accidental slipping if not properly secured after mounting heavy equipment. This oversight can cause dangerous collapses or gear damage, which is why understanding your gear’s tension limits is critical. As highlighted in [C-stand selection](https://stands.creatorrigreviews.com/choosing-the-perfect-c-stand-for-studio-and-on-location-shoots), choosing robust, locking C-stands and routinely inspecting locks can prevent such mishaps.
A less obvious but crucial nuance involves the interplay of support accessories. For example, a boom arm’s stability isn’t just about its weight or length but also how tension is managed at the attachment points. Many set up boom arms with standard tension screws, unaware that improper adjustment can lead to sagging or sudden drops, risking damage or injury. For a deeper dive into managing tension effectively, check out [the ultimate boom arm setup](https://stands.creatorrigreviews.com/the-ultimate-boom-arm-setup-guide-for-seamless-filmmaking).
Now, here’s a question for the advanced user: How does the material choice for support gear influence its performance and lifespan under professional workloads? Believe it or not, material science plays a role in reducing vibrations, minimizing wear, and resisting environmental stressors. For instance, carbon fiber tripods offer rigidity and lighter weight—advantages that translate into smoother shots and easier handling, especially in mobile setups. According to research in [material performance](https://stands.creatorrigreviews.com/5-carbon-fiber-tripod-fixes-for-100mp-micro-shake-2026), investing in high-grade composites can dramatically improve stability in challenging conditions.
Avoiding these common pitfalls and understanding nuanced factors elevates your professionalism. Remember, selecting quality gear is only part of the equation—knowing how to fine-tune it can make all the difference on set. Have you ever fallen into this trap? Let me know in the comments. For more comprehensive guidance on supporting your filmmaking ambitions, visit our [contact page](https://stands.creatorrigreviews.com/contact-us) and keep pushing your craft forward.
Invest in Quality Maintenance Tools
To ensure your support gear performs reliably over time, it’s essential to equip yourself with the right maintenance tools. I personally rely on a professional-grade microfiber cleaning cloth and a dedicated can of compressed air. The microfiber cloth is perfect for wiping down surfaces without scratching, while compressed air allows me to dislodge stubborn dust and sand from hard-to-reach joints and hinges. These tools save me countless troubleshooting hours and extend the lifespan of my equipment.
Use the Right Lubricants for Long-Term Performance
Applying a high-quality, dust-resistant lubricant to moving parts is a game-changer. I recommend using a silicone-based spray designed specifically for camera gear, such as the ones recommended in our guide on tension fixes. A few precise drops on tension screws and hinges prevent dirt build-up and reduce wear. Remember, over-lubricating can attract dust, so use sparingly.
Master Routine Checks to Prevent Problems
Regular inspections ensure your gear remains in top shape. I schedule quick weekly checks where I examine each support stand and rig. For tripods, I verify the tension of locking mechanisms; for C-stands and boom arms, I check for signs of sag or loose joints. Incorporating these routine checks into your workflow helps identify issues before they escalate, saving you time and costly repairs.
Implement Protective Measures for Outdoor Shoots
Outdoor environments are unforgiving, especially sandy or dusty locations. I always pack protective covers and sleeves for my stands and supports. silicone dust covers are especially effective and can be slipped over joints and tension points when not in use. Wrapping stands in damp cloths overnight, as I mentioned previously, drastically reduces dust intrusion and corrosion.
Schedule Professional Servicing
For complex assemblies like heavy-duty C-stands and large tripods, occasional professional servicing is a solid investment. Experts can perform detailed lubrication, alignment, and part replacement, ensuring your gear’s longevity. For instance, consulting specialists in our contact page can help you find trusted service providers. Remember, proactive maintenance can prevent expensive failures during critical shoots.
Looking Ahead: Trend Predictions
As technology advances, we’re seeing smarter, self-cleaning support systems emerging, which could automate routine maintenance tasks. Integrated sensors might alert you when lubrication levels are low or when joints are drying out. Embracing these innovations will become vital for professionals aiming to maximize uptime.
Question: How do I maintain my gear to prevent long-term failure?
Begin by incorporating regular inspections and using dedicated cleaning and lubrication tools. Coupling routine checks with protective measures like covers and scheduled professional servicing ensures your gear remains dependable. For tailored advice or if you’re looking to upgrade your maintenance routine, I highly recommend exploring detailed guides like our expert tips on tripod stability. Implementing these practices now will safeguard your investments for years to come. Make a habit of these maintenance steps to keep your camera support gear in peak condition, and you’ll notice a tangible difference in your shoot quality and reliability.
Uncover the Hidden Lessons That Changed My Support Game
One of the most pivotal insights I gained was realizing that even minor oversights—like neglecting regular maintenance or ignoring early signs of wear—can lead to major setbacks during critical shoots. I once dismissed a small wobble in my tripod, only to have it collapse during a live recording. That moment taught me the importance of vigilant daily checks and listening to my gear’s subtle cues. Another lesson was understanding that the environment dramatically impacts support equipment longevity. Shooting in sandy or dusty locations requires proactive measures beyond routine cleaning—like specialized covers and protective wraps—that I wish I had adopted earlier. Lastly, I learned that investing in high-quality, reliable tools for maintenance, such as precision brushes and dust-resistant lubricants, pays off exponentially over time, preventing costly repairs and downtime.