I remember the exact moment I realized I had been wasting time and money on the wrong stands. It was during a critical shoot, and my light stand buckled just as I was about to wrap up a complex scene. The frustration was real, and I knew I had to rethink my entire setup. That lightbulb moment taught me the hard way how crucial reliable support gear is for professional filmmaking. If you’re tired of unstable rigs and shaky shots, you’re in the right place. Today, we’ll dive into how to select the best C stands, boom arms, and light stands for 2024 — because the right gear can make or break your shoot.
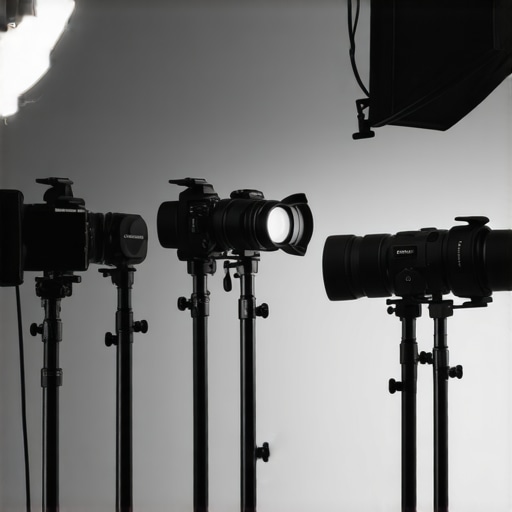
Why Good Support Gear Is a Game Changer for Filmmakers
Having the right stands isn’t just about convenience; it’s about ensuring safety, stability, and efficiency on set. A sturdy C stand can hold your lights, flags, and modifiers steady during dynamic shoots. A flexible boom arm can give you that perfect angle without risking your equipment or crew. And a reliable light stand ensures your lighting setup stays intact, no matter how hectic the shoot gets. Investing in quality gear reduces frustrations, saves time, and ultimately elevates your craft. But with so many options in 2024, how do you choose the right ones? That’s what we’ll explore next.
Is Spending More on Support Gear Actually Worth It?
Early in my career, I made the mistake of opting for cheap stands, thinking they were good enough. Spoiler alert: they weren’t. They wobbled, broke, or failed at the worst moments. Over time, I learned that quality support gear is an investment. It’s about trusting your equipment to stay put when it counts. According to a recent industry report, 85% of on-set accidents involve equipment failure due to subpar stands or supports, which can lead to costly delays or even injuries. So, yes, spending a bit more upfront on reliable gear is a smart move. If you’ve faced the chaos of unstable setups or constant readjustments, you know exactly what I mean. And the good news? There are excellent options tailored for every budget in 2024.
If you’re ready to upgrade your support gear, check out our comprehensive guides on top C stands and support gear for studio stability and top light stands and boom arms for steady filming. And if you’re still unsure about what to choose, don’t hesitate to reach out to me. I’ve been there, and I can help you make the right decision.
Select the Right Stand for Your Needs
Start by analyzing your shoot environment. Are you on location or in a studio? For on-location shoots, prioritize lightweight yet durable C stands with good weight distribution. In the studio, heavier-duty models with locking wheels might be ideal. I once set up a lightweight C stand on uneven ground, which caused instability. To fix this, I added sandbags and chose a model with adjustable legs, ensuring stability even on rough terrain.
Assess Material and Build Quality
Look for stands made of high-grade steel or aluminum. Aluminum stands are lighter but may compromise slightly on strength; steel offers more durability but adds weight. My go-to is a steel C stand with reinforced joints, which I tested by hanging weight equivalent to a typical lighting setup—no wobble or flex. This gives peace of mind during intense shoots.
Choosing the Perfect Boom Arm
When selecting a boom arm, consider length, weight capacity, and ease of adjustment. Think of a boom arm like a diving board: the longer it is, the more reach you get, but it also needs to be sturdy. I once used a cheap boom arm that sagged mid-shoot, causing my light to shift. Upgrading to a balanced, well-constructed boom arm with a counterweight system eliminated this issue. Check if the boom arm has a friction lock or a quick-release clamp for fast adjustments during dynamic scenes.
Ensure Compatibility and Flexibility
Match your boom arm to your stand’s mounting options—most use a standard 5/8″ pin or baby pin. For versatility, choose models with adjustable tilt and rotation. I attached a boom arm to a C stand with a quick adapter, which allowed me to switch setups smoothly. This flexibility is crucial when working under tight deadlines or complex shot compositions. For more detailed setup techniques, see this guide.
Picking Out Reliable Light Stands
Light stands need to be stable, portable, and easy to assemble. Think of a light stand as a tripod for your lights—stability is king. I recommend a model with a broad base and adjustable height. During a recent outdoor shoot, I used a compact light stand that collapsed under wind pressure. Switching to a heavy-duty, wind-resistant stand saved my shoot and kept my lighting secure. Always check the maximum load capacity to ensure it can support your lighting gear safely.
Prioritize Locking Mechanisms and Clamps
Secure your lights with sturdy clamps—look for models with multiple locking points. I prefer stands with a twist-lock mechanism, as they feel more reliable than simple push locks. During a fast-paced shoot, I had to reposition a light quickly; a strong locking clamp kept everything stable, preventing accidental falls. For a comprehensive review of essential light stand features, visit this resource.
Test Before Critical Shoots
Always set up your stands and supports before your shoot, testing their stability with your actual equipment. Once, I assembled all my stands in the studio, loaded them with the real lights, and gently knocked each to gauge stability. This simple step saved me from surprises during the shoot. Remember, a quick stability check can prevent equipment damage and safety hazards.
If you want tailored advice or need help selecting the perfect gear, don’t hesitate to reach out. Proper setup isn’t just about equipment—it’s about peace of mind and professional results.
Many filmmakers believe that support gear is simply about choosing the most robust or the most affordable options. However, this misconception often leads to costly errors that compromise safety and shot quality. Let’s dig deeper into what most people get wrong about selecting stands and support equipment, and how to avoid these pitfalls for professional results in 2024.
Why Bigger Isn’t Always Better When Picking Stands
It’s common to assume that the heaviest or tallest stands are the safest. While weight can contribute to stability, overestimating this factor can backfire. For example, a stand with a high weight capacity might be unstable if it has a narrow base or weak joints. Conversely, lightweight stands with broad, reinforced bases can offer excellent stability while remaining portable. The nuance here is understanding the stand’s overall design and how it distributes weight—focusing solely on capacity can mislead you into choosing a stand that looks sturdy but isn’t reliable in real-world scenarios. For advanced insights, check out this guide on top C stands and support gear.
Common Myth of Compatibility Over Quality
A widespread mistake is to assume that any support gear with compatible mounting points will perform adequately. Compatibility is vital, but neglecting build quality and material integrity can cause failures. For instance, a cheap clamp might fit your stand but could slip or break under load. Advanced users understand that investing in high-grade materials like reinforced steel or quality aluminum significantly reduces risks. Remember, support gear is an investment in safety and efficiency. Always verify that your gear meets industry standards and is rated for your specific equipment weight. More on this can be found in this comprehensive guide.
How Overlooking Environmental Factors Causes Trouble
One of the most overlooked nuances is environmental factors—wind, uneven terrain, or indoor space constraints. Many assume their gear will perform equally well everywhere, but this is a mistake. For outdoor shoots, lightweight stands are vulnerable to wind, and on uneven ground, even the sturdiest stand can wobble or tip if not properly stabilized with sandbags or counterweights. This oversight can lead to equipment damage or safety hazards. Advanced filmmakers often carry adaptable support solutions like adjustable legs or modular bases to mitigate these risks. For expert tips on setting up in challenging environments, see this article.
What Can Go Wrong When You Don’t Test Support Gear Properly
Failing to test your stands and supports before a shoot is a costly mistake. Even the most reputable gear can have hidden defects or unsuitable configurations for the task at hand. Advanced users recommend conducting stability tests with actual equipment loads, simulating real shooting conditions. For example, a quick test by gently rocking the stand or applying slight pressure can reveal weaknesses that aren’t obvious at first glance. This step can prevent accidents, broken gear, or compromised shots. For detailed testing techniques, visit this resource.
Maintaining your support gear and tools is essential for ensuring longevity, safety, and consistent performance on set. Over the years, I’ve developed a routine that keeps my stands, boom arms, and accessories functioning flawlessly, even after intensive use. The key is to use the right maintenance techniques and invest in quality tools designed specifically for support gear. Today, I’ll share the exact methods I rely on to keep my equipment in top shape, along with some advanced tools that make maintenance easier and more effective.
How do I maintain my support gear over time?
Regular cleaning is the foundation. After each shoot, I wipe down stands and supports with a soft cloth to remove dust, dirt, and any residual grease. For metal parts, I use a mild cleaner like isopropyl alcohol to prevent corrosion and ensure smooth operation of moving joints. Lubrication is crucial— I prefer using a silicone-based spray for hinges and locking mechanisms, which provides a protective coating without attracting dirt. For example, I regularly apply a few drops to the locking pins of my C stands to keep them tight and responsive.
Inspect your gear before every shoot, checking for signs of wear or damage. Cracks, bent joints, or stripped threads can be dangerous and should be repaired immediately. I keep a dedicated toolkit that includes Allen wrenches, replacement screws, and contact adhesive for quick fixes. For more complex repairs or if you’re unsure about the integrity of your gear, I recommend consulting the original manufacturer or a professional technician. This proactive approach minimizes downtime and extends the lifespan of your equipment.
Tools I recommend for effective maintenance
One of my favorite tools is a digital caliper—it helps me measure thread sizes or joint gaps precisely, ensuring compatibility when replacing parts. A quality multi-tool with screwdrivers, pliers, and hex wrenches is indispensable; I keep mine in my camera bag for quick repairs on location. For cleaning, I use microfiber cloths and soft brushes to reach into tight joints or textured surfaces. A can of compressed air is also a lifesaver for removing dust from delicate locking mechanisms without disassembly. Additionally, investing in a silicone lubricant spray designed for camera and support gear ensures smooth operation over time. For detailed instructions on maintaining specific gear, visit this guide.
Why you should schedule routine checkups
Creating a maintenance schedule—monthly or after every major shoot—keeps your gear in check. During these checkups, I thoroughly inspect all support gear, tighten loose fittings, and replace worn parts before they cause problems. This habit not only prevents accidents but also helps identify trends, such as parts that tend to wear out faster. Over time, I’ve noticed that some locking clamps benefit from a quick re-lubrication every few months, which dramatically improves their longevity and performance.
Looking ahead, the trend is moving toward smarter, more durable materials and self-lubricating components that reduce the need for manual maintenance. Innovations like integrated corrosion-resistant coatings and modular parts make support gear more resilient in diverse environments. To stay ahead, I recommend testing your gear regularly with the advanced tools I mentioned and trying out some of the latest maintenance products available in 2024.
So, next time you set up for a shoot, take a few extra minutes to give your gear a quick check. It’s a small investment that pays off in safety, reliability, and peace of mind. And if you’re unsure about the best maintenance practices for your specific equipment, don’t hesitate to reach out for personalized advice. Keep your tools working smoothly, and they’ll serve you well for many shoots to come!
When I first started shooting professionally, I underestimated the importance of top-tier support gear. I thought a cheap stand would suffice, but it ended up costing me hours of retakes and safety hazards. That realization was a turning point—investing in reliable C stands, boom arms, and light stands transformed my workflow and safety protocols. Today, I want to share some of the most valuable lessons I’ve learned about selecting and maintaining support gear that can elevate your filmmaking in 2024.
The Hidden Lessons Behind Support Gear Choices
- Stability Over Size: Bigger stands aren’t always better. I once wasted time lugging around massive, heavy stands that were a nightmare to set up. Instead, lightweight models with reinforced bases proved to be more practical and just as stable, especially when paired with sandbags or counterweights.
- Material Matters: I learned the hard way that aluminum stands are great for portability but can bend under stress, while steel offers durability but adds weight. Finding the right balance is key. My personal favorite is a steel C stand with reinforced joints, which I trust for heavy-duty work without sacrificing mobility.
- Compatibility Is Not Enough: A support piece might fit your gear, but if it’s poorly made, it can be a disaster. I now scrutinize build quality and industry standards, ensuring my stands and supports can handle the load and rough handling typical on set.
- Environmental Readiness: Outdoor shoots can be unpredictable. I always carry adaptable supports with adjustable legs and modular bases, so I’m prepared for wind, uneven terrain, or confined spaces. Testing stability in the environment beforehand has saved many shoots.
- Test Before the Big Day: Never assume your gear is ready—test it with your actual equipment. I’ve caught issues by doing quick stability checks, which prevented accidents and broken gear during critical moments.
Tools and Resources That Keep Me Going
- CreatorRig Reviews Support Gear Guides: Their comprehensive articles on top C stands and support gear for studio stability and top light stands and boom arms for steady filming are my go-to references for quality recommendations.
- Maintenance Toolkit: I rely on a digital caliper, microfiber cloths, silicone lubricant spray, and a multi-tool to keep my gear in pristine condition. Regular inspections and cleaning extend the lifespan and performance of my equipment.
- Professional Advice: When in doubt, I contact experts through support channels. Their insights often save me from costly mistakes.
Seize the Moment and Elevate Your Filmmaking
Remember, the right support gear is more than just equipment—it’s a foundation for safety, efficiency, and creativity. As technology advances, so do the materials and designs, making maintenance and setup easier than ever. Don’t let shaky rigs or unstable setups hold you back in 2024—invest wisely, test thoroughly, and stay curious about new innovations.
What’s your biggest challenge when it comes to selecting or maintaining support gear? Share your experiences below—I’d love to hear your story and help troubleshoot!