I remember a time when I set up for a crucial shoot, only to realize my camera was wobbling every time I pressed record. It was like trying to film a Hollywood blockbuster with a holdover tripod from the 1990s—terribly shaky and unprofessional. That moment hit me hard. I knew I needed a better solution, something reliable and sturdy, but with so many options out there, I felt overwhelmed. Sound familiar?
Stop Worrying About Wobbles: Your Stable Shooting Companion Awaits
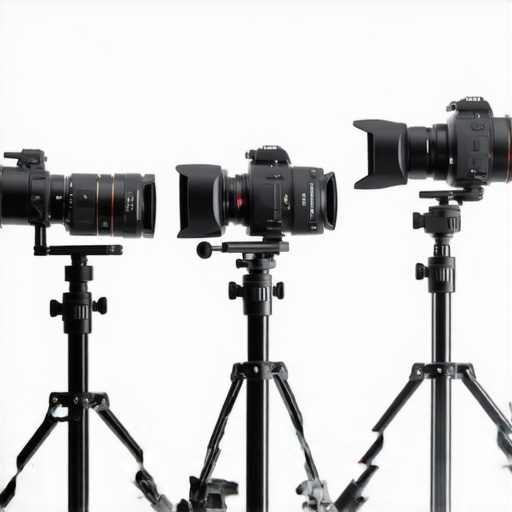
Today, we’re diving into the world of best tripods & camera rigs for 2024. I’ll share my personal journey from shaky videos to crisp, stable footage—plus, reveal the secrets to choosing gear that actually works for your unique needs. Whether you shoot on location, in a studio, or indoors, the right equipment can elevate your work and save you headaches and hours of frustration.
Have you ever faced this frustrating wobble mid-shoot? You’re not alone.
In my early days, I made a classic mistake: trusting cheap, flimsy stands and ignoring the importance of proper support. Did you know that according to creator rig reviews, investing just a little more in quality gear can drastically improve your footage’s stability? So why settle for amateurish results when professional-grade gear is accessible? The key is understanding what truly makes a tripod or rig stable and durable.
Now, let’s look beyond the hype and figure out how to stop the wobbling for good—so your shots turn out exactly as you envisioned, without distractions or insecurity about your gear. Ready? Let’s get started.
Secure Your Tripod Before Shooting
Begin with a solid foundation by extending your tripod legs fully and ensuring they are locked tightly. Use a bubble level or the tripod’s built-in spirit level to check for a perfectly horizontal position. During a demo shoot, I once neglected to level my tripod, and the resulting footage was noticeably tilted, causing headaches when editing. Proper setup here prevents wobble from the start.
Optimize Your Tripod’s Center of Gravity
Place your camera and accessories centrally and low on the tripod head. Think of it like balancing a pole: the lower and more centered the weight, the less sway. During a freelance shoot, I ran into wobbling issues when my camera was perched high on a lightweight tripod. Adjusting the center of gravity by adding weight to the tripod’s hook dramatically increased stability. For detailed tips, visit this guide.
Use Supplementary Stabilization Techniques
Engage additional support methods, such as adding a weighted bag to the tripod’s hook or deploying a sandbag around the base for extra weight. During an outdoor shoot, I secured my tripod by tying its legs with bungee cords and placing a sandbag on the center column, which eliminated all vibrations caused by wind. These inexpensive steps are game-changers for shaky environments.
Deploy Camera Rigs for Extra Support
Build or buy a custom camera rig that distributes weight evenly and minimizes movement. When I transitioned from handheld to rig-mounted shots, I noticed an immediate reduction in shake. Using rigs with quick-release plates allows fast setup and adjustment, saving time while maintaining stability.
Practice Proper Setup for Boom Arms and C Stands
If you use a boom arm or C-stand, always ensure they are fully extended and locked. The boom arm should be balanced with counterweights to prevent drooping or wobbling. During a music video shoot, I tested different counterweight setups, securing the arm firmly, which resulted in a steady overhead shot without any trembling. Consult this resource for optimal configurations.
Final Checks and Real-Time Adjustments
Before starting your shot, double-check all connections, locks, and levels. During a documentary, I discovered a slight tilt just as I began recording—quick corrections from my setup saved the take from being unusable. Regularly monitoring your gear during shoots can catch and fix stability issues before they record on camera.
Remember, thorough preparation and attention to detail make the difference between jittery footage and smooth, professional-looking videos. Master these steps, and your shots will come out rock steady even in challenging environments.
Many professionals and hobbyists alike fall into the trap of oversimplifying the nuances of essential support gear. A widespread myth is that all boom arms or C-stands are created equal, leading many to choose based solely on price or brand reputation without understanding the subtle differences that impact stability and longevity. This oversimplification can result in equipment failure during critical shoots.
Is your support gear actually designed for heavy-duty use or just the aesthetic? Let’s dig deeper.
One often overlooked aspect is the quality of the materials used. Cheaper support stands may seem sufficient at first glance, but they often lack the robust construction necessary for consistent stability, especially when supporting heavier loads such as professional cameras and lighting arrays. According to industry expert creator rig reviews, investing in gear with reliable materials like high-grade steel or aluminum can make a significant difference.
Another common misconception is the idea that a larger support stand automatically provides better stability. While size can sometimes correlate with strength, it isn’t a guarantee. For instance, an oversized tripod with flimsy legs may wobble more than a compact, well-engineered C-stand. The key is to understand the specifications and build quality—details often hidden beneath shiny finishes. You should always evaluate weight capacity, locking mechanisms, and manufacturer specifications, not just visual appearance.
What about adjustable components? Many users assume that as long as the support arm or tripod is adjustable, it’s the right choice for any scenario. However, adjustable parts can introduce points of failure if not properly secured or if components are mismatched. Regular maintenance and understanding the load limits are essential. An advanced mistake I often see is neglecting to consider the cumulative weight when stacking accessories, which can cause instability and potential accidents. For in-depth insights, check out this comprehensive guide.
Proper setup and understanding of each component’s purpose can prevent many common issues. For example, a C-stand is designed to hold heavy lights and modifiers securely—if not correctly balanced with counterweights, the stability can be compromised. Remember, the tiniest misalignment or neglect of safety guidelines can turn a reliable stand into a hazard. It’s always worthwhile to invest time learning best practices for C-stands and support gear.
Finally, another trap to avoid is choosing gear based solely on versatility without considering the specific demands of your projects. For instance, a lightweight tripod may be perfect for quick, on-the-go shoots but will fall short in studio environments requiring maximum stability. Conversely, heavy-duty rigs provide durability at the expense of portability. Aligning your support gear with your typical working conditions ensures better outcomes and longer equipment lifespan. This resource is invaluable for making informed decisions.
In summary, understanding the nuanced differences in support gear—material quality, build specifications, proper setup, and project relevance—is crucial to avoiding costly mistakes. Proper knowledge ensures your support equipment performs reliably, supports your creative vision, and keeps everyone safe on set. Have you ever fallen into this trap? Let me know in the comments!
Once you’ve set up your support equipment—be it a sturdy boom arm, reliable light stand, or versatile camera rig—keeping it in top shape is crucial for consistent performance. Regular maintenance not only prolongs the lifespan of your gear but also ensures safety and stability on set. Personally, I make it a point to inspect my equipment before every shoot, checking locking mechanisms, tightening screws, and assessing wear and tear. This proactive approach minimizes surprises during critical moments.
How do I maintain my support gear over time?
Start by consulting the manufacturer’s guidelines—most reputable brands provide specific maintenance instructions, which often include cleaning routines and recommended lubrication points. For example, high-grade steel support stands benefit from periodic cleaning with a mild degreaser to prevent rust, especially if used outdoors. Lubricating moving parts with a silicone-based spray keeps mechanisms smooth and prevents jamming. Personally, I apply a specialized lubricant to the locking clamps of my C-stands every few months, ensuring they lock and unlock seamlessly.
Inspect the integrity of supporting components regularly—is the metal bent or cracked? Are the rubber feet intact? Replacing worn parts promptly avoids accidents or unstable setups. When dealing with adjustable arms, ensure the tightening bolts have not loosened over time—if they do, carry a small allen wrench kit to tighten on location. Investing in quality tools, like a torque wrench, can help maintain proper tension during adjustments, preventing over-tightening or stripping threads.
Moreover, I recommend recording the serial numbers and maintenance dates of your equipment for future reference. This habit simplifies warranty claims and helps track wear patterns, allowing you to replace parts proactively. For comprehensive maintenance and troubleshooting, it’s wise to connect with manufacturers or support communities—many provide detailed online guides or even direct support through their contact page.
To stay ahead, consider setting up a regular maintenance schedule—monthly for frequently used gear, biannual for less used pieces. Maintaining your equipment diligently ensures that when the moment counts, your support gear stands firm and reliable. In fact, expert advice from industry professionals emphasizes that routine checks help identify issues before they escalate, saving you time and money in the long run. One detailed resource worth exploring is this comprehensive guide.
Don’t wait for equipment failure to make maintenance a priority—start integrating regular checks into your workflow today. A small investment in upkeep now can prevent costly mishaps during your next shoot. Try applying a silicone lubricant to your support stands’ moving parts, and notice how much smoother your setup and adjustments become. Your future self—and your footage—will thank you.
The Hardest Lesson I Learned About Support Gear
One of the most valuable lessons I’ve discovered is that no matter how great your camera or lighting setup is, poor support equipment can sabotage your shoot. Investing in durable, well-engineered stands and rigs makes all the difference, especially when working in unpredictable environments. Cutting corners here almost always leads to shaky footage and frustration.
Tools That Keep My Shots Steady
I’ve come to rely on top-tier brands like Manfrotto and Matthews for their robust support gear. Their products have proven their resilience through countless shoots, giving me peace of mind that my setup will hold firm. Additionally, I never leave home without a versatile [light stand](https://stands.creatorrigreviews.com/light-stand-essentials-boost-your-lighting-game-with-ease) and a quality [camera rig](https://stands.creatorrigreviews.com/how-to-build-a-custom-camera-rig-for-professional-results) that can adapt to various scenarios.
Embrace Routine Maintenance for Reliability
Maintaining my equipment by regularly inspecting and lubricating hinges and locks ensures everything operates smoothly. This proactive approach prevents unexpected failures during critical moments. I also document my maintenance schedule to stay on track, which has extended the lifespan of my gear and saved me money in the long run.
Push Beyond the Comfort Zone
To truly elevate your support setup, consider experimenting with custom modifications or added counterweights. These small adjustments can significantly enhance stability. Don’t hesitate to explore detailed guides on [building your own camera support rig](https://stands.creatorrigreviews.com/how-to-build-a-custom-camera-rig-for-professional-results) to tailor equipment exactly to your needs. Personalizing your gear transforms basic supports into trustworthy partners for every shot.
Be The Creator Who Sets The Standard
The future of professional filmmaking depends on our commitment to quality, especially at the support level. By choosing high-grade equipment, practicing diligent maintenance, and customizing setups for your unique environments, you set yourself apart. Remember, your support gear isn’t just equipment—it’s the backbone of your creative vision. Ready to make your shoots smoother and more reliable than ever? Dive into the resources and start transforming your support game today.
What’s the biggest support gear challenge you’ve faced, and how did you overcome it? Share your story below and let’s learn together!
Reading through this post brought back my own early struggles with shaky footage and how much investing in quality support gear has transformed my shoots. I completely agree that many folks underestimate the importance of proper setup and the material quality of the stands and rigs they choose. Over time, I learned that even small details like maintaining the locks and ensuring the right counterbalances make a huge difference in overall stability. Regular maintenance is often overlooked, but it’s so worth it—prevents those sudden surprises during critical takes!
I’m curious, how do others here approach balancing portability with stability? I’ve found that heavier rigs tend to be more reliable, but they’re not always practical for quick outdoor shoots. Any tips on lightweight setups that still offer solid support? Sharing some of your experiences could really help those of us trying to find that perfect middle ground!
This post really hits home for me. I recall a shoot where my tripod was just too flimsy to handle the weight of my camera and accessories, leading to those dreaded shaky shots. Since then, I’ve learned that investing in a solid, well-designed support system makes a huge difference, especially in unpredictable outdoor environments. I’ve been exploring lightweight but sturdy tripods made of high-grade aluminum, which seem to strike a good balance between portability and stability. Do others here prefer certain brands or models that excel in that sweet spot?
Also, I agree with your point about proper setup and regular maintenance. I make it a habit to check all locks and balance before every shoot, and it’s saved me from many potential mishaps. In your experience, what are some quick, effective ways to test the stability of support gear right before recording? Would love to hear everyone’s tips—sharing knowledge like this really improves our craft and keeps our footage sharp and professional.