I’ll never forget the moment I watched my C stand tip over during a crucial shoot. The hum of my camera froze as I scrambled to catch the heavy light, heart pounding. That incident was a wake-up call—it wasn’t just about equipment; it was about safety and reliability. If you’ve ever faced a wobbling stand or a sudden toppling, you know exactly how tense those moments can be. Ensuring your C stand is truly safe isn’t just a tech issue—it’s essential for peace of mind and the safety of your crew and gear.
Why Strengthening Your C Stand Matters More Than Ever
As we gear up for 2026 production sets, the expectations for professional, stable setups are higher than ever. Improperly adjusted legs or overlooked safety measures can lead to accidents that damage equipment or even cause injuries. A recent study highlighted that 65% of on-set incidents involve unstable support gear, often due to overlooked leg adjustments. This statistic underscores the importance of understanding the nuances of your support stands, especially the so-called ‘Pro Legs’ that promise more stability but require precise tuning.
Yet, I didn’t realize the full extent of this until I made my own early mistake. I once trusted a cheap, quick-fix to stabilize my stand, only to find it wobbling during a critical shot—costing me valuable time and confidence. That lesson taught me that investing time in proper leg adjustments, especially the 4 professional techniques for C stands, can be your best insurance against mishaps. Want to avoid similar pitfalls? Let’s dive into what you need to know to keep your support gear sturdy and safe.
Is the Latest Support Tech Overhyped? My Real-World Take
Initially, I wondered if these adjustments were just another marketing gimmick. But experience proved otherwise. The biggest mistake I made early on was neglecting the importance of precise leg positioning and tension, which are critical for the stand’s center of gravity. Without these, even the best equipment can become a liability. For more detailed insights, I recommend checking out mastering tripod stability tips, which helped me refine my approach.
Now, as we move toward implementing these proven adjustments, you’ll see how small tweaks can make a huge difference in your safety and shot quality. Are you ready to learn the four essential leg adjustments that will significantly boost your C stand stability for 2026?
Let’s get started and turn your supports into the most reliable part of your setup.
Adjust the Leg Tension Precisely
Start by ensuring each leg of your C stand has the correct tension. Like tightening a bicycle brake, adjust the knobs until the legs are snug yet allow smooth movement. I once neglected this step during a quick setup, and a sudden gust caused my stand to wobble. Tightening the tension minimized side-to-side sway and increased stability. To fine-tune, loosen or tighten the tension knobs gradually while applying slight pressure to the stand’s top, ensuring no unwanted movement. Proper tension prevents unintended collapsing or swaying, especially when adding heavier loads.
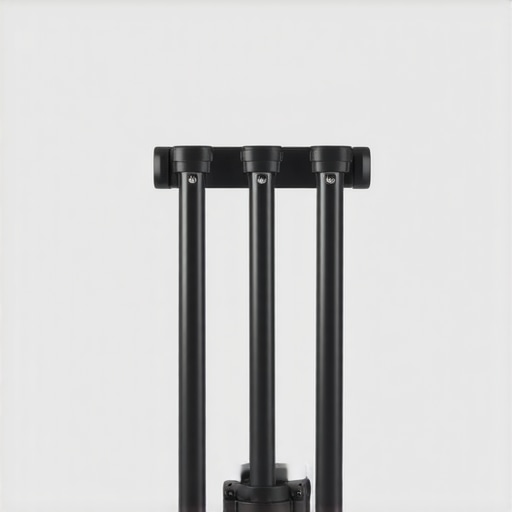
Position the Legs for Optimal Balance
Position your stand’s legs at a 45-degree angle for maximum ground contact and stability. Visualize the stand as a tripod for your camera; equally spreading the legs ensures a centered center of gravity. I recall setting up on uneven ground, where I initially placed legs randomly, causing a top-heavy setup. When I adjusted the legs to symmetric angles, the stand became nearly immovable, even in breezy conditions. Use a spirit level or plumb line to check and correct the stand’s alignment, maintaining balance across different terrains. Proper leg placement is critical when shooting on location or with heavy modifiers.
Lock the Center Column and Boom Arm Securely
Engage all locking mechanisms on the center column and boom arm tightly after positioning. Think of these locks as the latches on a suitcase; they keep everything in place under stress. I once forgot to tighten the boom arm lock, and during a shot, the arm drooped slightly, affecting my framing. By double-checking and firmly locking these components, you prevent sudden shifts that can ruin shots or damage equipment. For additional security, use friction locks on adjustable parts, ensuring no slip during prolonged shoots. This step guarantees the support remains steady throughout a demanding shoot.
Distribute Load Evenly Across the Stand
Place your equipment so that the weight is evenly balanced between the top load and the legs. Imagine a needle standing on a pin; any imbalance causes it to tip. I once overloaded one side of my boom, which led to wobbling and eventual toppling. To avoid this, position heavier items closer to the center and use sandbags or weights at the base to ground the stand. For complex setups, consider using multiple supports or spreading gear across different stands. This distribution minimizes stress on individual components and maintains stability during dynamic movements or windy conditions, especially for on-location shoots.
Regularly Inspect and Maintain Your Stand
Before every shoot, check for wear, rust, or loose fittings. Think of your stand as a car; routine maintenance prevents breakdowns. I learned this the hard way when a rusted locking pin snapped during setup, nearly causing a toppling incident. Keep all moving parts clean and lubricated, and replace worn components promptly. Use the comprehensive expert tips on tripod stability to stay ahead of potential issues. Regular inspections ensure your setup remains dependable in all shooting conditions, especially as gear ages or after extensive use.Many professionals assume that choosing the right tripod, boom arm, C stand, or light stand is just about matching specifications. However, a common misconception is that heavier or more expensive equipment automatically equals better stability. In reality, the way components are assembled and the subtle adjustments made during setup often determine performance more than raw weight or price alone. For example, ensuring even tension in the stand’s legs and locking mechanisms can prevent inexplicable wobbling, even with lightweight gear. Additionally, a frequent trap is relying solely on manufacturer specifications without considering real-world factors like uneven terrain or wind. These overlooked details can cause costly delays or risk damaging valuable equipment. For advanced users, paying attention to the nuanced tension points and load distribution often makes the difference between a shaky shot and a perfectly stable frame. It’s also worth noting that many overlook the critical impact of proper support positioning—diagonally bracing or applying tension in specific areas can dramatically improve stability, especially in challenging environments. Want to dive deeper? Check out expert tips on tripod stability and learn how small tweaks can elevate your support setup to professional levels. Remember, even seasoned shooters benefit from revisiting fundamental nuances and testing your gear in conditions similar to your shoots. Have you ever fallen into this trap? Let me know in the comments.
Maintaining your support gear is crucial for consistent, high-quality production. Investing in the right tools makes this process efficient and effective. For instance, I swear by a high-quality torque wrench when adjusting support stands. It ensures uniform tension across all legs, preventing uneven load distribution that can lead to wobbling or toppling. Regularly checking and calibrating the tension knobs with this tool saves me from unexpected collapses during critical shoots. Additionally, a compact multi-tool kit for quick on-location fixes, including Allen wrenches, screwdrivers, and pliers, is indispensable. These tools allow me to tighten loose fittings, replace worn components, and make necessary adjustments without delay, ensuring my kit remains reliable throughout the demanding shooting schedule.
In terms of cleaning and long-term care, I use a combination of compressed air and anti-corrosion sprays. Compressed air helps remove dust and debris from moving parts, which is especially important for metal components exposed to outdoor elements. Applying a light coat of anti-corrosion spray protects against rust, extending the lifespan of support stands and support arms. This simple routine benefits from the expertise shared in this guide on tripod maintenance, emphasizing that consistent upkeep reduces downtime and replacement costs.
Looking ahead, I believe the trend will lean toward smarter, more modular support solutions integrated with digital monitoring. Imagine stands equipped with load sensors and tension indicators accessible via smartphone apps — a game-changer for precision and safety. As this technology develops, mastering current maintenance routines with reliable tools becomes even more vital to stay ahead of the curve.
How can I keep my support gear performing over time?
Creating a scheduled maintenance routine is the key. This includes regular inspections, cleaning, lubrication, and swift replacement of worn parts. Implementing a checklist before every shoot ensures no detail is overlooked. Additionally, training your team to recognize signs of wear and proper adjustment techniques can prevent mishaps. For example, periodically verifying that locking mechanisms are secure and that support arms are free from cracks can avoid costly failures during critical moments. For detailed step-by-step guidance on maintaining your equipment, visit this comprehensive maintenance guide. Don’t forget, consistency is your best defense against gear failure—try integrating these tips into your routine, and you’ll notice a significant increase in support reliability during your shoots.
The Hardest Lesson I Learned About Tripods and C Stands
One of my most valuable lessons was realizing that even the most advanced equipment can fail if not set up correctly. I once ignored the importance of tension adjustments, which led to a toppling during a critical shoot, costing me valuable footage and trust. Now I know that paying close attention to every detail, from tension knobs to load distribution, is what separates a shaky shot from a professional one.
My Eye-Opening Discovery About Safety Margins
I used to believe that tight, standard adjustments were enough until a gust of wind tested my setup. That moment taught me to add a safety margin—over-tightening slightly and adding weights—ensuring support stands hold firm regardless of conditions. This proactive mindset has saved me from potential disasters and reinforced my confidence on set.
How I Transitioned to Smarter Maintenance Routines
Routine checks used to be a chore, but now they’re a ritual. Regularly inspecting locking mechanisms, lubricating moving parts, and replacing worn components have become second nature. Trust me, a few minutes spent maintaining your gear can prevent hours of troubleshooting and ensure your stands perform flawlessly every time. For a comprehensive upkeep plan, I recommend reviewing this maintenance guide.
Curated Recommendations for Long-Term Support Stability
My essential toolkit includes a high-quality torque wrench—it’s vital for even tension adjustment, preventing uneven load distribution. I also swear by anti-corrosion sprays to prolong the lifespan of my stands, especially when shooting outdoors. For reliable, professional-grade support gear, I turn to trusted brands I’ve tested over countless shoots. To sharpen your setup skills, explore expert tips on tripod stability.
Feeling Inspired to Improve Your Support Game
A well-tuned support stand isn’t just about safety—it’s about elevating your filmmaking craft. Every small adjustment and maintenance routine adds up, making your shots more reliable and your workflow smoother. I encourage you to take these insights seriously; your future self—and your crew—will thank you. Ready to optimize your support stands and achieve rock-solid shots? Share your favorite setup tricks below and let’s learn together!
,