It was late afternoon on a chilly set, lights in place, camera rolling, when suddenly my C-stand slipped just enough to ruin a shot I’d spent hours perfecting. I remember the jolt of frustration — and then the realization that this wasn’t a one-time fluke. C-stand slides had quietly become my most stubborn nemesis, threatening stability with every shoot. If you’ve ever wrestled with gear that refuses to stay put, you know the sinking feeling of watching your carefully balanced setup slowly topple over.
Getting Serious About C-Stand Grip Tactics
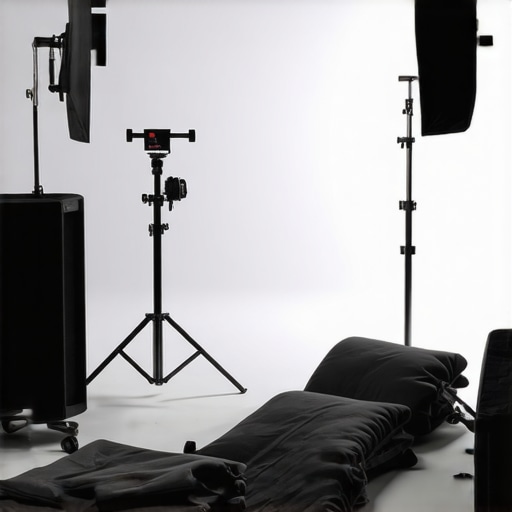
Understanding why your C-stand slides happen is half the battle won. These slips often stem from tiny issues—wobbly legs, uneven floors, or the weight distribution not being quite right—that can turn your professional setup into a safety hazard or a shaky nightmare. But here’s the good news: correcting this isn’t rocket science. I’ve learned a few key floor grip tactics over the years that consistently keep my gear planted, even on the most chaotic location shoots.
Before diving into solutions, ask yourself: Have I faced moments where quick fixes turned into major disruptions? If so, you’re not alone. Early in my career, I made the mistake of ignoring the importance of proper support and floor contact, which only led to more slips and ruined shots. That experience taught me the value of detailed, practical grip techniques—like strategic sandbag placement and optimal leg positioning—that you can find discussed in detail at [best tripod and support arm tips for stable filming in 2024](https://stands.creatorrigreviews.com/best-tripod-and-support-arm-tips-for-stable-filming-in-2024). This article was a game changer for me—helping me avoid mishaps and keep my setup rock solid.
So, let’s explore how you can fortify your C-stand and conquer those stubborn slides once and for all. Stay tuned—what follows are tried-and-true tactics that will elevate your grip game and preserve the stability of your gear in 2026 and beyond.
Anchor the Legs Firmly to the Ground
Begin by placing your C-stand on a flat, solid surface. Think of it like setting a tent: the more stable your foundation, the less likely it is to wobble. Use sturdy sandbags on each leg, ensuring they sit evenly to prevent slipping. I once shot outdoors when a gust of wind nearly toppled my rig; after placing weighted sandbags on each leg, my setup stood firm, and I completed my shot smoothly.
Distribute Weight Strategically
Always balance your gear so that the weight is centered over the tripod head. Imagine a see-saw—if weight shifts to one side, it teeters. When I mounted a heavy LED panel, I adjusted the counterweight opposite to the light to maintain equilibrium, reducing the chance of the stand sliding or leaning.
Leverage Non-Slip Pads and Grips
Attach rubber or silicone grip pads to the C-stand feet to enhance friction with smooth floors. I used these pads during a slick studio shoot, and they prevented any accidental slides when I repositioned the stand. These small pads are inexpensive but make a significant difference—think of them as sneakers for your stand.
Use Extended Leg Locks and Proper Leg Positioning
Ensure all leg locks are tightly secured. For added stability, position the legs outward at a wider angle rather than keeping them close together, much like spreading your stance when balancing on uneven ground. During a rapid outdoor setup, I extended the legs fully and locked them tightly, giving my C-stand extra grip on the uneven gravel.
Apply Support with Sandbags and Additional Weighting
Strategically place sandbags near the base of each leg or hang them from the center column if possible. This simulates the way a kite stabilizes in the wind; the extra weight counters lateral forces. I often hang one or two sandbags from the crossbar or base, especially when working with heavier modifiers, preventing slips and maintaining shot stability.
Monitor and Adjust Regularly During the Shoot
Continuous oversight helps keep your setup stable. Periodically check that all locks are tight and weight distribution remains even, especially if you bump the stand or change gear. I learned this the hard way when a slight shift caused my light to tilt—regular adjustments are your best defense against unexpected slides.
For further insights into selecting support gear that enhances stability, check out best tripod and support arm tips for stable filming in 2024, ensuring your entire rig stays put no matter what challenges arise.
While many filmmakers assume that choosing the most expensive tripod or support arm guarantees stability, this isn’t always true. In my experience, the real key lies in understanding nuanced details, like proper weight distribution and ground contact, which are often overlooked. A common myth is that larger support gear inherently offers better stability; however, without correct setup, even heavy-duty equipment can wobble or slip, especially on uneven surfaces. This misconception can lead to costly on-set mistakes, such as capturing shaky footage or damaging expensive gear. For advanced practitioners, it’s crucial to focus not just on gear specifications but also on practical setup and ground interaction techniques. For instance, ensuring that support stands are evenly weighted and firmly anchored prevents unwanted movement—something I learned the hard way during outdoor shoots. [Mastering tripod stability](https://stands.creatorrigreviews.com/mastering-tripod-stability-expert-tips-to-elevate-your-shots) offers detailed insights into these high-level nuances.
**What about support arms or boom poles?** They often get misused because of a lack of awareness about tension and load placement. Overextending a boom arm without proper counterbalance can cause sagging or tipping, even on sturdy support stands. I advise always balancing the load carefully and using additional support accessories when necessary. Did you know that improper use could also lead to equipment damage? Overloading or incorrect positioning can strain the stand’s joints, risking failure during critical moments. Always double-check your setup—this diligence can save your shoot and your investment.
Advanced users should also consider the importance of ground contact and grip tactics. For example, using non-slip pads or wider leg positioning on uneven terrain maximizes stability. Simply put, understanding the hidden nuance—such as ground interaction—is what separates competent operators from professionals.
If you want to deepen your expertise, I recommend exploring [the ultimate guide to camera rig support](https://stands.creatorrigreviews.com/ultimate-guide-to-camera-rig-tripod-support-in-2024), which covers sophisticated setup tips and common pitfalls. Remember, even the best gear can fail if not properly configured. Have you ever fallen into this trap? Let me know in the comments and share your experiences so that others can learn from your mistakes.
Maintaining your tripod, camera rig, light stand, C-stand, or boom arm is essential to ensure reliability and save costs over time. I rely on a set of proven tools and methods to keep my gear functioning flawlessly, no matter how hectic the shoot. One of my favorite investments is a high-quality silicone spray lubricant, which I use on moving parts like tripod leg locks and support arm joints. This prevents squeaks and corrosion, ensuring smooth operation and extending the lifespan of critical components. When I started applying lubricant every six months, I noticed immediate improvements in stability and ease of use, especially in humid environments. Additionally, I keep a dedicated toolkit containing Allen wrenches, small screwdrivers, and spare parts—because nothing’s worse than a support arm that doesn’t tighten properly during an important shoot. Regular inspections, such as checking for loose bolts or worn-out rubber grips, are vital; I schedule these during routine cleaning sessions. For cleaning, a microfiber cloth paired with a mild alcohol-based cleaner keeps dust and grime at bay, maintaining optimal grip and friction. When it comes to long-term results, investing in modular support systems allows easy replacement of worn parts, saving money and reducing downtime. I also adhere to manufacturer maintenance schedules—many [support gear](https://stands.creatorrigreviews.com/ultimate-guide-to-tripods-light-stands-for-filmmakers-in-2024) includes recommended care routines that should be followed meticulously. Looking ahead, I predict that advancements in smart support systems with built-in sensors for wear detection will become a game-changer in professional filmmaking. To keep your gear reliably operational, I highly recommend regularly applying high-quality lubricants like SuperLube® on moving parts, which has a proven track record for durability. Make sure to perform a weekly visual inspection of all locking mechanisms and replace any worn grips promptly. A simple habit like this can save your shoot from unexpected gear failures, ensuring your support system is always ready for the next challenge.
Over the years, I’ve faced more than my fair share of support stand mishaps on set. The most eye-opening lesson was realizing that stability isn’t just about choosing heavy gear but about mastering nuanced setup techniques that transform a wobbly support into a rock-solid foundation. From experimenting with ground contact to weight distribution, each small adjustment contributed to a safer, more reliable rig—saving me hours of retakes and countless nerves in the heat of production.
Secrets That Changed My Approach to C-Stand Setup
One of the game-changers was learning to focus on ground interaction—using non-slip pads and wider leg positioning to grip even the slickest floors. I also discovered that fully extending and locking all legs, coupled with strategic sandbag placement, creates a hugging effect that keeps everything in place during dynamic scenes. These insights came from personal trial, error, and the invaluable resource best tripod and support arm tips for stable filming in 2024, reminding me that the devil is in the details.
Details That Matter More Than Cost
Many assume that investing in extravagant equipment alone guarantees stability, but I’ve learned that proper setup is the real key. Weighting the support legs appropriately and maintaining even weight distribution often outweigh the benefits of ultra-expensive gear. The misconception that bigger or pricier stands inherently offer better support can lead to costly mistakes. Instead, focusing on correct balancing and ground support ensures your gear performs reliably in any environment—be it studio or outdoor shoot.
Adding to this, support arms and boom poles require diligent tension management, balancing the load to prevent drooping or tipping. Ignoring this can not only compromise shot quality but also risk equipment damage, which is why regular checks are vital. For a comprehensive look at these juggling acts, I recommend the ultimate guide to camera rig support, that deep dives into best practices and common pitfalls.
Regular Maintenance Keeps Your Gear Alive
Whisper-quiet gear isn’t just a dream—it’s a result of routine maintenance. Applying high-quality lubricants like SuperLube® on moving parts, inspecting locks and grips, and replacing worn components ensure your setup stays tight and dependable. I reorganized my maintenance routine to include weekly visual checks and biannual lubrications, which vastly reduced on-site surprises. Long-term, modular support systems save money and time, allowing quick swaps of worn-out parts without sacrificing stability. Many professionals overlook this, but trust me, a well-maintained rig is your best support partner.
By focusing on these factors—ground contact, weight distribution, regular upkeep—I’ve unlocked a new level of confidence in my support supports. Remember, even the most advanced equipment can’t compensate for poor setup. Investing in knowledge and routine care pays dividends when the spotlight is on you and your shot.
Insider Wisdom That’s Too Good to Keep to Myself
- Don’t Ignore the Foundation: The stability of your C-stand begins from the ground up—slip pads and widespread legs are your first line of defense. Making this a habit prevents many support accidents.
- Balance Is Everything: Whether it’s a heavy light or a camera accessory, always keep weight centered over the support. Think of it like balancing a bicycle—wider stance and even weight prevent wobbles.
- Maintenance Is a Game Changer: Regularly lubricating and inspecting your gear extends its life and keeps your supports performing at their best. It’s a small investment with massive payoff.
- Think Beyond Cost: Expensive gear isn’t a guarantee of stability; proper setup and care are often more crucial. Focus on technique, not just price tags.
- Pay Attention to Load and Tension: For support arms and booms, balanced tension and load management prevent sagging and accidental drops during critical moments.
What I Recommend for Future Success
If you’re serious about mastering C-stand stability, I encourage exploring comprehensive support gear care guides and investing in quality lubricants and modular components. Remember, support stability isn’t just about heavy gear; it’s about smart setup, diligent maintenance, and attentive ground interaction. These lessons not only elevate your technical skills but also boost your confidence on set—knowing your gear can stand up to anything when prepared right.
The Future of Support Equipment is in Your Hands
Support gear is evolving rapidly, with innovations promising even better stability and ease of setup. But the core principles—attention to ground contact, weight balance, routine care—will always be essential. Take control, apply these lessons, and push your filmmaking skills further. Your shots—and your support system—will thank you.
What’s your biggest support setup challenge? Share your experiences below, and let’s learn together!
This post really hits home for me, especially the emphasis on ground interaction and weight distribution. I’ve learned through my own outdoor shoots that no matter how sturdy your gear might look, the ground can still be a sneaky enemy—especially uneven terrain or slick surfaces. The idea of using wider leg positioning and non-slip pads resonated because I’ve seen how small adjustments can make a big difference in stability. I recall a recent shoot on a gravelly hillside where I extended the legs fully and secured multiple sandbags around each leg; the difference was night and day. It’s fascinating how often people overlook these details when setting up, thinking that high-end gear alone will do the trick, but as the article points out, proper setup and constant attention are what truly ensure safety and stability. What are some of your best tips for quickly checking stability during fast-paced shoots, especially outdoors where the environment is constantly changing? I’d love to hear others’ experiences on maintaining support stability under challenging conditions.