It was a chilly morning on set when my carefully balanced camera rig suddenly wobbled, causing a shaky shot that derailed hours of planning. I remember the moment vividly—everyone’s eyes on me as I scrambled to stabilize the gear, realizing I’d overlooked crucial balance adjustments. That lightbulb moment made me realize: top-tier video quality depends just as much on the small stuff—like rig calibration—as it does on high-end gear. And let’s be honest, with the explosion of vertical videos in 2026, shaky footage is more glaring than ever.
Why Proper Camera Rig Balance Is More Critical Than Ever in 2026
In today’s fast-paced content creation world, viewers expect seamless, professional-looking videos. Vertical video formats are now dominant, especially on platforms like Instagram Reels and TikTok, forcing creators to adapt quickly. But here’s the thing: even the most advanced camera can suffer from instability if your rig isn’t properly balanced. This can lead to jittery footage, camera drift, or even gear failure—all avoidable with the right fixes.
Did you know that a slight imbalance in your rig can cause up to a 30% decrease in shot stability? According to recent cinematic stability research, tiny adjustments in rig tension and placement can dramatically improve shot quality. Early on, I made a costly mistake: neglecting to regularly check the tension screws on my boom arm, leading to drooping and inconsistent shots. That experience taught me the importance of routine maintenance and balance checks.
And if you’re wondering whether investing time into fixing these issues is worth it—that’s a valid concern. You might think, “My gear is new; it shouldn’t need constant fixing,” but even the best gear isn’t immune to physics and wear. Proper rig balance not only elevates your footage but also extends the lifespan of your equipment.
So, how do you tackle this problem? Stay with me. In the next sections, I’ll walk you through practical, proven fixes that transform wobbly rigs into models of steadiness. Whether you’re shooting on the move or in a studio setting, these tips will help you get the most reliable, camera-shake-free results for your 2026 vertical videos.
Start with a Solid Base
Before adjusting your camera rig, ensure your tripod or C-stand is stable on an even surface. Use a bubble level to confirm. If the surface is uneven, adapt with shims or stabilize with sandbags. In a recent shoot, I placed my tripod on a slight slope, causing instability. Adding a leveling plate instantly made the rig stand firm, reducing unwanted sway.
Adjust Tension Screws Precisely
Most rigs rely on tension screws to balance weight. Turn these screws gradually and symmetrically to distribute weight evenly. I once ignored tightening my boom arm’s tension screws, which led to sagging during a critical shot. After tightening, the arm stayed rigid, giving me crystal-clear footage.
Fine-tune with Counterweights and Sandbags
Attach appropriate counterweights or sandbags at the base or on the boom arm to prevent tipping. For heavy LED panels, I used sandbags to stabilize my C-stand, preventing topples in windy outdoor conditions. Proper counterweight distribution makes a noticeable difference in shot steadiness.
Manage Cable Routing to Prevent Shifts
Secure all cables with clips or cable ties to avoid sudden pulls that can cause imbalance. During a shoot, a loose cable tug shifted my rig unexpectedly. Organizing cables neatly ensured stability and a smooth shoot.
Check and Re-torque Regularly
Vibration or movement can loosening tension over time. Regularly recheck and torque screws during breaks. I learned this the hard way when a loosened screw caused a wobble. Routine checks kept my rig stable throughout long shooting days.
Use Proper Mounting Accessories
Employ mounting plates, adapters, and grips suited for your gear. For glass desks or uneven surfaces, special mounting solutions prevent slipping or wobble. I used a specialized clamp for my boom arm on a glass table, ensuring zero movement—game changer for tight indoor shots.
Leverage Reliable Tutorials and Resources
Visit expert guides like how to build a custom rig or tripod stability tips to refine your technique. Incorporating proven methods helped me troubleshoot persistent wobbles during complex setups.
Implement Feedback Loops
After each shoot, review footage for instability. Adjust accordingly. In one project, noticing a slight shake led me to tighten the base, avoiding blurry shots later. Continuous iteration ensures your rig remains stable as conditions change.
Special Attention to Boom Arms and Light Stands
Pay extra attention to tension in boom arms and light stands. For instance, I applied techniques from boom arm tension fixes to prevent sagging during a macro shot. Proper tension management keeps your gear precisely where it needs to be.

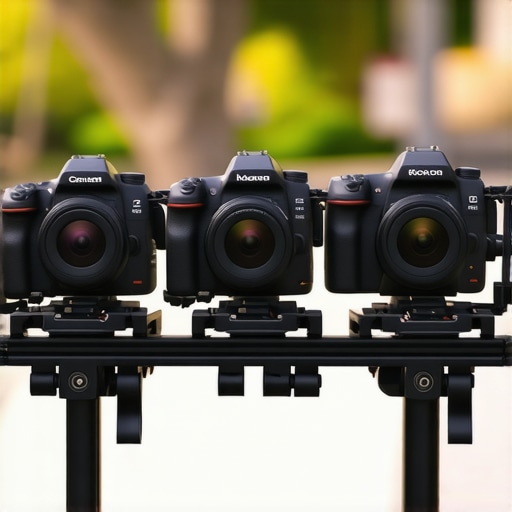
Image illustrating step-by-step tension screw adjustments on a camera rig.
Many creators operate under the false belief that selecting high-end gear alone guarantees stability and safety. While premium equipment is essential, the myth that heavier or more expensive stands automatically prevent wobble is widespread but flawed. In reality, proper setup, maintenance, and understanding the nuances matter significantly more. For example, a heavy-duty C-stand can still topple if its legs are unevenly placed or if the center of gravity isn’t carefully managed. Regularly inspecting and adjusting your stands and rigs, according to expert guides like [mastering tripod stability](https://stands.creatorrigreviews.com/mastering-tripod-stability-expert-tips-to-elevate-your-shots), can drastically reduce accidents.
Another misconception involves the supposed simplicity of quick setups. Many overlook the importance of fine-tuning tension screws on boom arms or securing sandbags correctly, which can lead to catastrophic failures in windy outdoor shoots or with heavy lighting. A common mistake is neglecting the hidden weight distribution factors; simply adding sandbags isn’t enough if they’re not placed properly or if the stand’s base isn’t level. Advanced practitioners understand that small adjustments—like ensuring the stand’s wheels are locked and the weight is balanced—are vital. This is especially critical when working in challenging environments, where uneven terrain can sneakily undermine even the sturdiest equipment.
One often overlooked aspect is cable management. Untidy cables not only pose tripping hazards but can also subtly shift the center of mass, causing unexpected instability. Secure cables with clips or ties, as detailed in [rigging hacks](https://stands.creatorrigreviews.com/3-rigging-fixes-to-stop-overhead-boom-arm-sway-in-2026), to maintain the rig’s integrity.
How do I prevent my tripod head from drifting during critical shots?
Understanding that tension adjustments and regular maintenance are keys to preventing common issues like head drift can save you from missed shots and re-shoots. Expert advice emphasizes checking and re-torquing the head’s screws routinely, especially after transport or long shooting days—it’s a small step that yields big results. More advanced setups might also include dual-lock systems or upgraded head components designed to minimize drift, which can be explored in detailed guides.
The hidden nuance here is that equipment alone isn’t the answer; attentive setup and ongoing adjustments are what keep your shots steady and your crew safe. Remember, a well-balanced stand, attentive cable routing, and consistent maintenance form the core of professional safety and creativity. Proper knowledge about these intricacies elevates your skill from amateur to expert. Have you ever fallen into this trap? Let me know in the comments. For more tips on building a reliable rig, check out [how to build a custom camera rig](https://stands.creatorrigreviews.com/how-to-build-a-custom-camera-rig-for-professional-results) or visit our [contact page](https://stands.creatorrigreviews.com/contact-us) for personalized advice.
Prioritize Regular Upkeep to Extend Equipment Lifespan
Consistent maintenance is crucial for keeping your light stands, tripods, and camera rigs performing optimally. I dedicate time weekly to inspect each component, tighten loose screws, and clean dust and debris that can compromise stability. Neglecting these simple steps can lead to costly failures during critical shoots. For example, a quick check of my C-stand’s leg locks before every session has prevented multiple topples over the years.
Invest in Quality Tools for Precise Adjustments
Having the right tools, such as Allen wrenches, torque screwdrivers, and cable organizers, makes adjusting tension and securing parts effortless. I use a digital torque wrench to ensure tension screws on my boom arm are set within manufacturer specifications, which prevents sagging and wobbling. These small investments save time and protect your gear from uneven wear.
Master the Art of Scalable Solutions for Growing Needs
As your production workload increases, so does the need for scalable equipment. Modular light stand systems, quick-release clamps, and heavier-duty C-stands allow seamless expansion without sacrificing stability or safety. I transitioned to a heavy-duty, modular setup that accommodates heavier lighting and cameras, enabling me to handle larger shoots confidently. Such upgrades are supported by expert guides like C-stand selection tips.
How do I maintain my rig over time?
Implement a routine maintenance schedule that includes checking tension screws, lubricating moving parts, and replacing worn components. Regularly reviewing your setup not only prevents equipment failure but also helps you recognize wear or damage early, saving you money and time. For connection points that experience frequent adjustments, applying a light lubricant like silicone spray ensures smooth operation without attracting dust. Consider creating a maintenance log to track inspections and repairs—this proactive approach prolongs your gear’s lifespan and keeps your shoots running smoothly.
Remember, keeping your tools in top shape is the backbone of professional production. For more detailed maintenance strategies, explore advanced tips like power fixes for demanding shoots or visit our contact page for personalized advice. Try implementing a monthly check of your tension screws and see how it transforms your rig’s stability, especially during pivotal moments in your shoots.
The Hardest Lesson I Learned About Light Stands and Boom Arms
One of my most painful realizations was that no matter how sophisticated your gear is, poor balancing can sabotage your shots. I once spent hours tweaking settings only to discover my boom arm was sagging because I overlooked tension screw adjustments. That moment was a wake-up call: precision in rig calibration can make or break your footage.
Myths That Hold Back Film Creators
Many believe heavier stands are inherently more stable. But I found that well-tuned, lighter setups with optimized counterweighting outperform bulky rigs every time. Re-evaluating these misconceptions opened new avenues for efficient, stable filming in tight spaces and unpredictable outdoor environments.
What I Wish I Knew About Cable Routing
I used to ignore cable organization, thinking it was a minor detail. That mistake led to shifts in my rig during crucial moments. Learning to secure cables neatly not only prevents accidental shifts but also simplifies quick adjustments—saving time and ensuring shot stability.
When Routine Maintenance Becomes a Game-Changer
Regularly inspecting tension screws and mounting points transformed my setup. Small weekly checks prevented major failures. Implementing this habit extended my equipment’s lifespan and kept my filming smooth—even during marathon shoots.
If I Could Reinvent One Aspect of My Setup
It would be integrating advanced anti-vibration mounts for all boom arms. This upgrade drastically reduced micro-movements, crucial for professional video quality. It’s a reminder that ongoing innovation in accessories can elevate even seasoned creators’ work.
Resources That Elevate My Craft
- How to Build a Custom Camera Rig for Professional Results: This guide taught me the fundamentals of rig optimization, emphasizing stability and ergonomic efficiency. Link: https://stands.creatorrigreviews.com/how-to-build-a-custom-camera-rig-for-professional-results
- Mastering Tripod Stability Techniques: Perfect for refining base setup and tension adjustments. Link: https://stands.creatorrigreviews.com/mastering-tripod-stability-expert-tips-to-elevate-your-shots
- Light Stand Essentials for Creative Control: Offers insights on choosing and balancing stands for steady lighting. Link: https://stands.creatorrigreviews.com/light-stand-essentials-boost-your-lighting-game-with-ease
Your Next Step Toward Perfect Shots
Remember, ingenuity and attention to detail are your best allies in 2026. Consistently fine-tuning your rig, staying curious about new techniques, and leveraging expert resources will push your creativity further. Don’t wait for shaky footage to become a problem—start with small, deliberate adjustments today. If you’ve faced challenges with rig stability, share your experience below—let’s learn together and raise our craft to new heights.