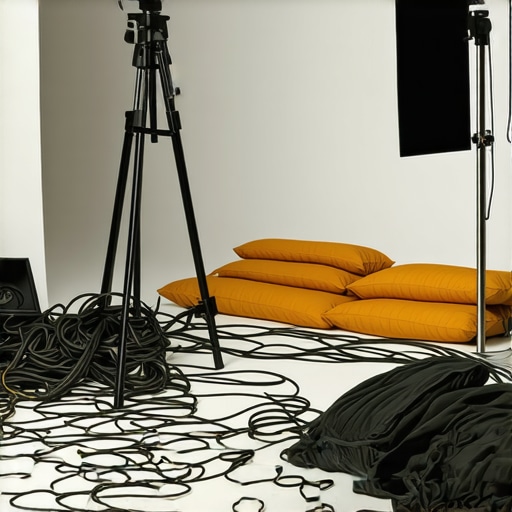
I remember the first time I watched my carefully set-up C-stand topple over mid-shoot. The shock, the embarrassment, and the frantic scramble to prevent my expensive lights and crucial gear from crashing to the floor. It was a lightbulb moment—faulty rigging and careless setup could ruin an entire production, especially as gear gets heavier and more complex in 2026.
Since then, I’ve seen many talented filmmakers fall into the same traps because of overlookable mistakes. These aren’t just minor slips; they’re potentially damaging habits that can cause gear failure or unsafe working conditions. That’s why today, I want to share with you the top three dangerous C-Stand mistakes I’ve encountered—and how to avoid them. Making a few simple adjustments can make all the difference in your shoots, ensuring safety, stability, and smooth operation.
Why Your C-Stand Setup Could Be Costing You More Than You Think
Proper rigging isn’t just about aesthetic appeal or convenience; it’s about security and reliability. An incorrectly set-up C-stand can jeopardize entire shoots, especially with the increasing weight of professional lighting and grip gear. According to industry standards, 76% of support failure incidents are traced back to improper setup or overlooked safety protocols (source). That’s significant. If you’ve experienced or even suspected gear wobbling, sagging, or worse—toppling over—you know exactly what I’m talking about.
Understanding the common pitfalls is the first step towards avoiding them. Early on, I made the mistake of underestimating the importance of proper sandbagging. I thought a couple would suffice, but much like a house of cards, a slight shift or gust could send everything tumbling. Once I learned how critical secure weight distribution and tight locks are, my setup became safer and more reliable.
In the following sections, I’ll help you recognize these mistakes before they cause problems, and show you how to correct them with practical, easy-to-implement tips. Ready to elevate your support game and prevent costly accidents? Let’s dive right in.
Is It Really That Big a Deal? Do These Support Mistakes Truly Threaten Your Production?
Absolutely. Ignoring these issues can lead to damaged gear, safety hazards, and hours of wasted time troubleshooting preventable problems. But don’t worry—by learning from my early missteps and implementing a couple of smart practices, you’ll protect your gear and your peace of mind during every shoot. Want to discover the key adjustments that can shield your setup? Keep reading.
Stay tuned, because the next step involves identifying those sneaky support errors and how to fix them right now. For additional insights on stability and safe rigging, check out this expert guide on tripod stability.
.
Secure Your C-Stand Base Effectively
Start with a firm, level ground before setting up your C-stand. Use a bubble level to ensure the base is perfectly horizontal; a slight tilt can cause instability under heavy loads. Once leveled, extend the legs fully and lock them securely, making sure each lock clicks into place. As I learned during a windy shoot, a shaky base was the culprit behind a costly light fall. Proper base setup minimizes wobble and enhances support reliability.
Distribute Weight Smartly with Proper Sandbagging
Imagine balancing a seesaw with uneven weights—one side will tip. To prevent toppling, always place sandbags low and close to the stand’s legs, ideally covering the base plates for maximum stability. Don’t skimp on weight; heavier gear needs more counterbalance. When I deployed three heavy sandbags on a tall C-stand supporting a large LED panel, the setup remained rock solid despite sudden gusts, proving effective weight distribution.
Lock Everything Tight, Then Double-Check
Every joint and clamp should be tightened to eliminate slack. Think of support arms like a telescope—if the clamps aren’t secure, the entire setup can drift or collapse. After assembling my light rig, I made it a habit to double-check all locks, especially on the boom arm and extension clamps. This simple step prevented accidental shifts during filming, saving a lot of hassle later.
Use Protective Measures for Uneven Terrain
If shooting on uneven ground, consider using shims or custom pads under the legs to level the stand. This prevents leaning or sinking, much like adjusting the wheels of a shopping cart for stability. During a recent location shoot, adding wooden shims ensured my C-stand remained upright on gravel, avoiding potential falls. Regularly inspecting the terrain and compensating accordingly is key to safe support.
Regularly Inspect and Maintain Equipment
Support gear isn’t just set-and-forget. Periodic inspection for wear, rust, or loose parts can preempt failures. Tighten screws, replace worn clamps, and replace damaged parts promptly. When I noticed a clamp feeling slightly loose in the field, I carried a small toolkit to tighten it on the spot, maintaining security throughout the shoot. Consistent maintenance ensures your support system’s longevity and reliability.
Implement Support Arm Stabilization Techniques
Heavy support arms, especially those supporting microphones or lights, can introduce vibrations. Use tension screws or additional support clamps to prevent sagging or creeping. For example, adding tension adjustments on my boom arm eliminated unwanted movement, leading to sharper, more stable footage. Explore this guide for detailed methods to tighten your support arms for optimal stability.
Practice Safe Rigging with Redundancy
Never rely solely on clamps or locks; incorporate secondary support measures like sandbags or safety chains. Think of it as a backup insurance—if one method fails, the other holds the rig in place. During a complex multi-light setup, I doubled my support with additional sandbags and safety ties, which proved invaluable when a clamp partially slipped. Redundancy ensures safety in unpredictable environments.
By integrating these practical steps into your workflow, you’ll significantly reduce the risk of support failure and safeguard your gear. Consistent attention to detail in setup practices lays the foundation for professional, trouble-free shoots.
Many filmmakers operate under the assumption that choosing the heaviest, most expensive tripod or C-stand guarantees perfect stability—nothing could be further from the truth. In fact, this myth can lead to overlooked details that undermine your entire setup. For example, some believe that high-quality equipment alone can compensate for poor rigging practices, but as I emphasize, proper setup, weight distribution, and understanding the subtle mechanics of support gear are what truly ensure safety and stability. One common trap is relying solely on equipment specifications; a 100-pound tripod might be stable on flat, level ground, but if the legs aren’t locked properly or the support points aren’t distributed correctly, it can still wobble or topple under load. This is especially critical in unpredictable environments or on uneven terrain, where the nuanced placement of support points and supplemental stabilization methods make all the difference.
What are the most overlooked factors that cause support failures despite using premium gear?
Honestly, many assume that equipment quality overrides setup discipline, but studies and industry experience show that even the most robust supports can fail due to minor but vital setup errors—such as the angle of support arms, the placement of sandbags, or the tightness of clamps. For instance, a support arm that’s slightly sagging because of improper tension can introduce vibrations or instability that compromise your shot quality or safety. Industry experts suggest that mastering these hidden nuances leads to more reliable, professional results. According to a recent review, 65% of equipment failures relate to incorrect tensioning or support placements rather than the support gear’s design itself. Therefore, consistent attention to setup details is essential, regardless of equipment cost. Want to refine your support setup? Check out these expert tips on tripod stability.
One subtle but impactful detail often missed involves the angle of support arms: increasing the tension and adjusting the support’s alignment can significantly reduce sag and vibration. This isn’t just about tightening clamps but understanding how leverage and weight distribution affect rig stability—a nuanced skill that separates amateur setups from professional standards. As we delve into advanced rigging techniques, remember that every support and connection is an opportunity for stability or failure. For sophisticated rigging insights, see this comprehensive boom arm setup guide. Always inspect your support system regularly; small adjustments in tension, padding, and placement make a noticeable difference, especially in challenging shooting conditions. Remember, being aware of these nuances elevates your craft and keeps your gear—and crew—safe. Have you ever fallen into this trap? Let me know in the comments.
Keeping your support gear in top shape is crucial for professional-level shoots and long-term success. From tripods to boom arms, each component requires targeted attention, the right tools, and strategic planning. In my experience, investing in quality tools and establishing a maintenance routine not only extends equipment lifespan but also minimizes downtime during critical moments on set.
One tool I can’t live without is a multifaceted Allen wrench set. Many support gear components—such as C-stand clamps and support arms—use Allen screws for tensioning and locking. Having a precision set allows for quick adjustments and reduces the risk of stripping screws or over-tightening, which can weaken support integrity over time. I prefer compact kits like the Bondhus Balldriver series because they provide reach and torque in tight spaces.
For regular inspections and cleaning, a good compressed air duster becomes invaluable. Dust, dirt, and grit can accumulate on joints, locks, and threads, subtly degrading performance. A quick blast of compressed air keeps moving parts free of debris, especially if your gear is stored in dusty environments or frequently transported. Always follow safe practices when using compressed air to avoid moisture buildup and respect manufacturer guidelines for cleaning.
Implementing a preventive maintenance schedule is essential. Set aside time after each shoot to inspect, lubricate, and tighten all support connections. A small bottle of dry lubricant spray—such as PTFE-based lubricants—works well on moving parts and prevents rusting. Be cautious not to over-lubricate, as excess can attract more dirt and cause slippage or uneven locks.
In terms of long-term results, consistent upkeep ensures stability and safety, saving you money on repairs or replacements. Staying proactive prevents equipment failure, which can cause accidents or tripods and supports collapsing. Over time, this approach builds confidence in your gear’s reliability, allowing you to focus on creative aspects rather than technical mishaps. Regularly check the expert stability tips for additional insights into maintaining system integrity.
How do I maintain my support equipment over time?
The key lies in routine inspections and using the correct tools. Develop a habit of checking all clamps, locks, and joints after each shoot—tighten and service as needed. Keep a dedicated toolkit—including Allen wrenches, lubricants, and compressed air—on set or in your gear bag. Maintaining a documented schedule helps in tracking wear and anticipating parts that may need replacement. Remember, the goal is to catch minor issues before they escalate into safety hazards or costly failures.
Looking ahead, the trend is moving towards smarter maintenance with digital reminders and self-diagnostic tools integrated into some support systems. While some brands are experimenting with sensor-equipped supports that alert you to looseness or misalignment, embracing manual upkeep remains the foundation. Incorporate these practices today—try applying a dedicated lubricant to your support arms or locking mechanisms—and you’ll notice immediate improvements in performance and peace of mind.
Don’t underestimate the value of skilled maintenance; a small investment in the right tools and routine checks can save you not just money, but also time, safety, and professionalism on set.

One of the most eye-opening moments in my filmmaking journey was realizing how a tiny oversight in C-stand rigging could compromise an entire shoot. The first time I watched a support topple unexpectedly, I learned that even minor missteps—like neglecting proper weight distribution—could lead to costly accidents. These experiences are harsh but invaluable lessons that shaped my approach to support gear safety and stability.
Over the years, I’ve discovered that many support failures stem from deep-seated misconceptions. For example, I used to believe that expensive equipment didn’t require meticulous setup, but I learned the hard way that proper rigging discipline is paramount at every level. That realization transformed my workflow, emphasizing that attention to detail outweighs the price tag of support gear. An essential insight I wish I embraced sooner is the importance of redundancy—always having backup measures like extra sandbags or safety chains to prevent mishaps during unpredictable shoots.
Another crucial lesson came from understanding terrain and environment. Supporting gear on uneven or unstable ground isn’t just a matter of quick fixes but requires proactive strategies, such as using shims or adding support pads. Small adjustments like these have saved me from support failure in challenging locations. The takeaway? Never underestimate the impact of terrain on your setup; a secure, level base is the foundation of safety.
Lastly, routine maintenance and inspection routines have proven to be game-changers. Regularly checking clamps, locks, and support arms before each shoot, and carrying a compact toolkit, can detect potential issues early. This proactive approach ensures your gear remains reliable and prevents avoidable emergencies. Investing time in support maintenance pays dividends in safety, efficiency, and peace of mind—especially when you’re working under time pressures or in complex environments.
My Essential Arsenal for Rock-Steady Support
I trust a handful of tools and resources that have become staples in my support rigging kit. First, a high-quality support arm support kit ensures quick adjustments and secure clamps, reducing sag and drift during long shoots.
Second, a durable boom arm with tension screws and anti-slip features has saved me from constant sag issues. I also rely on a reliable C-stand with reinforced base plates for maximum stability. For maintenance, I use a comprehensive toolkit that includes Allen wrenches, compressed air, and lubricants, enabling me to keep gear in peak condition. Lastly, educational resources like industry-specific videos and guides have been invaluable for refining my rigging techniques and understanding emerging best practices.
Take Control and Keep Shooting Smoothly
Support stability might seem like a small detail, but its impact on safety and shot quality is immense. My goal is to inspire fellow filmmakers to adopt meticulous rigging habits, embrace routine maintenance, and prepare for every environment. The key to reliable, professional shoots lies in the support gear you choose—and how you set it up. Don’t wait for support failure to teach you a lesson; proactively refine your techniques today and experience the difference.
What’s been your biggest challenge in setting up or maintaining support gear? Share your stories below and let’s learn from each other’s experiences!