I remember the moment vividly—the boom arm holding my most expensive mic suddenly slumped mid-shoot. My heart sank, and I realized I had overlooked a simple detail that could have prevented it. It was a lightbulb moment: even seasoned pros can get caught in the trap of common mistakes with their C-stand counterweights. As I’ve tinkered and learned, I’ve seen how these tiny oversights can turn a smooth production into a shaky nightmare. If you’ve ever had a stand wobble unexpectedly or a counterweight slip, you’re not alone. Today, I want to share insights based on my experience—and a bit of research—to help you avoid these pitfalls in 2026. Doing so can save time, protect your gear, and keep your shots steady. Sound familiar? Keep reading, because the fix might be simpler than you think.
No More Wobbles: Mastering C-Stand Counterweight Placement
Is Ignoring Counterweight Mistakes Actually Costing You Everything?
When I first started out, I thought adding more weights was the surefire way to stabilize my setup. Turns out, I was dead wrong. Overloading or misplacing counterweights can cause imbalance, damaging your gear or leading to unexpected collapses. I learned this the hard way early on, and it’s a mistake I see even experienced filmmakers repeating. Proper counterweight placement isn’t just about balance; it’s about safety and longevity of your equipment. According to industry experts, correct counterweight use can extend the life of your stands and prevent costly accidents—an essential tip for all professionals (Creator Rig Reviews). Now, let’s get into practical ways to avoid these costly errors and keep your shoots running smoothly. Before diving into the solutions, I have to ask—have you ever faced a stand tip-over that could’ve been prevented with the right counterweight technique? If yes, you’re going to find this especially useful. Now, onto the most common mistakes—and how to dodge them efficiently.
Secure the Base First
Start by inspecting your stand’s base; ensure it’s on stable, level ground. For uneven surfaces, use adjustable feet or wedges to create a flat surface. When I was on a windy outdoor shoot, I used wooden shims under my tripod legs to level the setup precisely, preventing wobble. This step is crucial before adding any weights or mounting equipment.
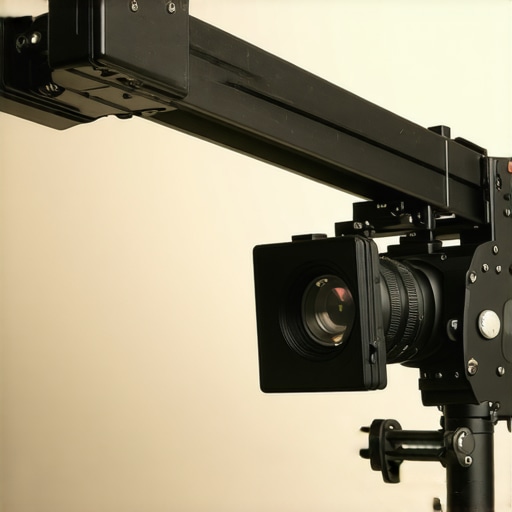
Understand the Balance Point
Identify the center of gravity of your setup. Think of your boom arm or C-stand as a lever; all mass should balance around the fulcrum. For a boom arm carrying a mic, position the counterweight directly opposite the load, roughly 2-3 feet from the arm’s pivot point. This distributes weight evenly, reducing the chance of tipping or sagging. Remember, improper placement increases stress on joints and can cause failure down the line.
Distribute Weights Appropriately
Use multiple smaller weights instead of a single heavy one when possible. Imagine stacking building blocks for stability; solid distribution beats a single monolith. For example, rather than placing two 10 lb weights on one side, split them into four 5 lb weights spread along the stand. This approach enhances stability, especially when working with telescoping or adjustable stands, as seen in my recent experience with an overhead light rig.

Proper weight distribution on a C-stand or tripod ensures maximum stability and safety. Place weights symmetrically, keeping the center of mass low and close to the stand’s base. For detailed guidance on choosing the right stand for your setup, see this comprehensive guide.
Tighten and Lock Components
Once weights are in place, double-check all tightening knobs, screws, and clamps. Loose components are a leading cause of wobble and accidents. I once neglected this step with a light stand; the entire rig tilted during a shoot, causing a minor scare. Regularly inspecting and tightening connections is a simple yet effective habit to maintain stability and prevent mishaps. For tips on gear maintenance, visit this resource.
Test and Adjust Before Shooting
Finally, give your setup a gentle nudge to test stability. If any movement or wobble is detected, readjust your weights or reposition the stand. This step saved me from a disaster when a shaky tripod nearly caused my camera to fall during a high shot. A quick shake test can reveal subtle imbalances, allowing for fine-tuning before critical moments. Remember, no detail is too small when it comes to stability.
In the world of filmmaking and photography, many professionals hold onto certain beliefs about gear setup that, in practice, can lead to unnecessary issues. One widespread misconception is that heavier is always better for stability. While casting a wide net for weights might seem intuitive, excessive weight can actually compromise your equipment’s lifespan and introduce new wobble if not balanced correctly. According to expert rigging tips, understanding the nuance of weight distribution is crucial for optimal stability, rather than simply piling on more mass. Another common trap is over-relying on quick-release clamps assuming they are sufficient for heavy setups. However, frequent use or improper tightening can cause slippage, risking safety and shot stability. Proper torque application and periodic checks are often overlooked, leading to costly accidents. Additionally, many believe that fine-tuning the tension of boom arms is unnecessary once initially set. But subtle adjustments, especially after loading or environmental shifts, can prevent sagging or sudden drops, ensuring smooth operation. It’s essential to master the advanced tensioning techniques outlined in comprehensive guides to avoid these pitfalls. On an even more sophisticated level, some assume that all tripods or stands are universally compatible with any gear. However, mismatched load capacities or incompatible mounting points can cause instability or gear damage. This is why consulting detailed support and compatibility resources, like the in-depth guide on selecting the perfect C-stand, is vital for professional setups.
Why does improper gear setup seem so insignificant until it causes a disaster? Let’s dig deeper.
The subtlety lies in the physics of load balance and environmental factors. For example, even a slight tilt or imbalance can be magnified by external forces like wind or uneven surfaces. Recognizing the importance of proper setup is a nuanced skill that separates amateurs from seasoned pros. A good rule of thumb is to always inspect your gear from multiple angles before shooting. Do not assume that initial stability guarantees safety under load changes or prolonged use. Industry studies highlight that most accidents happen due to overlooked fine details, reinforcing the necessity of vigilant setup routines. To enhance your knowledge further, check out detailed tutorials on mastering tripod stability or assembling a reliable camera rig. Remember, the devil is in the details, and understanding these nuances can save you from costly re-shoots or damaged equipment. Have you ever fallen into this trap? Let me know in the comments or reach out for personalized advice through our contact page, especially if you’re dealing with complex setups or persistent wobbling issues. Properly applied, these advanced insights transform your setup from fragile to professional-grade, elevating your production quality significantly.
How do I maintain my filmmaking equipment over time?
Proper maintenance is crucial to keep your boom arms, C-stands, camera rigs, tripods, and light stands performing reliably over years of use. I personally rely on a combination of regular inspections, the right cleaning tools, and preventive care routines. For example, I always carry a microfiber cloth and compressed air duster in my toolkit. These help me remove dust and dirt from moving parts and tightening points without risking corrosion or damage. Additionally, applying a light lubricant like silicone spray to joints ensures smooth operation. Regularly checking the tension screws on boom arms, such as those discussed in this guide, minimizes sag and keeps setups stable. Prediction-wise, I anticipate that smart wearables and IoT-enabled tools will soon notify us of potential failures before they occur, extending equipment lifespan further.
The most trusted tools for ongoing maintenance
One tool I can’t do without is a digital torque wrench. It helps me ensure that clamps and tension screws are tightened to manufacturer specifications, preventing over-tightening or loosening over time. For cleaning, a bristle brush with soft nylon fibers is ideal for removing debris from gear teeth and moving parts without scratching delicate surfaces. When dealing with lubricants, using a silicone spray on movable joints keeps everything feeling smooth without attracting dust. For inspecting the integrity of my stands and rigging, I employ a compact LED flashlight with a CRI rating over 90—standard in professional setups—so I can spot even minute cracks or corrosion. To keep my setups aligned, I use a precision spirit level, often integrated into my tripod ball heads, to ensure perfect horizontality and prevent creeping sag.
Scale with confidence and keep your setup reliable
As your operation grows, investing in quality, modular gear becomes more critical. I recommend transitioning to adjustable, lockable stands and modular rigs that can adapt to diverse shooting environments. For example, using lightweight carbon fiber tripods with reinforced joints reduces weight without sacrificing stability. Incorporating accessory mounts with quick-release systems allows rapid adjustments and minimizes wear. Remember, a well-maintained rig not only extends lifespan but also boosts confidence when capturing crucial shots, especially under unpredictable conditions. Don’t forget to document your maintenance routines digitally or with a dedicated checklist—this practice simplifies scaling efforts and ensures consistency across multiple setups.
Stay ahead with proactive care to avoid surprises
Implement basic yet effective routines like weekly visual inspections of all stands, tightening any loose components, and cleaning dust in mechanical joints. When you spot corrosion or worn-out parts early, replacing or refurbishing them saves headaches during critical shoots. For those dealing with complex rigs or heavy-use scenarios, consider investing in a dedicated maintenance kit, including spare tension screws, replacement feet, and protective gear covers. Integrating these practices into your workflow ensures your equipment remains dependable, giving you peace of mind to focus on your creative vision. Ready to upgrade your maintenance game? Start with one tip from this list—perhaps your tension screws or cleaning routine—and observe the difference it makes.
Lessons From My Biggest Stability Slip-ups
One of the toughest moments in my career was when a critical shot was nearly ruined because I overlooked a tiny detail—proper weight distribution. That experience taught me that even seasoned pros can fall into the trap of complacency. I realized that meticulous attention to even the smallest connection points on boom arms and stands is what separates professional results from costly mishaps. I learned that regularly testing your setup after making adjustments can catch potential failures before they escalate, saving time and preventing gear damage. This lesson underscored the importance of proactive maintenance routines, especially when working with complex rigs under unpredictable environments. Sharing this ensures you avoid repeating my mistakes and keeps your shoots smooth, stable, and safe.