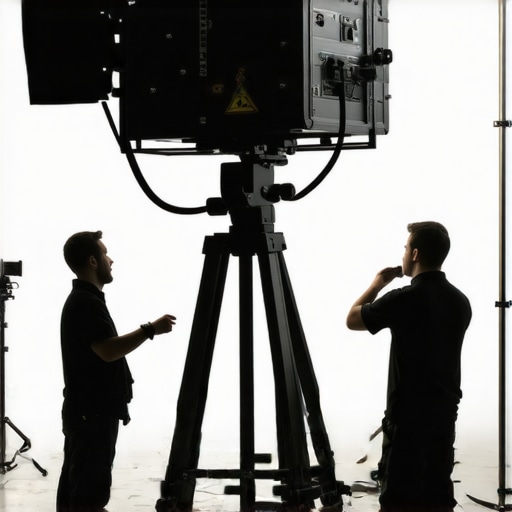
I remember a moment on set when my heart nearly stopped. A massive 2026 lighting rig, perched precariously on a C stand, wobbled dangerously with a slight gust of wind. My first instinct was panic, but then I realized—this isn’t just a fluke; it’s a common oversight that can lead to disasters. That incident was my lightbulb moment: ensuring C stand safety isn’t optional—it’s essential for protecting equipment, people, and shoots.
Why Your C Stands Might Be a Hidden Danger
Heavy lighting rigs can be astonishingly unstable if not properly secured. Despite advances in gear technology, many operators underestimate the importance of proper C stand setup and safety measures. Missteps like incorrect weight distribution or neglecting to use sandbags can turn a sturdy stand into a toppled nightmare within seconds. And the truth is, according to industry safety statistics, equipment failure caused by poor support setup accounts for a significant percentage of on-set accidents—some reports cite up to 20% of incidents (source: Creator Rig Reviews).
My early days were riddled with such mistakes. I used to trust that a C stand’s built-in locking mechanism was enough, forgetting the critical role of weight stabilization. That was a grave error. Little did I know that a simple step—like properly sandbagging—could make all the difference. If you’re like me, you’ve probably faced moments where your support gear subtly shifts, risking the entire shoot—an unnerving experience that could have been prevented with a few safety tips.
Are C Stand Safety Tips Overhyped or Absolutely Critical?
Initially, I thought safety tips were just cautionary fluff until I witnessed a rig collapse during a high-profile shoot. Trust me, the aftermath was costly—both financially and professionally. Early in the game, I made the mistake of underestimating the importance of proper setup, assuming that my gear’s weight alone would keep everything stable. That mistake cost me dearly, but it was a lesson well learned. To avoid similar pitfalls, I’ll guide you through proven safety practices that can save you from a potential disaster and ensure your lighting setup remains rock-solid, no matter the environment. Ready to level up your C stand safety game? Let’s dive into the essential tips that will become your go-to for every shoot.
Secure the Base Firmly
Start with a solid foundation. Spread the legs of your C stand evenly on flat, stable ground, ensuring each leg is fully extended and locked. Use a level to confirm the stand isn’t leaning, preventing wobble. On uneven terrain, consider placing the stand on sturdy platforms or creating a flat surface with planks. During a shoot at a cluttered outdoor location, I once used wooden blocks under the legs to stabilize a tall stand on uneven mud, which kept everything secure throughout the day.
Distribute Weight Properly
Imagine your C stand as a tower of blocks; balance is key. Position your heavier lights or modifiers close to the stand’s center and lower down to keep the center of gravity stable. Use the manufacturer’s weight limits as a guideline to avoid overloading. During my own setup, I once attempted to hang a large softbox too high, causing instability. Adjusting the weight distribution lower and closer to the stand’s base significantly improved stability and reduced wobble.
Use Sandbags Effectively
Sandbags are your armor against tipping. Place at least two evenly weighted sandbags—one on each side of the stand’s legs or at strategic points along the base. Don’t just drape them; ensure they sit snugly and are securely fastened if possible. I once neglected to secure sandbags, and in a gusty outdoor shoot, the stand shifted slightly, risking collapse. Properly secured sandbags absorbed the gust, keeping the setup firm. For optimal safety, check their weight regularly and avoid overloading one side, which can cause imbalance. Learn more about effective sandbagging techniques at this guide.
Lock Everything Three Ways
Don’t trust a single mechanism to hold your gear. Engage all locking points—legs, height adjustments, and swivel joints—simultaneously. Think of it as locking every latch on a window for maximum security. Check each lock after setup; a quick tug can reveal hidden slack. I once thought locking the extension column was enough, but a quick test showed it moved slightly, risking instability. Engaging all locks and testing under load ensure your stand holds firm during the shoot.
Manage Wind and External Factors
Wind can be a stealthy killer of support stability. Use wind-resistant accessories like hefty sandbags, or position stands in sheltered spots. For open outdoor shoots, anchor stands with additional weights or guy wires if available. During a windy shoot, I attached extra sandbags and moved closer to natural barriers, which drastically reduced stand movement. Always monitor changing weather conditions and be prepared to adjust or dismantle supports if conditions worsen.
Regularly Inspect Your Equipment
Before every shoot, give your support gear a quick check—locks, legs, joints, and the base. Look for wear, damage, or loose parts that could compromise stability. During a recent shoot, a locking knob was slightly stripped; replacing it prevented a potential failure. Consistent inspection becomes second nature and helps prevent accidents before they happen. Remember: a small crack or loosened lock today can cause significant damage or injury tomorrow. For detailed inspection routines, visit this safety guide.
Position with Purpose
Place your stands deliberately—their position should account for both support and safety. Avoid placing support under walkways or obstructed areas where accidental bumps may occur. If working near foot traffic, consider barriers or warning signs. When I set up in a busy studio, I positioned stands away from high-traffic zones and secured them against accidental contact. A thoughtful setup minimizes risks and ensures support remains undisturbed during the shoot.
 Many practitioners believe that choosing the heaviest, most robust support equipment guarantees the best stability, but in my experience, this is a misconception that can lead to overlooked details and costly mishaps. One of the most overlooked aspects is the importance of *proper setup and understanding the nuanced behavior of support gear under various conditions*. For example, a heavy-duty tripod might seem inherently stable, yet if it’s set up on uneven ground or with loose locks, its stability diminishes significantly. As discussed in the ultimate guide to tripods and support gear, the real key is understanding how support structures behave under load and environmental influences, minimizing vibrations and instability inheriting common pitfalls—more on that in the full article.
Maintaining your support equipment, from tripods to C stands and boom arms, is essential for ensuring reliable performance and extending their lifespan. A well-kept rig not only saves you money but also guarantees safety and stability during crucial shoots.
Invest in Quality Support and Tooling
Start with high-quality gear. Brands like Matthews, Manfrotto, and Avenger offer supports that are built to last and withstand rigorous professional use. For everyday maintenance, I rely on specific tools like torque wrenches, which allow me to tighten locking mechanisms precisely, preventing wear over time. Using a digital torque wrench ensures consistent tension, especially on tension screws of boom arms and C stands, reducing the risk of equipment failure. Regularly checking the integrity of locking knobs and joints with these tools is part of my routine—it’s a step often overlooked but crucial for long-term reliability.
Implement Routine Inspection Schedules
Scheduled inspections are key to catching wear and tear early. I inspect my stands at the start of each shoot, paying close attention to locking mechanisms, welds, and rubber feet. For example, loose or cracked rubber feet can cause instability, especially on uneven surfaces. During inspections, I also examine support arms for signs of fatigue or stress fractures, and replace any compromised parts immediately. Routine cleaning with a gentle lubricant on moving joints can prevent corrosion and ensure smooth operation. Creating a checklist tailored for your gear, referencing guides like this resource, can streamline your maintenance process.
Assemble and Store Gear Properly
Proper assembly and storage extend the life of your gear. Always follow manufacturer instructions, ensuring that all components are correctly aligned and locked before use. When not in use, store stands and support arms in a dry, climate-controlled environment, ideally hanging supports to prevent warping or deformation. Using protective cases for transport and storage reduces exposure to dust and impacts—keeping your gear pristine. For support arms and heavy-duty supports, I prefer foam-lined cases which cushion delicate tension screws and joints against shocks, preventing premature failure. An organized storage setup simplifies maintenance routines and quick deployment in demanding environments.
Future Trends in Support Equipment Durability
As materials science advances, expect to see more carbon fiber supports and corrosion-resistant alloys becoming standard. These innovations will reduce weight while improving durability, especially for outdoor operations. Additionally, anti-fatigue coatings and modular designs will make repairs faster and more cost-effective. Staying ahead with the latest equipment maintenance practices, like those discussed in the ultimate guide to tripods and stands, will keep your support gear ready for any shoot, anytime.
How do I keep my support gear performing optimally over years?
Develop a disciplined maintenance routine that includes regular inspections, cleaning, and part replacements as needed. Using precise tools like torque wrenches for tension adjustments and following manufacturer recommendations ensures longevity. Consider investing in modular supports with replaceable components—they simplify repairs and minimize downtime, keeping your support setup reliable through demanding projects. For detailed support gear maintenance, check out this comprehensive guide. Try applying a weekly inspection routine, and you’ll notice a significant boost in gear lifespan and safety.
The Hardest Lesson I Learned About Support Gear
One of my most valuable takeaways came after a support stand wobbled ominously during a crucial outdoor shoot. I realized that even seasoned professionals can overlook the subtle nuances of proper setup. Ensuring stability isn’t just about heavy equipment; it’s about understanding the terrain, the setup techniques, and the importance of routine checks. That incident pushed me to never assume support gear is foolproof, teaching me that vigilance and knowledge are your best safeguards against costly mishaps.
My Arsenal of Tools and Resources
Over the years, I’ve curated a toolkit that’s proven its worth, including brands like Manfrotto and Avenger for their durability. I rely on a digital torque wrench to tighten locks uniformly, preventing wear and ensuring maximum safety. Reading industry-proven guides such as this resource has expanded my understanding of support mechanics. These tools and insights elevate my confidence and keep my gear working flawlessly, no matter the environment.
Your Next Step Toward Confidence in Support Stability
Now is the perfect time to assess your setup routines and invest in quality gear. Remember, a well-maintained, properly assembled camera support setup isn’t just safer—it allows you to focus entirely on your creative vision without nagging worries about gear failure. Take small steps today: inspect, organize, and refine your setup process. Your future shoots will thank you, and your reputation as a reliable professional will be solidified.
What support challenge have you recently faced, and how did you solve it? Share your story below, and let’s learn together!