It was a gusty afternoon, and I was setting up for a crucial outdoor shoot. As I extended my light stand, a sudden, fierce wind caught me off guard. My heart sank as I watched it wobble uncontrollably, threatening to topple over my expensive equipment. That moment was a wake-up call—stabilizing light stands against high winds isn’t just a matter of convenience; it’s a necessity for professional results and safeguarding your gear.
Why High Winds Are the Biggest Threat to Your Lighting Setup
Anyone who shoots outdoors knows the chaos that unpredictable weather can bring. High winds can turn what seems like a stable setup into a disaster in seconds. I’ve seen lights tip over, cords yank loose, and even equipment get damaged—all because of a sudden gust. According to a recent report by National Park Service, wind-related incidents are responsible for a significant portion of outdoor gear damage each year. Recognizing this threat is the first step towards prevention.
Have You Ever Faced a Windy Set That Turned Sour?
If you’ve ever experienced a wobbling, unstable light stand during a shoot, you’re not alone. Early in my career, I made the mistake of ignoring basic stabilization techniques, which led to unnecessary setbacks. Trust me—proper stabilization isn’t just for the pros; it’s something every serious outdoor shooter must master. Today, I’ll share four insider tricks I’ve perfected over the years to keep your light stands firmly planted, even when Mother Nature isn’t on your side.
Ready to elevate your outdoor lighting game? Let’s dive into these proven techniques that will transform your shooting experience and keep your gear safe from the wind’s wrath. For more detailed gear recommendations, check out my comprehensive guide on light stand essentials.
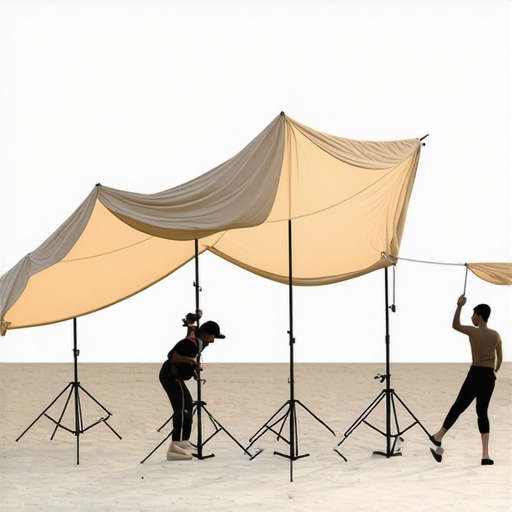
Secure Your Light Stands with Heavy-Duty Sandbags
The simplest and most effective step is to anchor your light stands with high-quality sandbags. Fill sturdy bags with sand or gravel, and hang them over the base to lower the center of gravity. During my first outdoor shoot in a gusty park, I used two heavy sandbags to stabilize my stand. It prevented wobbling and ensured my lights stayed in place despite the wind. For best results, position the sandbags close to the base and avoid stacking them unevenly, which could cause tipping.
Utilize C-Stand Arms and Proper Weight Distribution
Leverage C-Stand Sandbaging
In tight spaces or when multiple lights are involved, C-stands are invaluable. To prevent tip-overs, always use sandbags on the C-stand’s legs, especially on the short or exposed side. When I set up a backlight in a windy alley, adding sandbags to my C-stand legs kept it stable against gusts. Proper weight distribution—placing sandbags low and on both sides of the stand—creates a balanced setup that resists high winds. Learn more about choosing the right C-stand for your needs.
Increase Friction with Non-Slip Devices
Attach non-slip pads or rubber mats beneath your stands’ base to enhance grip on slick surfaces. During a sandy outdoor event, my lightweight light stand kept slipping on the gravel, risking toppling over. Placing a rubber sheet under its base improved friction significantly. For uneven terrains, consider using traction pads designed for photography equipment, which prevent sliding and provide additional stability during strong gusts.
Implement Guy Wires or External Supports
For extremely windy conditions, secure your stand with guy wires—thin, durable cords tethered to nearby solid anchors. I once used thin steel cables attached to a nearby tree and the top of my stand, creating a triangulated support system. This drastically reduced movement and kept my lighting setup steady. When applying this method, ensure that the anchor points are stable and that the wires are taut but not overly tight to avoid exerting undue stress on your equipment.
Optimize Setup Position and Orientation
Position your stand so that the wind hits it from the least vulnerable angle—preferably with its back to the wind and the heavier side facing into it. During a shoot on an open field, I placed my stand with the wind at its rear, which minimized swaying. Additionally, positioning the stand close to natural barriers like walls or large objects can disrupt wind flow, offering extra protection. Remember, the less exposed the stand, the less likely it is to topple.
Adjust Tension and Lock Joints for Firmness
Ensure all adjustable joints and tension screws are tight—loose fittings are a recipe for instability. During my last outdoor shoot, I checked and tightened all joints before setup. If your stand or boom arm feels wobbly, consult detailed guides like this step-by-step tutorial. Properly tensioned joints contribute significantly to resisting wind-induced movement.
Many photographers and videographers believe that choosing the right support equipment is merely about selecting the heaviest or most expensive gear. However, this oversimplifies a complex set of nuances that can make or break your shoots. For instance, a common myth is that a larger C-stand always provides more stability. In reality, proper weight distribution and gripping techniques often outperform sheer size, as discussed in my guide on boom arm setup. Another misconception involves tripod robustness; many assume that thicker tripods are automatically more stable. But if the tripod’s center of gravity isn’t correctly managed, even the sturdiest model can wobble, especially during long exposures or when using telephoto lenses. An advanced mistake I see professionals make is neglecting the fine-tuning of tension screws on support stands, which can lead to dangerous collapses or camera shake. For example, over-tightening a light stand to compensate for wind can stress the joints, causing eventual failure. This is why mastering stand calibration, as detailed in tripod stability techniques, is crucial. When setting up camera rigs, many overlook the importance of cable management and support positioning, which can introduce subtle vibrations and reduce image sharpness. Advanced setups often include auxiliary supports or damping mechanisms, explained thoroughly in my custom rig guide. Additionally, light stands are frequently underestimated in their stability; using a lightweight stand outdoors and ignoring proper sandbag placement is a recipe for disaster. The key lies in understanding the balance point and deploying weighted support intelligently—details covered in lighting stand tips.
Now, here’s an interesting question for seasoned professionals: How does understanding the physics of support stands influence your setup choices for challenging environments? It’s not just about equipment but also about applying scientific principles to optimize safety and performance. Studies on structural stability, such as those highlighted by the engineering research, confirm that proper weight distribution and support tension are critical. Mastering these finer points can prevent mishaps and ensure your gear remains secure under adverse conditions.
Have you ever fallen into this trap? Let me know in the comments. The more you understand these nuances, the better your setups will perform under pressure, leading to professional results and safety for your valuable equipment.
Keeping Your Support Equipment Working Like New
Maintaining support gear like boom arms, camera rigs, C-stands, tripods, and light stands is essential for reliable performance each time you shoot. Even high-quality equipment wears over time due to frequent use and environmental stressors. I personally recommend establishing a regular inspection routine that includes checking for signs of wear, corrosion, or loose joints. Using a dedicated toolkit with socket wrenches, screwdrivers, and lubrication sprays ensures quick repairs and adjustments on the fly, reducing downtime. For example, regularly applying a light machine oil to tension screws on your boom arm can prevent squeaks and maintain stability, as detailed in this expert guide. Prediction-wise, this trend toward proactive maintenance will expand as more professionals adopt remote diagnostics and smart sensors for real-time gear health monitoring.
How do I maintain my gear over time?
Implement a systematic cleaning schedule after each shoot, removing dust, sand, and moisture that can cause corrosion or grit buildup. Check all locking mechanisms and tighten any loose screws, especially on support joints or the connection points of camera rigs. For support stands and tripods, regularly inspect leg locks and replace worn-out rubber feet or grip pads. Keeping your gear lubricated with appropriate grease or oil prevents stiffness and reduces wear, ensuring smooth operation. For long-term durability, store your equipment in a climate-controlled environment, away from extreme humidity or temperature fluctuations. This approach minimizes material fatigue and prevents failure at critical points, like the joints of a C-stand or the extension arms of a light stand. Additionally, investing in sturdy protective cases or padded wraps can shield your gear from bumps and environmental damage during transport.
When upgrading or scaling your support setup, consider tools like adjustable tension wrenches that fit your specific gear—this makes calibration easier and safer. Learning how to build a custom camera rig, for instance, can be a game-changer for tailored stability, as explained here. Regular maintenance not only extends the lifespan of your equipment but also ensures consistent, professional results shot after shot. So, pick one piece of support gear today—perhaps your light stand—and give it a thorough inspection, then try applying a lubricant to its joints. You’ll be surprised how much smoother and more reliable your setup becomes over time.
The Hardest Lesson I Learned About Support Gear in the Wind
Early on, I believed that selecting heavy-duty equipment alone would shield me from weather issues, but I soon discovered that technique and positioning matter just as much—if not more. A misjudged setup or overlooked support tweak can turn a gust into a topple, no matter how expensive your gear is.
Why Overconfidence Can Be Your Biggest Support Mistake
I once assumed that a sturdy tripod was sufficient for unpredictable outdoors, only to learn that neglecting proper weight distribution and surface friction was a recipe for disaster. Staying humble and checking every support element, from sandbags to surface grip, is vital for windy conditions.
How Rethinking Support Techniques Saved My Shots
By experimenting with external supports such as guy wires and low-center-of-gravity setups, I realized that combining multiple stabilization methods offers peace of mind. Each shoot presents a chance to refine these strategies—making your support system as resilient as your vision demands.
Curated Gear That Keeps You Steady
- Weighted Support Bases: I trust reinforced lighting stands with integrated counterweights because they streamline stability without extra setup time.
- High-Quality Sandbags: Durable, tightly woven bags filled with gravel or sand have become my go-to for quick stabilization on uneven terrain.
- Traction Pads: Rubberized non-slip mats ensure that stands stay put on slippery surfaces, critical for outdoor shoots.
- Support Tether Kits: External guy wire systems can be assembled quickly, offering extra security against sudden gusts, especially when working in exposed locations.
Believe in Your Setup and Embrace the Challenge
Windy conditions are an unavoidable part of outdoor filming, but with the right mindset and support strategies, you can turn potential setbacks into opportunities for creative brilliance. Your support gear isn’t just equipment—it’s the foundation that allows your vision to thrive. Take that extra moment before each shoot to assess stability, innovate support methods, and trust your preparations. The more you invest in understanding and enhancing your setup, the more confidently you’ll respond to nature’s surprises. Are you ready to elevate your outdoor stability game and turn challenging environments into your creative playground? Share your experiences below and let’s grow stronger together.
This article hits on some really practical tips that I haven’t always considered in my outdoor shoots. I recall one incident where a gust of wind almost toppled my lightweight stand, despite it being sturdy in calmer conditions. Since then, I’ve started using sandbags more consistently and have experimented with positioning my stands more strategically, like placing them near natural barriers when possible. I’m particularly interested in the option of guy wires, though — has anyone found easy-to-setup kits that don’t require a lot of extra gear? It seems like the support setup is just as important as the actual gear, especially in unpredictable environments. I’d love to hear other photographers’ favorite techniques or anchor solutions, especially for remote locations where you might not have access to traditional support options.