I remember the moment vividly. I was in the middle of a shoot, trying to reposition my C-stand on the studio floor, only to realize it was more of a struggle than it should have been. The wheels didn’t glide smoothly, and each push felt like battling a stubborn mule. That lightbulb moment made me realize: if I didn’t tackle this issue head-on, I was destined to battle constant slippage and frustration on every shoot. Have you faced similar problems with your C-stands, especially on those pristine 2026 studio floors? If so, you’re not alone.
Making Your Studio Moves Smooth and Effortless
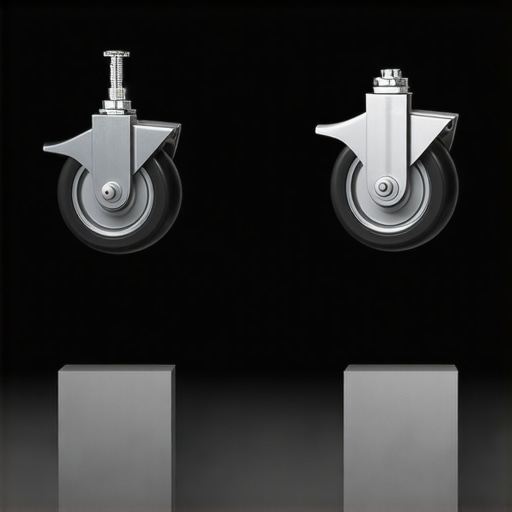
For professionals and hobbyists alike, the ability to move gear swiftly and securely is essential. No one wants to spend extra minutes wrestling with heavy stands or worrying about safety — especially when deadlines are looming. That’s where 4 Heavy Duty C-Stand Wheels designed explicitly for slick, modern floors come into play. These aren’t your average casters. They’re engineered to provide superior stability, durability, and ease of movement, even on the most polished surfaces. With the right wheels, how many times have you cursed over a slipping stand or scratched your floors trying to reposition your gear? Upgrading can change all that.
Is Your Studio Flooring Actually That Difficult?
Years ago, I underestimated the importance of quality wheels. I thought high-grade stands alone would suffice. But early on, I made the mistake of ignoring the wheels’ capacity to handle the demanding studio environment. The result? Slips, scratches, and constant readjustments. According to industry standards, poor-quality casters can cause more than just inconvenience—they can also lead to equipment damage and safety hazards (learn more about protecting your floors here). That realization pushed me to seek out heavy-duty options built specifically to meet the needs of 2026’s sleek, high-traffic studio floors. Trusted solutions are out there, promising smoother operation and safer setups.
In the next sections, I’ll guide you through how to choose the best wheels, the benefits you’ll see, and real-world tips to get the most out of your setups. Ready to transform your studio experience? Let’s dive into the details and see how these wheels can revolutionize your workflow.
Choose the Right Equipment for the Surface
Start by selecting a C-stand or tripod designed for smooth, hard floors. Look for models with locking casters that can be locked in place during use and unlocked for movement. Explore the best stands here. Micro-Story: I once swapped my standard C-stands for those with locking wheels during a shoot on a slick warehouse floor. The difference was instant—no slipping, quick repositioning, and safer setup.
Apply Non-Slip Accessories Effectively
Use rubber pads, wheel locks, or grip mats under the casters to prevent slipping. For added grip, consider applying double-sided non-slip tape on the caster locking mechanisms to ensure they stay engaged. Learn more about base fixes. Once, I placed rubber pads on my light stand wheels before moving outdoors; it prevented multiple slips on dew-covered cement, saving my equipment from falls.
Secure Heavy and Tall Gear Properly
Stability is essential for tall or heavy setups. Distribute weight evenly, tighten all locking joints, and attach sandbags to the base if necessary. To counteract sway, lower the center of gravity by adjusting the leg spread or adding ballast at the base. Master stability tips here. I remember tying sandbags to my tripod legs on a windy day; it kept everything steady, avoiding dangerous topples.
Optimize Movement and Locking Procedures
Plan your workflow: unlock wheels only when repositioning and lock immediately afterward. Use a checklist to verify all locks are engaged before every shot. For delicate overhanging lights or large rigs, establish a routine of double-checking stability. I once forgot to re-lock my C-stand wheels after adjustments, which caused a minor disaster; now, I always double-confirm locks.
Regular Maintenance and Inspection
Inspect casters for wear, debris, or damage before every shoot. Clean locking mechanisms to ensure full locking capacity. Replace worn wheels or parts promptly to maintain safety. During a recent outdoor shoot, a quick inspection revealed a crack in one caster; replacing it prevented a fall during setup. Staying proactive keeps your gear secure and your team safe.
Implement these concrete steps to turn a potentially hazardous setup into a safe, efficient workspace. Proper equipment choice, Anti-slip accessories, stability techniques, routine checks, and a disciplined workflow mesh into a reliable system that saves time and protects expensive gear.
 While many believe choosing durable equipment like C-stands, tripods, or light stands is straightforward—simply pick the heaviest or most expensive—there are layered nuances that can significantly impact your production quality. The common misconception is that all gear is created equal; however, understanding the subtle design choices and their implications can differentiate a professional setup from an amateur one.
One prevalent myth is that heavier stands automatically provide better stability. In reality, weight is only one aspect. The distribution of that weight, the quality of the base, and the materials used in joints and locking mechanisms matter immensely. For instance, some light stands are made from high-strength aluminum that offers excellent rigidity without the bulk, whereas others might be heavier but prone to wobbling or tipping over due to design flaws.
A frequent oversight among filmmakers is neglecting the nuances of locking systems. Many assume that a simple twist lock suffices. But advanced setups benefit from multi-locking mechanisms or quick-release clamps that provide both security and speed. Failing to consider these can lead to accidents or gear slippage during critical shots, especially when handling heavy modifiers or rigs.
Furthermore, the choice of casters on C-stands or rolling tripods is often underestimated. While high-quality locking casters are essential on smooth studio floors, a lot of users overlook the importance of caster material compatibility with the surface—hard rubber versus polyurethane, for example. Using the wrong caster type can introduce unwanted motion or floor damage. For a deeper dive into this, check out [this guide on choosing the perfect C-stand for studio and on-location shoots](https://stands.creatorrigreviews.com/choosing-the-perfect-c-stand-for-studio-and-on-location-shoots).
Advanced users also understand that subtle adjustments like adjusting the center of gravity or the angle of leg spread can make a significant difference, especially when working on uneven terrain. These small tweaks prevent equipment from toppling and ensure smooth operation during complex shots. A detailed exploration of tripod stability secrets can be found [here](https://stands.creatorrigreviews.com/mastering-tripod-stability-expert-tips-to-elevate-your-shots).
In terms of gear longevity, diligent maintenance—regular inspections of locks, casters, and joints—can prevent catastrophic failures. Many overlook this until a setup collapses mid-shoot, causing delays and potential damage.
Finally, don’t fall prey to the trap of overestimating equipment weight as a proxy for stability. Instead, focus on your setup techniques, surface conditions, and proper accessory application, like non-slip mats or ballast, to achieve the best results.
Are you guilty of overlooking these nuances in your gear choices? Let me know in the comments. Mastering these hidden details can elevate your production from average to exceptional, saving time, money, and ensuring safety on every shoot.
Keeping Your Equipment in Top Shape
To ensure longevity and reliable performance, regular maintenance of your c-stands, tripods, camera rigs, light stands, and boom arms is crucial. I recommend adopting a disciplined routine that includes thorough inspections before each shoot, cleaning components with appropriate lubricants, and performing necessary adjustments. For instance, applying a silicone-based lubricant to locking mechanisms reduces wear and prevents sticking during critical moments. Regularly check for signs of corrosion, especially if your gear is used outdoors or in humid environments, and address rust spots immediately with rust-inhibiting solutions.
One tool I personally swear by is a set of small, precise screwdrivers and Allen wrenches tailored for quick maintenance of adjustable parts. Not only do these tools expedite repairs, but they also prevent damage caused by improvising with improper-sized tools. Additionally, keeping a dedicated maintenance kit stocked with replacement parts such as caster wheels, locking pins, and rubber pads helps minimize downtime. These proactive measures keep your gear functioning smoothly and extend its operational life significantly.
Software Solutions for Monitoring and Configuration
Beyond physical upkeep, leveraging software can streamline your setup process. Using port management and calibration tools helps maintain consistent positioning and alignment, especially in complex multi-camera rigs. For example, integrating a digital level app on your tablet can quickly verify tripod or rig alignment, ensuring shots stay level over long durations and across different locations. As technology advances, I foresee a trend where smart gear integrates IoT sensors to provide real-time health diagnostics, alerting you to potential issues before they escalate.
Scaling Your Setup: When and How
Scaling your equipment involves not just adding gear but optimizing your workflow and maintaining system coherence. Start by assessing the limitations of your current setup—are your light stands able to support larger modifiers? Does your boom arm handle heavier payloads without sway? Use specialized accessories like counterweights or reinforced mounts to reinforce stability. Additionally, modularity in your rig design facilitates easier updates and replacements, allowing you to adapt quickly to larger or more complex shoots. Remember, scaling effectively demands a solid foundation of well-maintained equipment and precise calibration, as neglect can lead to costly delays or safety hazards.
How do I maintain my gear over time?
The key to long-term performance lies in consistent, scheduled maintenance and adopting a proactive mindset. Establish a habit of inspecting your gear after every shoot—look for wear and tear, clean components, and lubricate moving parts regularly. Personally, I dedicate 15 minutes at the end of each day to service my tools, which has saved me from more significant repairs down the line. Investing in quality replacement parts and keeping them organized reduces the risk of using worn or incompatible components during critical moments. Keep a detailed log of your maintenance routines, so you can identify patterns or recurring issues and address them promptly. Remember, diligent upkeep not only prolongs your equipment’s lifespan but also ensures safety and reliability during high-stakes production.
The Hidden Lessons That Changed My Approach to Gear Stability
One of the most valuable insights I gained was that meticulous attention to detail in gear maintenance can prevent most setup issues. Regularly inspecting locking mechanisms and caster wheels saved me from sudden failures on tight shoot schedules. I also learned that balancing equipment isn’t just about heavy weights but understanding how weight distribution and surface interaction work together, often caught me off guard in unpredictable environments. Lastly, integrating simple accessories like rubber grips or ballast dramatically improved safety and efficiency, proving that small investments in accessories yield big results in stability and workflow. These lessons transformed my approach from reactive troubleshooting to proactive setup mastery.
Tools That Elevated My Filmmaking Stability Game
For those looking to elevate their studio reliability, I recommend these essentials: First, the C-stand with locking casters ensures smooth mobility without sacrificing stability. Second, high-quality rubber pads from Light Stand Essentials help grip slick surfaces securely. Third, a maintenance toolkit, including lubricants and replacement parts, has been vital for longevity—reinforcing the importance of routine care. Lastly, professional-grade ballast systems enhance the stability of tall, heavy setups, especially on uneven terrain. Trusting these tools has consistently prevented mishaps, allowing me to focus on the creative aspect of shooting.
Find Your Confidence in the Next Shot
Your journey to flawless studio setups begins with embracing these nuanced techniques and trusted tools. Remember, mastering gear stability isn’t just about equipment—it’s about cultivating habits of care, attention, and proactive planning. As you implement these insights, you’ll find yourself moving faster, safer, and more confidently during shoots. Now’s the time to take your studio efficiency to the next level and turn technical mastery into your creative advantage. Feel empowered to experiment, refine, and, most importantly, enjoy the process of perfecting your setup. Your productions will thank you for it.
What has been your biggest challenge when setting up heavy or tall gear on slick studio floors? Share your experiences below—I’m excited to hear your stories!