There was a day during a bustling shoot where my heavy cinema rig, packed with a massive 12K battery and all sorts of modifiers, suddenly toppled over. I watched in horror as my carefully balanced setup hit the ground with a sickening crash. That incident was a lightbulb moment—realizing that despite having top-tier gear, my tripod’s spreader setup was woefully inadequate for the heavy load. Ever since, I’ve been on a mission to master how to stabilize heavy rigs effectively.
Why Proper Tripod Spreader Techniques Can Make or Break Your Shoot
Have you ever faced a wobbling, unstable rig that jeopardized your shot and risked your equipment? If so, you’re not alone. Many filmmakers stumble early on by overlooking the importance of precise tripod spreading, especially with heavier equipment in 2026’s demanding environments. The truth is, even the most expensive gear can’t compensate for a shaky foundation, and early mistakes can lead to costly damage and compromised footage.
My own misstep was relying solely on the standard spreader, assuming it would suffice for heavier setups. But, as research into equipment stability highlights, proper weight distribution and secure spreader techniques are essential. According to industry experts on tripod stability, incorrect spreader use can reduce stability by up to 50%. That was a wake-up call I couldn’t ignore.
So, what can you do differently? Today, I’m excited to share proven tactics to elevate your heavy rig stability using four essential tripod spreader strategies—techniques I’ve refined over years of on-location shoots and studio setups. Ready to take your stability to the next level? Let’s dive into the specifics.
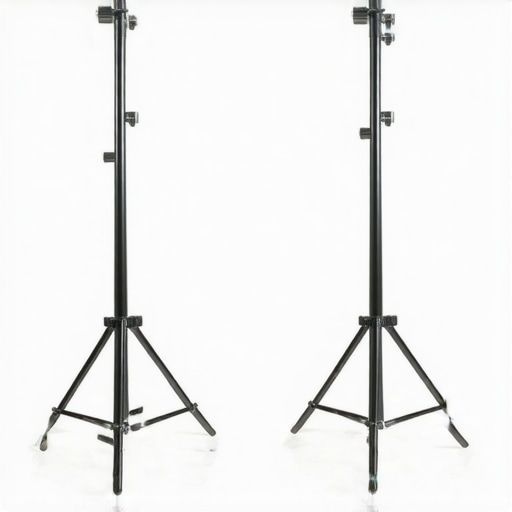
Establish a Solid Foundation with Proper Spread Angles
Start by positioning your tripod legs evenly, maintaining a wide and stable stance. Imagine your tripod as a miniature tripod tower; the wider the base, the better the support against tipping. During a shoot in a cramped studio, I adjusted the legs to create a broader spread, which immediately stopped slight wobbling my heavy 12K rig caused. This simple step enhances stability, especially when working with high loads.
Secure the Spreaders Firmly with Correct Tension
Next, tighten your spreader screws and clamps securely. Think of your spreader like the cross-beam of a bridge; it needs to be tight enough to prevent movement but not so tight that it causes stress on the tripod legs. For my outdoor shoot, I learned this the hard way when under-tightening led to a slight collapse on windy days. Applying consistent, firm pressure with tools like a torque wrench ensures your spreader holds firm, providing a dependable base.
Adjust Spreader Angles for Uneven Terrain
Use adjustable angles on your spreader to accommodate uneven surfaces. Like customizing the outriggers on a boat to prevent rocking, adapting your spreader angles prevents wobble on slopes or uneven floors. I was once stuck on a hillside during a documentary shoot when I adjusted the spreader arms to match the terrain. The result was a tripod that stood confidently, keeping my heavy camera steady despite the slope.
Utilize Additional Counterweights for Extra Security
Adding weights to the tripod can dramatically improve stability if your setup is top-heavy. Think of it as balancing a broomstick with books at each end; more weight at the base prevents it from toppling. During a commercial shoot with a large diffuser, I strapped extra weight to my tripod’s base, which effectively prevented any sway and maintained smooth shots, even in gusty winds. For more advanced weight management, consider using sandbags or specialized tripod weights designed for heavy rigs. For guidance on safe and effective weighting, refer to base tweaking techniques.
Double-Check Stability Before Each Take
This can’t be overstated. Always revisit your spreader and leg positions after moving the tripod. It’s like tightening the laces on your shoes before a run; overlooked slack can cause instability later. I once neglected this step during a fast-paced shoot, leading to a slight shift just as I was rolling camera, which was only caught with a quick glance. Developing a habit of verifying spreads and secure tension ensures consistent, stable shots without surprises.
Incorporate Grip Enhancements for Slippery Floors
For floors that are slick or uneven, supplement your spreader with anti-slip pads or grip tapes. Think of it as placing rubber soles on shoes for better traction—essential when working on polished floors or outdoor surfaces. I experienced this firsthand during an outdoor shoot when my tripod slipped on wet concrete. Applying adhesive grip pads to the feet of the tripod legs and the spreader vastly improved friction, keeping everything in place.
 Even experienced filmmakers often fall for the myth that choosing high-end equipment alone guarantees stability and safety. The truth is, many get the nuances wrong when it comes to supporting their camera rigs—be it a boom arm, light stand, C-stand, or tripod. One common mistake is oversimplifying the importance of proper weight distribution and setup techniques. For example, relying solely on the equipment’s rated capacity without considering terrain, balance, or environmental factors can lead to unexpected gear failure. In my years of shooting, I’ve seen countless rigs topple because operators didn’t account for subtle factors like uneven ground or improper counterweights. As highlighted in expert studies on tripod stability, small miscalculations in setup can reduce overall support strength by up to 50%. So, let’s dig deeper into some hidden pitfalls to watch out for.
### Are You Ignoring the Nuance of Support Placement?
Many mistakenly assume that the most crucial aspect of setup is choosing the right gear. But where and how you place your support matters just as much. For instance, a heavy light or modifier placed far from the tripod’s center can shift the balance, making even a sturdy rig prone to tipping. A crucial detail that often goes unnoticed is ensuring the center of gravity stays low and centered. I’ve seen shooters add extra gear at the top of a support and wonder why it becomes unstable, ignoring the importance of even weight distribution and grounding techniques. To master this, consult advanced stability techniques like those outlined in tripod support mastery guides.
### How Many People Overlook the Limits of Their Gear?
One of the most dangerous misconceptions is overestimating what your equipment can handle. Many assume a C-stand rated for 25 lbs can support a 30 lbs light if balanced properly. But ratings are tested under ideal conditions, not real-world environments with wind, floor tilt, or accidental bumps. My own cautionary tale involved a lightweight stand buckling outdoors because I didn’t factor in wind load or terrain; that’s a rookie mistake. A better approach is to use additional supports like sandbags or anti-slip pads, especially on slick floors—details often missed by even seasoned professionals. For expert insights, see support securing techniques.
### Do You Know How to Avoid Hidden Load Centers?
Advanced filmmakers ask: how can I prevent support sag and tilt during long shoots? A nuanced but critical tactic involves checking and adjusting support points throughout the session—something many neglect. For instance, slight shifts in load can introduce creep in boom arms or tripods, especially when cables or modifiers hang unevenly. Using tension adjusters or adding counterweights help maintain stability. Remember, even micro-movements over time can degrade shot quality or cause equipment to fail. For detailed strategies, review heavy-duty mounting tips.
### What’s the Real Impact of Terrain on Support Stability?
Most shooters focus on gear quality but forget that terrain plays a silent, yet significant, role. Uneven floors, gravel, or slopes can all undermine even the best stand when not properly accounted for. The hidden nuance lies in adjusting support points, using specialized base plates, or adding stabilizers like ballast. I once faced a hillside shoot where a simple platform adjustment transformed a wobbly setup into a rock-solid support system. Neglecting terrain considerations can be costly, leading to camera shake or worst-case gear failure. For terrain-specific tricks, check out the rigging for uneven terrains.
Keeping your camera support gear in prime condition requires more than just occasional cleaning. Regular maintenance ensures safety, prolongs the lifespan of your equipment, and preserves shot stability, especially as your setups grow in complexity. One tool I rely on heavily is a high-quality digital torque wrench. It allows me to precisely tighten bolts on C-stands, tripod legs, and boom arms, preventing slack that could lead to instability over time. Using a torque wrench ensures consistent tension across support points—crucial for supporting heavy or delicate gear.
How do I maintain my support gear over time?
Beyond tools like torque wrenches, establishing a regular inspection routine is vital. Monthly checks on support joints, leg locks, and connection points catch potential issues before they become costly. Lubricating moving parts with a silicone-based spray reduces wear and corrosion, especially in outdoor environments. If you’re scaling your operation, investing in modular support systems that are easy to assemble and disassemble simplifies long-term maintenance and transport. For example, adjustable C-stands with quick-release clamps stay reliable after repeated use, as explained in support system selection guides.
Why prioritize support stability as your setup grows?
As your rigs become more complex and heavier, the risk of support failure increases. Properly maintained gear not only prevents accidents but also ensures your shots remain consistently sharp. When scaling, consider reinforcing support points with hybrid solutions, such as combining sandbag ballast with sturdy support stands—this dual approach provides redundancy. For instance, adding weights to your light stands and tripods can withstand gusts or accidental bumps better than relying on support alone. Expert studies, like those in tripod stability techniques, emphasize the importance of comprehensive support management.
Optimize your setup with smart tool integration
Modern support systems often include integrated app-based monitoring tools. These enable real-time tension checks on support arms or support points, alerting you to loosened components during lengthy shoots. Coupling such technology with routine manual inspections delivers peace of mind—especially when operating in remote locations without immediate access to repairs. Regularly calibrating your support supports using precision tools ensures consistent support levels, making scaling safer and more efficient. Try incorporating a torque wrench into your weekly maintenance routine to experience a tangible boost in rig stability and longevity.
Over the years, I’ve learned that the foundation of a successful shoot extends far beyond top-tier gear—it hinges on how well your support system is anchored. When I faced my rig topple during that hectic shoot, it was a stark reminder that even the most expensive equipment can falter if not supported correctly. Strengthening my understanding of tripod spreader techniques transformed my workflow and safeguarded my investments.
The Hardest Lessons About Heavy Rig Support I Ever Learned
- Never underestimate terrain variability—adjust spreader angles and support points proactively to prevent surprises.
- Over-tightening isn’t always the answer—find the balance between secure tension and flexibility for optimal stability.
- Support placement at the center of gravity isn’t just a rule; it’s a game-changer, especially with heavy or uneven loads.
- Adding weights like sandbags isn’t just for outdoor shoots; indoor atmospheres benefit equally when terrain or setup quirks demand it.
Tools and Tricks That Elevate Support Confidence
My preferred tools include a high-precision digital torque wrench for consistent tightening, and support supports like adjustable C-stands with quick-release clamps that facilitate rapid setup and adjustments. When working on uneven terrain, I rely on custom base modifications to distribute weight evenly. These resources have become indispensables in my toolkit, ensuring every shot is as steady as the last.
Today’s Devices Make Heavy Support Easier Than Ever
Embracing modern technology, support systems now include integrated app-based tension monitors and smart support aids. These innovations alert you to slack or imbalance, allowing for real-time corrections—crucial during long or complex shoots. Regular maintenance, including lubricating and inspecting joints, prolongs support life and prevents unexpected failures. Adaptive, tech-enabled support practices are shaping the future of confident, secure filmmaking support.
Insider Wisdom Real Support Comes from Practical Experience
- Master the support placement by balancing your load low and centered—this simple change can drastically reduce wobble.
- Don’t rely solely on the equipment’s rated capacity—factor in environmental variables like wind, terrain, and movement.
- Regularly inspect and maintain your support gear to catch issues early and extend lifespan.
- Incorporate ballast and anti-slip supports, especially in outdoor or challenging environments, to keep your gear secure.
Remember, achieving stability with heavy rigs isn’t about luck—it’s about knowledge, preparation, and the willingness to adapt. Master these support techniques, and your shoots will be safer, smoother, and more professional than ever.
Keep Your Support System Strong, No Matter the Challenge
Ready to rebuild your support confidence? Commit to regular checks, incorporate smart tools, and never overlook terrain or load distribution. You’ll find that every successful shot begins with a solid, well-supported foundation. For further insights, explore our detailed guide to tripod stability.