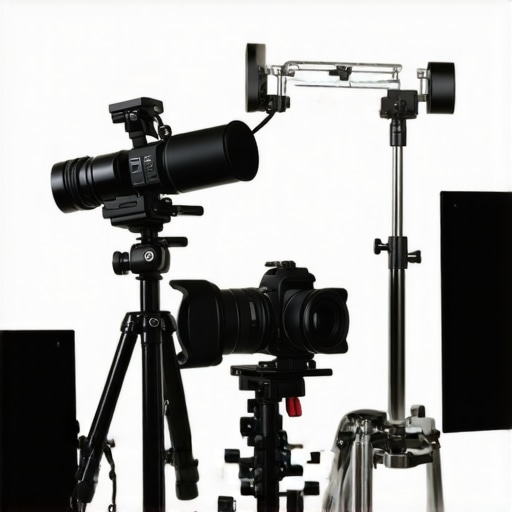
Ever found yourself on set, struggling to secure that perfect shot, only to have your C stand wobble ominously or your tripod wobble just a little too much? I remember the moment I realized that shaky support gear was not just a minor annoyance but a true barrier to professional-looking footage. It was a realization that cost me valuable time, patience, and the kind of confidence I needed to make every shot count. That lightbulb moment led me down the path of understanding how to properly set up and stabilize my support gear, especially C stands, tripods, and boom arms, for consistent, studio-quality results.
Why Your Support Gear Could Be Sabotaging Your Shots and How to Fix It
If you’ve ever felt frustrated because your camera or lighting setup kept moving or jittering during a take, you’re not alone. Support gear is the foundation of your entire shot. Poorly set up or unstable C stands, tripods, and boom arms can ruin even the most well-planned shoot. The good news? Once you understand the core principles of setup and stabilization, you can ensure rock-solid support every time. Today, I’ll share practical tips I’ve gathered from years in the field, along with insights from top industry experts, to help you elevate your filmmaking toolkit.
Is C Stand Stability Really That Critical for Professional Results?
Absolutely. Early on, I made the mistake of skipping detailed setup, trusting that just tightening a few knobs would do the trick. Spoiler: It doesn’t. Properly configured C stands and tripods don’t just prevent wobble—they safeguard your expensive gear and keep your shots clean. According to professional rigging experts, stability is the secret sauce behind consistently sharp footage, whether you’re working in a studio or on location. For comprehensive guidance, I recommend checking out this detailed guide on C stands and tripods to master your support setup.
Now, before we dive into step-by-step techniques, ask yourself: Have you ever set up your support gear only to find it wobbles or shifts mid-shot? If so, you’re in the right place. Let’s get your support system rock solid and ready for those flawless shots ahead.
Tighten and Stabilize All Knobs and Levers
Think of your C stand or tripod as a tall tree in a breeze—if the roots aren’t firm, it wobbles. Start by double-checking every locking mechanism. Grip each knob firmly and turn clockwise to ensure they lock tightly. I once shot a crucial scene, expecting perfection, only to realize my C stand’s wheels weren’t fully locked—resulting in a shaky shot that cost me hours of reshoots. Lock everything before mounting your gear, and don’t forget to inspect for worn or loose parts.
Position on Level, Stable Surfaces
A wobbly setup often begins with an uneven foundation. Place your tripod or C stand on a flat, firm surface. If you’re outdoors or on uneven ground, use leveling devices like a bubble level or adjustable feet. In a recent outdoor shoot, I found a slight tilt in the ground that caused my tripod to drift. Using a portable leveling compacted the terrain and stabilized the setup, leading to sharper footage. Always verify stability after positioning—your shot quality depends on it.
Use Sandbags or Heavy Weights Effectively
Support stands need extra weight to stay put, especially in windy environments. Fill your sandbags completely and position them close to the base, not on the legs’ tips. When I first started, I placed sandbags far from the stand’s center, which made it tip over during a gust. Closer positioning improves stability. Consider using heavy-duty support arms that can hold additional weight; reviewing https://stands.creatorrigreviews.com/ultimate-tripod-c-stand-boom-arm-guide-for-filmmakers-2024 provides insights into the best configurations.
Check Balance of Camera and Lights
Uneven weight distribution causes wobble. Mount heavier equipment (like large lights or cameras) closer to the support’s center axis. For example, I once attached a bulky lighting setup at the edge of my C stand’s arm, leading to imbalance. Shifting the light closer to the center made a noticeable difference. Use support arms to extend weight safely, and verify the center of gravity before shooting. Proper balancing reduces strain on the support as well as movement during filming.
Implement Anti-vibration Techniques
Small vibrations can ruin footage, especially with long lenses or macro shots. Use rubber pads or anti-vibration mounts between support and equipment. Recently, I added anti-vibration pads to my lighting stands, which significantly cut down jitter. For tripods, consider using isolation accessories or padding the legs. These simple steps preserve clarity, especially when recording in noisy or unstable environments.
Regularly Inspect and Maintain Equipment
Worn or damaged gear is a silent wobble source. Check for rust, loose screws, or cracked parts before every shoot. I once ignored a minor crack in my tripod leg, which worsened over time and caused instability. Implement a routine inspection, cleaning, and lubrication schedule, referencing https://stands.creatorrigreviews.com/essential-tripods-c-stands-for-stable-filming-in-2024 for equipment care tips. Maintaining your gear ensures dependable performance and reduces unexpected wobble.
Utilize Support Accessories for Extra Security
Accessories like stabilizing plates, tension hooks, or crossbars can enhance stability—especially in challenging setups. During a recent outdoor shoot, I employed tension straps across my tripod legs to counteract wind pressure. These small additions reinforced support and prevented movement. Explore accessory options at https://stands.creatorrigreviews.com/best-support-arms-c-stands-light-stands-for-stable-filming-in-2024 to elevate your support system’s reliability.
Test Before Commencing Recording
Finally, always give a thorough shake test. Gently nudge your setup to see if it moves. When I tested my camera rig after setup, I discovered an unexpected wobble that only became apparent during movement. Making quick adjustments—tightening screws or repositioning weights—ensured a stable shot. This proactive step saves time and prevents costly reshoots, making it an essential part of your setup routine.
Many filmmakers and photographers operate under the assumption that setting up a camera rig or support stand is straightforward—that tightening a few knobs and placing gear on a flat surface guarantees stability. However, this oversimplified view can lead to critical mistakes, especially when aiming for professional results. In my experience, one of the most persistent misconceptions is that heavier equipment always equals better stability. While weight provides some advantage, improper setup and overlooked nuances often have a bigger impact on shot quality.
For instance, some believe that positioning support stands directly on the ground ensures maximum stability. But in reality, uneven surfaces or soft terrains can compromise support integrity. Using leveling plates or tripod feet with adjustable heights can mitigate this issue—an advanced tip I often recommend to seasoned professionals. Moreover, many neglect the importance of proper weight distribution and center of gravity management, which are vital for preventing wobble during dynamic shots. This nuance becomes even more critical when working with customized rigs or unconventional camera setups, where imbalance can be invisible until you experience jitter during recording. For insights on building a reliable rig that maintains balance, feel free to check out this guide on custom camera rig setup.
Am I Really Using the Correct Clamp and Joint for My Equipment?
Another common pitfall involves underestimating the significance of compatible clamps, joints, and support accessories. Using generic or low-quality connectors might seem cost-effective at first, but these components can wear out quickly or fail under stress, leading to sudden collapses or shifts. This is especially problematic when supporting heavy lighting or camera rigs that demand tight, secure fixtures. Industry experts emphasize the importance of choosing high-grade, purpose-built hardware to avoid accidents and ensure consistent safety. For example, a professional-grade C-stand with heavy-duty knuckles and pins can handle complex configurations reliably. Never overlook the value of proper mating parts—your gear, footage quality, and safety depend on it.
Beware the trap of assuming that all support accessories are interchangeable; in reality, mismatched parts can increase wear and lead to unpredictable movement. It’s worth investing in quality components that are compatible with your specific setup. When in doubt, consult with expert sources or manufacturer specifications. This way, you prevent the costly mistake of equipment failure during crucial shoots.
Finally, considering support gear’s role in advanced scenarios, such as multi-camera setups or macro photography, can unlock the full potential of your rig. For deeper insights into optimizing your camera support system, explore this comprehensive guide. Remember, attention to these nuanced details distinguishes amateur work from professional storytelling. Have you ever fallen into this trap? Let me know in the comments.
Investing in quality support gear like C stands, tripods, and boom arms is just the beginning; keeping them in top condition ensures longevity and optimal performance. Regular maintenance can prevent unexpected failures and save you money in the long run. One of my favorite tools for monitoring and maintaining my support equipment is the Essential Tripods and C-stands maintenance kit. This kit includes lubrication sprays, cleaning cloths, and replacement parts tailored for professional gear, making routine upkeep straightforward and effective. Additionally, applying anti-corrosion sprays on metal joints and locking mechanisms can drastically extend the lifespan of your equipment, especially if you work in humid or coastal environments. To further ensure consistency, I schedule monthly inspections using a checklist that covers stability, wear and tear, and proper lubrication, referencing the expert guidelines found here. Staying proactive with these small steps prevents minor issues from evolving into costly repairs or compromises in shot stability. As support gear continues to evolve, I predict a trend toward smart, sensor-equipped stands that can alert you when maintenance is needed, much like automotive warning systems. Embracing such innovations could become standard in professional setups within the next few years. How do I maintain my support gear over time? I dedicate time each month to inspect, clean, and lubricate my stands, ensuring all locking mechanisms and joints operate smoothly. Using tools like a high-grade adjustable wrench helps tighten loose parts without damaging the finish or threads, and carrying a portable toolkit helps address on-set emergencies quickly. For example, I keep a small silicone spray bottle handy to lubricate moving joints promptly if I notice any stiffness or squeaking. I also recommend periodically reviewing your equipment’s load capacity and realigning support arms for balanced weight distribution—an overlooked detail that can reduce stress on joints and prevent wobbling. To prevent damage from environmental factors, I store my stands in a climate-controlled space and always wipe down surfaces after outdoor shoots. One advanced tip I recently adopted involves using a motion-activated camera to monitor support stands during long shoots, ensuring stability remains consistent and allowing for immediate adjustments if shifts occur. For that, check out the ultimate boom arm setup guide. Try implementing a scheduled maintenance routine coupled with these tools and tips, and you’ll notice fewer surprises and longer-lasting equipment. Regular upkeep isn’t just about preventing failures—it’s about enhancing your confidence and ensuring every shot looks polished, shot after shot.
The Hardest Lesson I Learned About camera rig,c stand,light stand,tripod,boom arm
One of the most impactful lessons was realizing that even the smallest wobble could compromise an entire shoot. I once spent hours setting up a complex scene, only to find that a slight misalignment in my C stand caused jittery footage. That moment taught me that meticulous setup and double-checking every part are non-negotiable for professional results.
3 Myths About camera rig,c stand,light stand,tripod,boom arm That Held Me Back
First, I believed that heavier gear always meant better stability—wrong. Second, I thought tightening knobs once was enough; ongoing inspection is key. Third, I underestimated the importance of proper weight distribution; placing heavy lights far from the center caused unnecessary wobble. Challenging these myths transformed my approach and improved my shoot quality dramatically.
What Experts Won’t Tell You About camera rig,c stand,light stand,tripod,boom arm
Many seasoned professionals don’t emphasize enough that regular maintenance extends your gear’s lifespan and maintains stability. Small details, like lubricating joints and inspecting for worn parts, prevent unexpected failures. Incorporating professional maintenance routines is a game-changer—those tiny efforts preserve your setup and ensure consistent, studio-quality footage every time.
My Essential Toolkit for camera rig,c stand,light stand,tripod,boom arm
I trust high-quality support accessories like durable clamps, leveling devices, and support arms. These tools, often overlooked, make a significant difference in on-site stability. I recommend checking out the comprehensive guide on C stands and tripods—it’s become my go-to resource for reliable gear choices that stand up under tough conditions.
Keep Moving Forward: Elevate Your Support Game
Investing in quality support gear and maintaining it diligently reshapes your filmmaking journey. Remember, stability isn’t just about equipment—it’s about your confidence and the clarity of every shot you capture. Don’t settle for shaky footage—embrace these lessons, refine your setup, and watch your storytelling elevate to new heights. What’s your biggest challenge when stabilizing support gear? Share below and let’s learn together!