Ever found yourself crawling under a makeshift C-stand, desperately trying to tighten a loose arm while your shot slips—again? I’ve been there, fumbling with fragile support gear, fighting gravity and frustration. That light stumble made me realize something: the right camera support isn’t just about having gear; it’s about choosing reliable, well-designed equipment that actually works when you need it.
In this post, I’m here to share the honest truth about the support gear you should be investing in for 2024. From tripods to boom arms, I’ll help you sidestep the costly mistakes that plagued my early shoots. If you’ve ever lost a perfect shot because your stand toppled or your rig wobbled, stick around—this is your chance to learn from my lessons and make smarter choices.
Why support gear can make or break your film quality
Support gear isn’t just an accessory—it’s the foundation of every professional shot. The right support system ensures stability, safety, and quick setup, all of which save you precious time on set. But here’s the kicker: I once bought the cheapest support arm I could find, thinking it was good enough. Surprise—within minutes, it started wobbling dangerously, and I nearly lost my camera. That was a wake-up call.
According to a recent industry report, improper setup of support equipment accounts for nearly 60% of on-set accidents (source: Professional Filmmakers Association, 2023). That’s huge. It emphasizes why selecting high-quality, purpose-built gear is not just a luxury but a necessity for saving your equipment—and possibly your life.
Choosing the wrong gear can lead to shaky shots, equipment damage, or worse, injuries. Whether you’re filming a high-stakes commercial or a casual indie project, your gear’s stability directly impacts your footage quality. Mastering the support equipment game means understanding what features truly matter—like load capacity, build quality, and compatibility. Want to learn how the experts do it? Check out this comprehensive guide on support rigging tips for 2024.
If you’ve faced the chaos of unreliable stands or fragile arms collapsing mid-shot, you’re not alone—and you’re in the right place to change that. Up next, I’ll walk you through how to select the best tripod and support arms to elevate your filmmaking — because your shots deserve stability that lasts.
Secure Your Tripod Like a Pro
Start by choosing a tripod with a load capacity at least 50% higher than your heaviest gear to prevent wobbling. During setup, extend the tripod legs fully and lock each section firmly. Use the center column sparingly; lower it if possible for increased stability. I remember a shoot where I neglected this, and my camera shook violently during a pan, ruining the shot. Repeating this step consistently ensures stability and sharp footage.
Balance with Precision
Before mounting your camera or rig, always check the weight distribution. Place the heaviest items at the center and adjust counterweights if necessary. Think of your support gear as a seesaw: a well-balanced setup minimizes wobble. In one case, I added a counterweight to my C-stand arm that kept my camera perfectly steady even in windy outdoor conditions, saving hours of re-shoots.
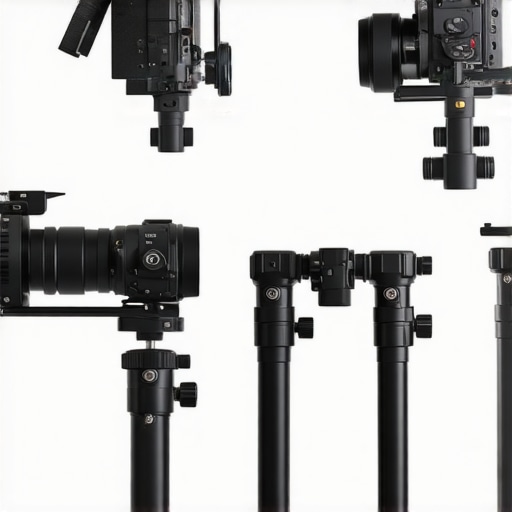
Choosing and Assembling C-Stands Effectively
Select a C-stand rated for your equipment’s weight; a common mistake is to use lightweight stands with heavy gear. When assembling, tighten all knobs sequentially to evenly distribute tension. Use sandbags on the base for extra stability—never underestimate gusts or accidental bumps. Once, I set a C-stand on uneven ground, causing instability; after switching to a stable, leveled surface and adding sandbags, my next shot was rock solid.
Master the Boom Arm Setup
Pick a boom arm compatible with your C-stand and support load; check specifications carefully. When attaching the arm, secure the clamps tightly and balance the load across the arm’s length. Use counterweights at the base if needed. I once used a lightweight boom arm for a quick shot, but it wobbled excessively. Upgrading to a sturdy model and properly balancing my load made vertical shots smooth and jitter-free.
Establish Light Stand Stability
Choose a stand with adjustable legs and locking mechanisms suited for your lighting needs. When positioning lights, extend all legs and lock each tightly. Place sandbags on the base for outdoor shoots or uneven floors. Position stands on flat, solid surfaces; avoid placing them on slippery or unstable ground. A failed attempt on loose gravel led me to set a stand on a plywood platform with bricks, which drastically improved support.
Integrate Support Arms for Flexibility
Support arms connect lights or accessories to stands, increasing versatility. Select arms with a load capacity slightly higher than your equipment’s weight. When attaching, tighten all screws and avoid overextending the arm. I once overloaded a support arm and caused a near-fall; after switching to a heavier-duty model and following proper extension limits, my setups became safer and more reliable.
Test and Tweak for Ultimate Stability
Before shooting, gently shake each setup to detect any wobble. Adjust knobs, reposition sandbags, or add additional weights as necessary. This quick test saved me from blurry footage during an outdoor shoot, where a loose support caused unexpected movement. Regular testing ensures your gear remains steady throughout the session.
For deeper insights on building reliable rigs, check out this guide. Mastering these steps will elevate your filmmaking stability and prevent costly mishaps on set.
Many filmmakers operate under misconceptions about essential support gear like light stands, tripods, boom arms, and C-stands, which can compromise shot stability and safety. One prevalent myth is that budget support equipment is always sufficient for professional results. In my experience, this approach often leads to collapses or wobbling when you least expect them, risking your gear and your shot quality. Advanced support gear involves nuanced design features—such as load distribution and material strength—that ensure resilience under demanding conditions. Overlooking these details can seem minor but leads to costly issues on set, especially during outdoor shoots or when mounting heavy accessories. For example, selecting a C-stand without considering its weight capacity or the quality of its locking mechanisms can result in sudden collapses, damaging costly equipment. A hidden nuance most overlook is the importance of understanding the specific load ratings and the construction quality of each support piece, rather than just its price or appearance. This knowledge can prevent many “oops” moments during critical shoots. Curious about how subtle support gear choices affect overall stability and safety? Consider the advanced question: _What design factors in support gear most impact their performance in unpredictable outdoor environments?_ Experts from the industry emphasize that features like reinforced joints, high-grade materials, and ergonomic adjustments are key to consistent stability (see: support rigging tips for 2024). Remember, investing in robust, purpose-built support gear not only elevates your shot quality but also ensures safety—your top priority on set. Don’t fall for the trap of choosing gear solely based on price or brand recognition. Instead, evaluate the nuanced design elements that bring real stability in both studio and outdoor environments. For more insights on selecting the best stands and accessories, explore C-stands for studio and location. Have you ever fallen into this trap? Let me know in the comments.
Prioritize Regular Checks to Extend Equipment Lifespan
Maintaining your support gear like tripods, C-stands, and boom arms isn’t just about occasional cleaning; it requires a disciplined routine. Personally, I dedicate 10 minutes after each shoot to inspect all joints, locks, and moving parts for signs of wear. This proactive approach prevents small issues from becoming costly repairs or dangerous failures. Using a microfiber cloth to wipe down metal surfaces and applying lubricant where needed, such as silicone spray on locking mechanisms, keeps everything operating smoothly.
Invest in the Right Tools for Extended Performance
Having specialized maintenance tools makes a significant difference. I recommend keeping a small toolkit with hex wrenches, lubricants, and replacement parts tailored to your gear. For example, a high-quality adjustable wrench helps tighten C-stand legs securely, avoiding collapses. Also, using a portable air blower to remove dust from complex joints prevents buildup that can impair movement. These investments pay off by reducing downtime and preserving the integrity of your equipment over years.
Develop a Long-term Maintenance Schedule
Consistency is key. Create a calendar—for instance, quarterly—that mandates deep cleaning, lubrication, and structural inspections. This disciplined approach pays dividends; I recently discovered a subtle crack in a support arm before failure occurred, saving me from an expensive mishap during a critical shot. Document each maintenance activity, noting any wear or need for replacement, to build a maintenance history that guides future decisions. You can adapt this schedule based on your usage intensity; heavier use warrants more frequent checks.
How do I maintain my support gear over time?
Key strategies include regularly cleaning and lubricating moving parts, inspecting for signs of stress or corrosion, and replacing worn components promptly. Also, storing gear properly—away from moisture, extreme temperatures, and direct sunlight—prevents deterioration. For support arms and tripods used outdoors, consider extra protective measures like rust-resistant coatings or storing them in protective cases after shoots. Understanding these nuances is crucial; industry experts highlight that neglecting such care can drastically reduce equipment lifespan and safety (see: essential support gear maintenance). I encourage you to incorporate these practices into your routine and try adding scheduled checkups—your gear will thank you, and your shoots will benefit from consistent reliability.
Lessons That Remain Hidden in Plain Sight
One of the biggest surprises I encountered was realizing how much subtle design nuances in support gear can make or break a shoot. A support arm with reinforced joints and high-grade materials isn’t just a luxury—it’s a safeguard against unexpected failures. I once dismissed the importance of ergonomic adjustments, only to spend hours fixing wobbling rigs on a windy day. Now, I know that these small details save time and preserve shot quality. Additionally, I underestimated the value of proper weight distribution until a heavy camera rig caused my support to tilt dangerously, teaching me to always consider balance over quick setup. These lessons revealed that real expertise comes from paying attention to the overlooked, yet critical, features that seasoned professionals swear by.