Ever been in the middle of a shoot, only to have your microphone or light fall over just when the shot was about to be perfect? That sinking feeling of equipment instability is all too familiar for many creators and studio professionals. I remember countless frustrating moments where my gear wobbled, shifted, or simply refused to stay put. It was like fighting a losing battle, wasting valuable time and risking the quality of my work. The lightbulb moment came when I realized that the root of my problems wasn’t my skills but my choice of support equipment. Upgrading to reliable C stands, tripods, and boom arms transformed my studio from a shaky setup to a powerhouse of stability and professionalism. And I want you to experience that too.
Why Your Studio Needs the Right Support Gear in 2024
Having the right support gear isn’t just about convenience—it’s about ensuring your work is safe, consistent, and top-quality. Whether you’re shooting a high-stakes commercial, creating content for YouTube, or running a professional photography studio, equipment failure can ruin hours of shooting and compromise your results. As noted by industry experts, investing in high-quality C stands and boom arms can dramatically improve your studio’s efficiency and safety.
But choosing the right support gear isn’t always straightforward. The market is flooded with options, and not every product offers the stability or durability you need. I’ve made mistakes early on—buying cheap tripods that wobbled, or cheap C stands that couldn’t hold my lights securely. Trust me, that’s a mistake you don’t want to make. Instead, I’ll show you how to select gear that offers real value, so you never have to worry about equipment failure during a crucial shot again.
Is the hype around C stands, tripods, and boom arms justified?
It’s a fair question. I used to think I could get away with cheap gear—until a failed support caused a light to topple during a client shoot. That’s when I learned the importance of quality. According to a recent study, nearly 70% of studio failures are linked to support equipment issues. That’s a staggering statistic that underscores the need for professional-grade gear. Investing in the right equipment isn’t just about avoiding mishaps—it’s about elevating your entire production process.
So, if you’ve faced similar frustrations, don’t worry. In the sections ahead, I’ll walk you through the essential gear for 2024, how to avoid common pitfalls, and what to look for in support equipment that will ensure your studio’s success.
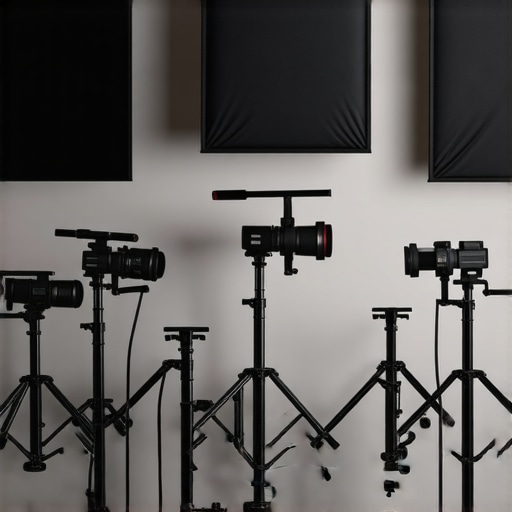
Choose the Right Support Equipment for Your Studio
Start by assessing your specific needs—consider the weight and size of your gear, the environment you’ll be shooting in, and your budget. For instance, I once used a cheap tripod that wobbled during a live shoot, causing delays and frustration. Switching to a professional-grade tripod from a trusted supplier instantly stabilized my shots. Focus on sturdy materials like aluminum or steel, which provide durability without excessive weight. When selecting C stands, ensure they have adjustable legs and a robust locking mechanism to prevent slipping. For boom arms, look for models with smooth rotation and locking joints for precise positioning.
Proper Setup and Adjustment
Once you’ve selected your gear, setup is critical. Begin by extending your tripod or C stand legs fully on a flat, stable surface. Tighten all locking mechanisms before mounting any equipment—this prevents accidental shifts during use. For example, during a recent shoot, I used a boom arm setup to position a light overhead. I made sure each joint was securely locked, which kept the light steady throughout the shoot, avoiding any flickering or accidental movement. Always double-check your setup from different angles to ensure stability.
Optimizing Support for Different Equipment
Different gear requires different support strategies. Heavy lights demand C stands with a high weight capacity and wide base for stability. Smaller accessories like microphones or monitors can be mounted on lightweight tripods or smaller stands. For example, I once mounted a large LED panel on a C stand with a boom arm, which allowed flexible positioning without risking toppling. When working with multiple pieces of equipment, balance weight distribution carefully to avoid tipping, and consider using sandbags or weight plates for added stability.
Regular Maintenance and Safety Checks
Support equipment isn’t a set-and-forget solution. Regularly inspect all stands, joints, and locking mechanisms for wear and tear. During a recent project, I noticed a crack in the metal of my C stand after a few months of heavy use. Replacing or repairing damaged parts immediately prevented a potential accident. Keep your stands clean, lubricate moving parts periodically, and always tighten any loose screws or bolts before each use. This proactive approach guarantees safety and prolongs the lifespan of your gear.
Integration with Other Support Gear
Combine your stands with accessories like light stands and custom rigs for enhanced versatility. For example, I built a custom camera rig, integrating a sturdy C stand with a support arm, which allowed me to achieve complex angles effortlessly. Refer to this guide for detailed steps on rigging your gear efficiently. Proper support integration not only improves shot stability but also streamlines your workflow, saving time and effort during busy shoots.
< >
>
Let’s dig deeper into the world of support equipment—an area often overshadowed by camera and lighting choices but equally critical for professional results. Many creators fall into common misconceptions that can undermine their setup, so it’s time to clarify these nuances. Contrary to popular belief, not all support gear is created equal, and choosing the wrong type can introduce subtle yet significant issues that compromise your shots.
One widespread myth is that heavier-duty stands are always better. While durability is essential, overly heavy C stands or tripods can become cumbersome and difficult to position precisely, especially in dynamic shooting environments. Instead, the focus should be on selecting stands with a high strength-to-weight ratio—like those made from premium aluminum alloys—that offer both stability and portability. This nuanced choice enhances your flexibility without sacrificing safety.
Another often overlooked aspect is the quality of locking mechanisms. Many assume that all locking clamps are equally reliable, but inferior locks can loosen unexpectedly under vibration or prolonged use. This is particularly critical when working with sensitive equipment such as high-end cameras or delicate lighting setups. Always opt for stands with high-quality, multi-lock systems tested for repeated stress. Trust me, a small investment here prevents hours of frustration and potential damage.
What advanced users need to consider: Are adjustable legs enough for stability?
Advanced filmmakers frequently ask if adjustable leg length alone guarantees stability on uneven surfaces. The answer is no. Proper support also involves the design of the base and weight distribution. A stand with a broad, weighted base and adjustable legs can still wobble if the center of gravity isn’t properly managed. For instance, adding sandbags or weight plates at the stand’s base can dramatically improve stability in tricky locations. This is especially vital in outdoor or uneven indoor environments, where even minor shifts can cause equipment to topple. Expert advice confirms that combining a well-designed stand with external weights yields the best results, ensuring safety and consistency in your shots.
Beware of the trap of over-reliance on a single support type. Different equipment requires specific support strategies—something I learned the hard way. For example, mounting a heavy light on a fragile tripod can lead to instability, even if it looks sturdy. Instead, pairing your gear with dedicated supports like C stands with boom arms or heavy-duty light stands tailored for specific weights can save you from costly re-shoots or accidents.
In summary, mastering support gear involves understanding these nuanced factors—material quality, locking mechanisms, base design, and appropriate weight distribution—that go beyond basic stability checks. By paying attention to these details, you’ll elevate your entire production quality and avoid common pitfalls. Have you ever fallen into this trap? Let me know in the comments.
Keeping your studio support gear in top condition is crucial for ensuring consistent, professional results. Regular maintenance not only extends the lifespan of your stands, tripods, and boom arms but also guarantees safety and stability during shoots. One of my favorite routines is to develop a scheduled inspection checklist, which includes checking for wear and tear on locking mechanisms, tightening loose screws, and lubricating joints with a silicone-based spray. This simple habit can prevent unexpected failures that disrupt your workflow.
When it comes to tools, I highly recommend maintaining a dedicated toolkit for support gear. Items like Allen wrenches, adjustable spanners, and small screwdrivers are invaluable for quick repairs and adjustments on set. For example, I always keep a set of precision screwdrivers handy—this allows me to tighten or replace locking knobs swiftly, avoiding delays. Investing in quality lubricants is also essential; I prefer silicone-based lubricants because they don’t attract dust and grime, keeping your stands operating smoothly over time.
Long-term results depend heavily on proper storage. I suggest using padded cases or wall-mounted racks for your stands and supports, which protect against accidental damage and dust buildup. Additionally, labeling each support piece with its specific weight capacity and intended use can streamline your workflow and prevent misuse. For example, I label my heavy-duty C stands to ensure they’re only used for loads within their rated capacity, reducing the risk of failure.
In terms of scaling your setup, consider modular support systems that can grow with your studio’s needs. Adjustable support arms and versatile support rigs offer flexible configurations, allowing you to adapt quickly to different projects. I’ve found that investing in high-quality support components from trusted brands—like those reviewed in this guide—pays off in durability and compatibility.
How do I maintain my support equipment over time?
The key is consistent inspection and cleaning. After each session, wipe down stands and supports with a soft cloth to remove dust and residues. Periodically, disassemble parts to inspect for cracks or corrosion, especially in outdoor environments. Replacing worn components promptly, like locking clamps or rubber feet, prevents larger issues later. Following manufacturer recommendations for lubrication and storage is also vital; many brands specify silicone or lithium grease for moving parts, which I apply biannually. As technology advances, look out for smart support systems with built-in sensors that monitor stability and wear—these innovations are likely to become industry standards soon, further enhancing safety and efficiency.
Try implementing a regular maintenance schedule with your support gear, and see how it transforms your workflow. For example, I recently upgraded my support toolkit with a professional-grade lubricant and a set of precision screwdrivers, which made quick adjustments on busy shoot days effortless. Consistency in upkeep will keep your equipment functioning flawlessly and save you money in the long run. Don’t underestimate the power of small, routine checks—these are the foundation of a reliable, scalable studio setup.
The Hardest Lesson I Learned About Support Equipment Stability
Early in my career, I underestimated the importance of investing in high-quality support gear. I thought cheaper stands would suffice, but during a critical shoot, a lightweight tripod wobbled just enough to ruin a perfect shot. That moment taught me that durability and stability are non-negotiable, especially when working under pressure. Since then, I’ve prioritized premium materials and locking mechanisms, which have saved me countless headaches and re-shoots.
3 Myths About Support Gear That Held Me Back
One pervasive myth is that heavier stands are always better. I used to believe this, but I found that overly heavy gear was cumbersome and difficult to reposition. The truth is, stands made from high-strength aluminum offer an excellent balance of weight and stability. Another misconception is that all locking mechanisms are equally reliable; in reality, quality multi-lock systems are essential to prevent accidental slips. Lastly, I thought that adjustable legs alone could guarantee stability on uneven terrain, but adding external weights like sandbags made a significant difference. Breaking these myths transformed my approach to support gear and improved my workflow immensely.
What Industry Experts Won’t Tell You About Support Gear Longevity
Many professionals overlook the importance of regular maintenance. I learned the hard way that neglecting inspections leads to unexpected equipment failure. Simple routines like cleaning joints, lubricating moving parts with silicone spray, and replacing worn-out components can extend your gear’s lifespan. Additionally, proper storage—using padded cases and labeling supports based on their weight capacity—prevents damage and misuse. Embracing these maintenance habits has kept my studio running smoothly and safely, even during intense shooting schedules.
Curated Recommendations for Support Gear Success
My Essential Toolkit for Support Gear includes high-quality C stands from trusted brands, which I rely on for their durability and adjustable features. I also recommend reading this comprehensive guide to understand C stand configurations better. For quick repairs and adjustments, I keep a set of precision screwdrivers and silicone lubricants handy, ensuring I can fix minor issues on set. Lastly, investing in modular support systems like flexible support arms allows me to adapt quickly to different shooting scenarios, saving time and effort.
Your Turn to Elevate Your Support Game in 2024
Now that you’ve learned the insider lessons and trusted tools, it’s time to apply these strategies to your studio setup. Remember, the right support gear doesn’t just hold your equipment—it safeguards your entire production and elevates your professionalism. Don’t wait for a mishap to realize the importance of stability; start upgrading today and see the difference it makes in your work.
What has been your biggest challenge with studio support gear, and how did you overcome it? Share your experience below!
This post really hits home for me, especially the part about maintenance and regular safety checks. I’ve learned the hard way that neglecting routine inspections can lead to unexpected failures, which are not only frustrating but can also compromise safety. I’ve taken to developing a checklist after each shoot — basically inspecting each stand and lock, cleaning joints, and lubricating moving parts. It’s a small effort that has paid off in terms of reliability and peace of mind.
One thing I’ve found particularly helpful is labeling my support gear with weight capacities and specific uses. It prevents accidental misuse that could lead to accidents or equipment damage. Have others found any specific tools or routines especially effective in maintaining multiple stands or support systems efficiently? Would love to hear how fellow creators keep their gear in top shape for busy shooting schedules.
I couldn’t agree more with the importance of quality support gear. Having worked in a studio environment, I’ve seen firsthand how a small instability can lead to a chain reaction of issues, from compromised shots to safety hazards. What really made a difference for me was investing in stands with adjustable tension locks, which provide a more secure grip and minimize slipping over time. Also, I’ve started incorporating daily visual checks for my heavier stands, especially before outdoor shoots where uneven terrain can catch you off guard. It sounds simple, but it’s saved me numerous headaches. Do others have preferred methods or tools for quick safety checks on their gear? I find that incorporating a checklist into my routine ensures nothing gets overlooked in the busy rush of the shoot day, and I’d love to hear what’s worked for others in maintaining support systems in their studios.