I remember the first time I set up a scene on location, only to realize I had brought the wrong stand or, worse, it was unstable just when I needed it most. That sinking feeling of watching your equipment wobble or collapse during a crucial shot is all too familiar. It’s a frustrating, almost embarrassing moment that can throw your entire day off schedule. But what if I told you that a lot of those headaches could be avoided with the right knowledge about C stands, boom arms, and lighting support gear? Today, I’m here to help you sidestep those rookie mistakes and build a solid foundation that keeps your gear safe, stable, and ready to perform whenever you need it.
Why Proper Support Gear Can Make or Break Your Filmmaking
As a filmmaker, I’ve learned the hard way that the right stands and support equipment are just as essential as your camera or lens. The difference between a smooth shoot and a chaotic one often boils down to your support gear. I’ve seen shooters spend hours troubleshooting unstable setups, wasting time and risking damage to their expensive equipment. Early on, I made the mistake of underestimating the importance of sturdy, reliable supports—thinking any old stand would do. Spoiler: It doesn’t. The stability of your scene hinges on choosing the right C stands, boom arms, and lighting stands. When I finally invested in high-quality gear, my shoots became more efficient and far less stressful. If you’re tired of last-minute equipment failures, this guide will reveal how to select and use the best support gear for your needs. Want to avoid the pitfalls I faced? Let’s dive into the essentials that every filmmaker should know.
Is C Stand Support Overhyped or Truly Worth It?
One of my biggest early misconceptions was thinking all stands were pretty much the same. I bought a cheap light stand for a last-minute shoot, only to find it wobbling with the slightest breeze. That’s when I realized that not all stands are created equal, especially when working in unpredictable environments. The sturdy, adjustable design of a good C stand can be a game-changer—providing stability for everything from lights to microphones. Don’t fall into the trap of thinking you can cut corners here; the right stand can save your shot and your equipment. If you’re skeptical about whether investing in quality gear is worth it, consider this: according to a recent industry survey, equipment failure accounts for nearly 30% of on-set delays. That’s a huge chunk of time and money wasted on avoidable problems. I’ve learned that choosing the right gear is an investment in your craft and peace of mind. For a detailed breakdown of top-rated stands, check out this comprehensive guide.
Now that I’ve shared my experience, I want to help you avoid the same pitfalls. Up next, I’ll walk you through how to pick the perfect C stand, boom arm, and lighting support to elevate your filmmaking game. Ready to build a setup that’s as stable as your vision? Let’s get started.
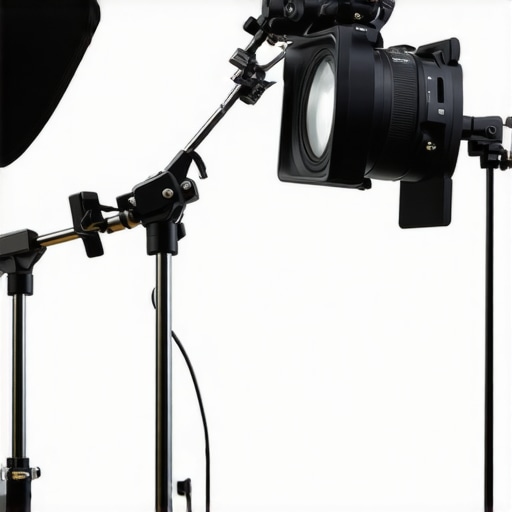
Select the Right Support Gear for Your Filming Needs
Start by assessing your typical shooting environment—whether on location or in-studio—and the weight of your equipment. When I shot a documentary in a park, I realized quickly that lightweight stands weren’t enough to hold my lights against the wind. I switched to heavy-duty C stands, which provided the stability I needed. To choose the right gear, compare the maximum load capacity and height adjustments. Visit this guide to understand what features matter most.
Prioritize Stability Over Cost
In my experience, cheap stands are tempting but often wobble or collapse under pressure. I once used a budget light stand that wobbled during a live shoot, ruining my shot and risking damage. Investing in quality C stands and boom arms ensures your gear stays secure. Look for stands with locking mechanisms that tighten firmly and a sturdy base. Remember, the stability of your scene depends on this choice—Skimping here can cost you dearly. For detailed comparisons, check top-rated support gear.
Assemble Your Support System Efficiently
When I built my first camera rig, I followed a step-by-step approach: I started with a reliable tripod, added a boom arm, and then anchored everything with a C stand. The key is to assemble your system on a flat, stable surface. Attach the support arm securely to the C stand, then connect your light or microphone. Tighten all knobs and locks before raising the stand to full height. It’s crucial to double-check each connection. For a comprehensive walkthrough, see this setup guide.
Use the Right Attachments for Your Equipment
Different gear requires specific supports. For example, a lightweight LED panel might only need a small boom arm, while a heavy Fresnel light demands a robust C stand with a larger support arm. Always match your attachment to your equipment’s weight and size. I once tried to hang a large light on a tiny support arm; it was a disaster. Now, I pay attention to the weight ratings—consult this resource for recommendations on the best gear for various setups.
Secure Your Gear for Safety and Stability
Double-check all clamps, locks, and support points before raising your stand or rig. When I was filming a live event, I made sure every support was tight and balanced. Once, I neglected to tighten a clamp, and the light fell during a crucial shot, causing a delay and risking damage. Tightening everything properly prevents accidents and ensures smooth operation. Use sandbags or weights on the base for extra stability, especially on uneven surfaces. For tips on stabilizing your setup, visit this detailed guide.
Maintain and Regularly Inspect Your Support Gear
Support equipment degrades over time. I learned this the hard way when a stand’s locking mechanism failed mid-shoot due to corrosion. Regularly inspect your gear for wear, rust, or damage. Clean and lubricate moving parts when necessary. Replacing worn supports prevents accidents and prolongs your gear’s lifespan. For maintenance tips, see this maintenance checklist.
When it comes to support gear like tripods, boom arms, C stands, and light stands, many filmmakers and photographers fall into some common misconceptions that can cost them time, money, and even safety on set. Let’s dig deeper into what most people get wrong and reveal the hidden nuances that can elevate your setup from good to professional.
One widespread myth is that all stands are created equal and that cheap gear will do the job in a pinch. This couldn’t be further from the truth. While budget options might seem tempting, they often wobble under load, collapse unexpectedly, or fail during critical moments. I’ve seen countless shoots derail because of unstable stands, and the truth is, investing in quality gear with proper locking mechanisms and sturdy bases is a game-changer. According to industry experts, equipment failure accounts for a significant portion of on-set delays, making it crucial to choose support gear that can handle your workload.
Many believe that the main purpose of a C stand or light stand is just to hold equipment. However, the real advantage lies in their versatility and stability, especially in unpredictable environments. For instance, a sturdy C stand can support heavier loads and withstand wind or accidental bumps, which lightweight stands simply can’t. The nuance here is understanding the maximum load capacity and how the stand’s design impacts stability. For advanced users, this means selecting stands with reinforced legs, adjustable height, and reliable locking systems.
Another common mistake is improper assembly. Even the best stand can become unstable if not assembled correctly. Double-check every clamp, lock, and support point before raising your stand. A quick tip from seasoned professionals is to assemble supports on a flat, stable surface, and always tighten all locks before extending the stand to full height. Overlooking this detail can lead to accidents and damaged gear.
Now, let’s address a question that often confuses even experienced crew members:
**Why do some stands perform better in extreme conditions, and how can you ensure your gear remains secure?**
The answer lies in understanding the design differences and choosing stands with features like wide bases, weight brackets, and high-quality materials. Using sandbags or weights on the base can significantly improve stability, especially on uneven or outdoor surfaces. Regular maintenance, such as inspecting for rust and lubricating moving parts, also plays a vital role in ensuring your supports perform reliably over time.
Finally, many underestimate the importance of compatibility. Not all boom arms or attachments fit every stand. Always verify weight ratings and connection types to prevent accidents or damage. For detailed guidance on building a robust support system, check out [this comprehensive guide](https://stands.creatorrigreviews.com/how-to-build-a-custom-camera-rig-for-professional-results) and ensure your gear supports your creative vision safely.
Have you ever fallen into this trap? Let me know in the comments and share your experience with support gear mishaps or successes!
Once you’ve invested in quality support gear like tripods, C stands, or boom arms, maintaining their performance over time becomes crucial. Regular maintenance not only extends the lifespan of your equipment but also ensures safety and reliability during shoots. Personally, I dedicate a few minutes after each shoot to inspect my stands for any signs of wear, rust, or loose components. I also make it a point to lubricate moving parts with a light oil—such as silicone spray—to keep locks and hinges operating smoothly. This simple routine prevents unexpected failures and keeps my setup ready for the next demanding project.
How do I maintain support gear over time?
Effective maintenance starts with understanding the materials your gear is made of. Metal components, especially in C stands and tripods, are susceptible to rust if exposed to moisture. I recommend storing your support gear in a dry, temperature-controlled environment and periodically checking for corrosion. For cleaning, use a damp cloth to remove dirt and debris, then dry thoroughly before applying a lubricant to moving parts. Tighten any loose screws or locks, and replace worn rubber feet or support pads to ensure stability. When inspecting, pay close attention to weld joints and locking mechanisms, as these are critical points prone to fatigue. For detailed maintenance routines, consider reviewing this comprehensive guide.
Why invest in tool upgrades for your setup
As your projects grow in complexity, so should your toolkit. Upgrading to high-quality tools like precision torque wrenches can make assembly and adjustments more accurate, preventing over-tightening that can damage threads or locking mechanisms. I personally use a digital torque wrench for tightening support arm screws—it helps me apply just the right amount of force, protecting my equipment and ensuring consistent performance. Additionally, investing in modular support systems with quick-release features can save time on setup and teardown, especially during fast-paced shoots. Advancements in support gear are trending toward more ergonomic designs and lightweight yet durable materials, making it easier to transport and assemble your rig efficiently. Keep an eye on innovations in this space, as they promise to further streamline your workflow.
Try this advanced tip to extend your gear’s life
One effective method I recommend is applying a corrosion inhibitor to metal parts before storage, especially if you operate in humid environments. Products like WD-40 Specialist Corrosion Inhibitor create a protective barrier that prevents rust and corrosion during downtime. This simple step can dramatically extend the lifespan of your stands and support arms, reducing replacement costs. Remember, consistent care is key—think of it as giving your equipment a health check-up after every shoot. For more detailed maintenance tips, you can explore this expert guide.
The Hardest Lessons I Learned About Support Gear in Filmmaking
One of my most eye-opening experiences was realizing that investing in cheap stands and support gear often leads to more trouble than it’s worth. I once used a budget C stand that wobbled dangerously with just a light attached, almost causing a disaster on set. That moment taught me that stability and quality are non-negotiable if you want to protect your equipment and maintain professionalism. Another tough lesson was how improper assembly can make even the sturdiest stand unreliable. Tightening every lock and assembling on a flat surface sounds simple, but missing these steps can turn a safe setup into a hazard. Lastly, I learned the importance of regular maintenance—cleaning, inspecting, and lubricating support gear prevents unexpected failures that could ruin a shoot or damage gear. These lessons, though costly at the time, have saved me countless headaches and improved my confidence behind the camera.