Ever had that heart-stopping moment when your camera rig wobbled just as you pressed record? I know I have. It’s like watching a building shake during an earthquake—disheartening and totally avoidable. I used to think that investing in a fancy camera was enough, but I quickly learned that the backbone of professional filmmaking lies in the gear that holds everything steady. That realization hit me during a shoot where my tripod kept slipping, ruining a perfectly good shot. It was a lightbulb moment: stability isn’t just about the equipment—it’s about choosing the right tools and knowing how to use them effectively.
Why a Solid Support System Changes Everything
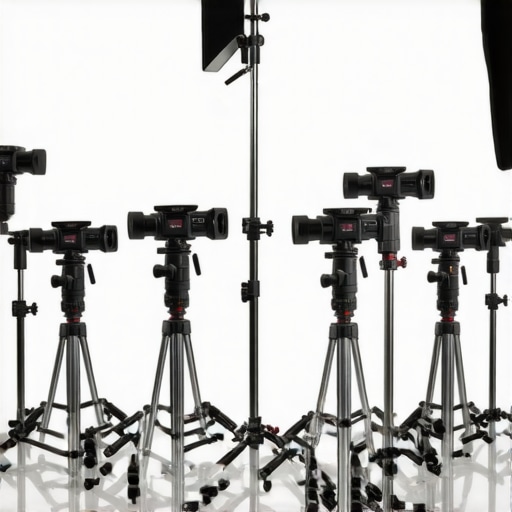
When I first started out, I underestimated the importance of quality support gear. I thought any tripod, boom arm, or C stand would do the job. Big mistake. A shaky setup can ruin even the best camera work, and trust me, post-production fixes only go so far. Proper support gear not only enhances image stability but also streamlines your workflow, saves time, and elevates your overall production quality. Whether you’re filming a documentary, music video, or a corporate project, the right stands and arms are your silent heroes, quietly holding everything in place while you focus on the shot itself.
Today, I’ll guide you through the essentials—helping you avoid the rookie mistakes I made early on and ensuring your gear works for you, not against you. From choosing the right tripod to understanding when a C stand is better than a boom arm, we’ll cover it all. If you’re tired of wasting time and footage due to unstable gear, stick around. This guide will help you build a support system that’s as reliable as your vision.
Is It Really Worth Spending More on Support Gear?
One of my biggest regrets was skimping on quality early in my career. I bought cheap stands just to save money, only to replace them later when they failed during critical moments. The truth is, investing in high-quality stands and support arms might seem like an extra expense, but it pays off in durability, safety, and peace of mind. According to industry experts, stable support gear can improve shot quality by up to 30%, which is a game-changer in professional filmmaking. Want to avoid my costly mistake? Let’s dive into how to pick the right gear for your needs.
If you’re ready to upgrade your setup, I recommend exploring our comprehensive guides on building a custom camera rig and light stand essentials. These will give you the foundation for a stable, efficient shoot. Now, let’s get into the practical steps so you can start making better, steadier shots today.
Choose the Right Tripod and Set It Up Properly
My first major mistake was using a cheap tripod that wobbled with the slightest touch. During a shoot for a local documentary, I decided to upgrade to a sturdy, professional-grade tripod. I started by ensuring the tripod’s legs were fully extended and locked securely on a flat surface. I also checked the bubble level to make sure the tripod was perfectly horizontal. Once set, I placed my camera on the quick-release plate and tightened everything firmly. A quick test shot revealed wobble-free footage, saving me hours of post-production stabilization. For detailed tips, see expert tripod stability tips.
Utilize Support Arms and C Stands Effectively
On a bustling set, I needed to position a light overhead without risking instability. I chose a C stand with a boom arm for its strength and flexibility. I adjusted the C stand’s legs to a wide stance for maximum stability, then attached the boom arm securely using the clamp. When mounting the light, I balanced it carefully to prevent tipping. I also used sandbags on the stand’s legs for added safety. This setup kept my lighting steady, even when I moved around. For more on selecting the right C stand, visit C stand selection guide.
Optimize Boom Arm and Support Placement
During a music video shoot, I needed a camera crane shot but lacked a dedicated crane. Instead, I used a heavy-duty boom arm attached to a sturdy C stand. I positioned the stand on an even surface, extended the boom arm, and secured it with the tightening knobs. I balanced the camera at the end of the arm, ensuring the weight was evenly distributed to avoid tipping. I also used a sandbag on the base of the C stand for extra stability. This improvisation gave me smooth, steady shots without expensive equipment. For a detailed setup, check out boom arm setup guide.
Maintain and Test Your Support Equipment Regularly
No matter how solid your gear looks, regular maintenance is key. I learned this the hard way during a location shoot when a tripod leg suddenly collapsed. I now inspect all stands, C stands, and support arms before every shoot. I tighten bolts, check for rust or wear, and replace any damaged parts. I also test each setup with a quick shot to ensure stability. This routine prevents accidents and keeps your footage steady. For comprehensive maintenance tips, see camera support maintenance.
Get Comfortable with Weight Distribution and Balancing
During a recent shoot, I used a heavy lens and monitor attached to my support rig. I balanced the setup by adjusting the position of the support arms and adding sandbags at strategic points. This prevented any wobbling or tipping, especially when I moved around. Proper weight distribution is crucial—think of it like balancing a scale. Practice makes perfect; experiment with different configurations until your setup feels secure. Want expert advice? Visit rigging tips for filmmakers.
Incorporate Support Gear into Your Workflow
Using the right stands and support arms seamlessly integrated into your setup makes a huge difference. I keep my gear organized and ready, so I can quickly assemble and adjust during shoots. When I prepared for a corporate video, I used a combination of light stands, C stands, and boom arms to position lights, microphones, and monitors. This efficiency saved time and reduced errors. Looking to streamline your process? Check out support gear integration.
Final Tip: Practice and Test Frequently
The key to mastering your support gear is consistent practice. I dedicated time to set up different configurations, testing stability and ease of adjustment. Each successful setup boosted my confidence and helped me troubleshoot common issues. Remember, a steady shot starts with a solid support system—invest time in learning your gear, and your footage will thank you. For more on advanced support techniques, explore rigging techniques for filmmakers.
Many filmmakers operate under the assumption that any support gear will do, or that spending less on stands and arms won’t impact the quality of their footage. Let’s dig deeper into what most people get wrong about these crucial tools and how falling for these myths can sabotage your projects. Understanding the nuances here can save you time, money, and countless frustrating moments on set.
Why Cheap Supports Often Lead to Costly Mistakes
One of the biggest misconceptions is that budget support gear is just as reliable as high-end options. In reality, cheaper stands and arms are often made with inferior materials, which can lead to wobbling, slipping, or even catastrophic failure during a shoot. This isn’t just about inconvenience—these failures can ruin shots, damage equipment, or worse, cause injury on set. Professional support gear undergoes rigorous testing and is built with durability in mind. Skimping here is like buying a cheap parachute: it might look fine until it’s too late.
Advanced Support Systems Require Proper Training
Many assume that once you’ve purchased quality stands and arms, your job is done. But the truth is, advanced support systems—like C stands with boom arms or heavy-duty tripods—demand proper setup and handling. Improper use can negate the benefits of high-quality gear, leading to instability. For example, uneven weight distribution with a boom arm can cause tipping, especially when mounted on an unlevel surface. Knowing how to balance and secure your gear isn’t optional—it’s essential. For expert tips on this, check out this comprehensive boom arm setup guide.
Will Over-Specifying Your Support Gear Help or Hinder?
One advanced question I often hear is whether using overly heavy or expensive stands is worthwhile for smaller projects. The answer: it depends. Over-specifying can offer peace of mind and extra stability, but it may also be unnecessary if your shoot is lightweight. The key is matching your gear to your needs. For instance, a sturdy C stand with a support arm makes a huge difference when working with heavy lights or monitors, but might be overkill for light handheld shots. Always evaluate your specific requirements and don’t fall into the trap of over- or under-investing. For more guidance, explore C stand selection tips.
Additionally, regular maintenance and inspection of your gear are often overlooked but critical to safety and performance. As I learned the hard way, a quick check before each shoot can prevent equipment failures that compromise safety and footage quality. Remember, even the best gear needs proper care and handling.
Have you ever fallen into this trap? Let me know in the comments. Mastering support gear isn’t just about buying the best; it’s about understanding how to use and maintain it effectively. With the right knowledge, your support system will become your reliable partner in every shoot, helping you capture steady, professional shots every time.
Maintaining your support equipment is crucial to ensuring long-term stability and performance during shoots. I personally swear by a few key tools and routines that keep my stands, arms, and tripods reliable, shot after shot. First and foremost, I use a high-quality multi-tool like the Leatherman Wave, which I keep in my kit at all times. It helps me tighten bolts, adjust clamps, and quickly address minor issues on the spot. Regular inspection of all gear is non-negotiable; I check for rust, wear, and loose parts before each shoot, following a routine I learned from industry veterans.
For cleaning and lubrication, I prefer silicone-based sprays that don’t attract dust or debris. These are especially useful for C stands and support arms that see frequent assembly and disassembly. I avoid WD-40 on support gear because it can degrade rubber and plastic components over time. Instead, I rely on dedicated lubricants designed for professional equipment, which I buy from reputable suppliers like B&H or Adorama.
To track wear and schedule maintenance, I maintain a digital log using my smartphone. I record dates of inspections, parts replaced, and any issues encountered. This habit has saved me from unexpected failures and costly repairs. For those who want an even more systematic approach, investing in a professional gear maintenance kit—containing replacement bolts, rubber feet, and calibration tools—can extend your equipment’s lifespan significantly.
Looking ahead, I predict that smart support gear with built-in sensors may become the norm, alerting you to loose bolts or misalignments via your phone. Companies are already developing IoT-enabled tripods and C stands that monitor stability in real-time. This tech evolution will drastically reduce downtime and improve safety on set.
How do I maintain my support gear over time?
The key is consistency. I set aside 10 minutes after every shoot to clean, inspect, and lubricate my equipment. I also perform a thorough check before critical shoots, especially those involving heavy lighting or camera rigs. Replacing worn parts proactively prevents failures during filming, which can be disastrous. I recommend keeping a detailed maintenance schedule and using quality lubricants and cleaning supplies to ensure your gear remains reliable for years to come.
Don’t forget to visit this comprehensive guide for more detailed maintenance tips and recommended tools. Implementing these routines and tools will keep your support gear working smoothly, saving you time and frustration on set. Try integrating a quick inspection routine into your post-shoot process—you’ll thank yourself during your next project!
Lessons from the Front Lines of Filmmaking Support
- The Hardest Lesson I Learned About Support Gear: Never underestimate the importance of quality and proper setup. I once relied on cheap tripods, which wobble at the worst moments, costing me time and footage. Upgrading to professional gear transformed my workflow and shot stability.
- Why Over-Specifying Can Be a Double-Edged Sword: I used to think heavier is always better. But matching your support gear to your project needs is crucial. Overkill can be cumbersome, while underestimating can lead to disasters. Find that sweet spot for your typical shoots.
- What Industry Experts Won’t Tell You About Maintenance: Regularly inspecting and maintaining your stands and arms prevents failures. A quick routine before each shoot saves time and keeps your gear performing at its best. Trust me, a little upkeep goes a long way.
- The Moment I Discovered Proper Weight Distribution: Balancing your camera, lights, and monitors on support arms isn’t just about stacking equipment. It’s about practicing weight distribution to prevent tipping. With patience and practice, you’ll get steadier shots effortlessly.
My Essential Tools for Reliable Support
- Support Gear You Can Trust: I swear by brands like Matthews and Manfrotto. Their sturdy tripods and C stands hold up under pressure and give me peace of mind during shoots.
- Maintenance Must-Haves: A high-quality multi-tool, silicone spray, and a gear log keep my setup in top shape. These small investments save big headaches.
- Learning Resources That Changed My Approach: The comprehensive guides on support gear maintenance and boom arm setup have been game-changers for my confidence and efficiency.
Take Action and Elevate Your Filmmaking Support
Remember, building a reliable support system isn’t about buying the most expensive gear—it’s about understanding your needs, proper setup, and routine maintenance. Your shots will be steadier, your workflow smoother, and your projects more professional. Now it’s your turn—what’s the support gear challenge you’re facing right now? Drop your questions or experiences below and let’s grow together!
Reading through this guide really drives home how crucial support gear is in professional filmmaking. I vividly recall a shoot early on where my instability issues caused several reshoots and extra time. Investing in a quality tripod and some sturdy C stands made a huge difference in my workflow and shot consistency. One thing I’ve learned is that even portable setups benefit from regular maintenance — tightening bolts and checking the integrity of support arms before each shoot should be standard practice. I also experiment with weight distribution by balancing heavier accessories close to the support joint, which seems to enhance stability during dynamic shots. As someone who’s faced the chaos of shaky footage, I’d love to hear from others: how do you organize your support gear for quick assembly and breakdown on tight schedules? Any tips for streamlining support setup for fast-paced shoots? Thanks for sharing such a detailed breakdown of essentials; it’s definitely helped me refine my process.
I’ve definitely been there—worrying about support gear when trying to keep a shoot on schedule, especially on tight days. Over time, I’ve found that organizing your gear into modular kits not only saves time but also ensures you have everything you need without rummaging through bags. Using color-coded straps or labels can make quick setups smoother, especially when multiple crew members are involved. Additionally, I’ve started practicing assembly and disassembly routines during downtime to speed things up on the day of shooting. It’s amazing how a little preparation can boost confidence and reliability. Have others tried any specific organization strategies that worked well in their flow? Sometimes I wonder if investing in lightweight yet durable gear actually cuts setup time or adds complexity. Looking forward to hearing different approaches, especially for on-location shoots where every minute counts.