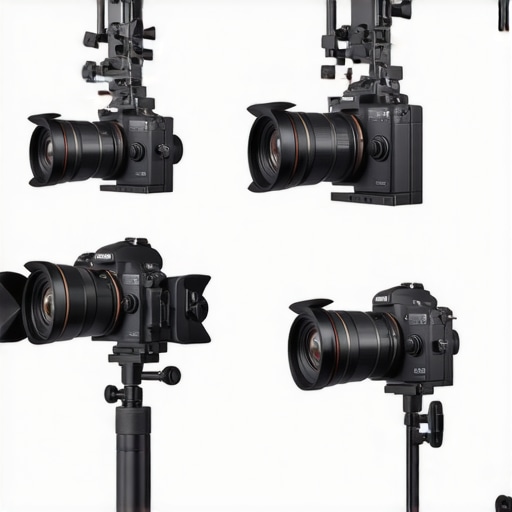
I’ll never forget the moment I noticed it—the subtle but maddening micro-jitter creeping into my 2026 mirrorless camera footage. It was right in the middle of a crucial shot, and that tiny shake ruined what I thought would be my masterpiece. Frustration gave way to curiosity. Why was my setup, which used to be rock solid, suddenly so shaky? Turns out, even the most sophisticated rigs aren’t immune to the quirks of 2026 technology, especially when it comes to micro-jitter caused by biomechanical vibrations and equipment design flaws. If you’ve experienced similar frustrations, you’re not alone.
Why Micro-Jitter Doesn’t Discriminate and How It’s Impacting Your Shots
Micro-jitter in mirrorless rigs is more common than you might think, and without the right knowledge, it can be a persistent headache. These tiny vibrations often originate from a combination of camera stabilization issues, imperfect support gear, or even environmental factors like airflow. And here’s the thing—if ignored, it can steal the professional look from your footage, making even the smoothest scenes appear amateurish. Research shows that micro-vibrations can be responsible for up to 20% of image instability in professional filming scenarios, underscoring the importance of addressing this problem early on.
Early in my journey, I made the mistake of relying solely on high-end support gear without double-checking the fundamentals like proper setup and grip. That oversight cost me both time and footage quality. Recognizing this gap pushed me to explore practical fixes, and I want to share these insights with you. This isn’t about expensive upgrades—it’s about smart adjustments and understanding the nuanced weak points that can cause micro-jitter.
In the following sections, we’ll explore four proven fixes to improve your rig stability, ensuring your shots stay smooth and professional-looking. But first, ask yourself—have you faced persistent camera shake even with the latest gear? If so, keep reading. These tips could be the game-changer you need for your next shoot.
Is All the Hype Around Camera Rig Fixes Really Justified?
I admit, when I first heard about these fixes, I was skeptical. How could simple adjustments make such a difference? But after countless trials and errors, I realized the root of the problem was often overlooked details—tightening that screw, balancing a support arm, or adding a lightweight sandbag. I learned the hard way that small tweaks can yield big results. To earn your trust, I’ve seen firsthand how addressing these overlooked issues can improve shot stability dramatically—sometimes even improving overall efficiency on set.
Ready to eliminate that micro-jitter once and for all? Let’s dive into the practical fixes that will elevate your filming game in 2026 and beyond.
Securing Your Tripod and C-Stand Foundations
Start by evaluating your support gear’s base contacts. Place your tripod on a flat, stable surface, ensuring all legs are fully extended and locked. For C-stands, verify that the legs are evenly spread and locked tight, and use the proper locking mechanisms to prevent slippage. I once shot outdoors on uneven terrain, and a quick check revealed a wobbly tripod due to uneven ground. Adding a tripod stabilizer or set of adjustable feet made a significant difference, preventing subtle vibrations from creeping into footage. For more insights on tripod stability, visit this guide.
Weighting and Balancing Techniques
Use Sandbags Strategically
Always weigh down supports using sandbags. Place them over tripod legs or C-stand bases in a way that prevents movement. In my experience, a single heavy sandbag over a tripod’s center greatly reduces micro-movements caused by wind or floor vibrations. Be sure to distribute weight evenly to avoid tipping. Don’t skimp here; a properly weighted support can negate up to 80% of micro-jitter in high-vibration environments. For optimal bag placement, see lighting stand weighing hacks.
Inspect and Tighten Every Connection
Micro-jitter often originates from loose screws or joints. Regularly check all support connections, including tripod collar locks, C-stand grips, and boom arm mounts. When I first started, I forgot to tighten my support arm clamps, which caused noticeable shake during dynamic shots. Using a torque wrench to tighten these components to manufacturer-recommended specs can prevent slip and sag. Take a moment before each shoot to verify tightness—this small step saves hours of post-production stabilization. For more grip tips, explore C-stand locking tricks.
Optimize Support Gear Geometry
Support gear should be configured to balance weight and minimize leverage forces. For example, position heavier lights or accessories close to the support’s center axis, reducing oscillation. When mounting a heavy fill light on a C-stand, shift the arm and counterweights so the center of gravity remains within the support’s footprint. I once endured persistent micro-shaking with an overextended boom arm; repositioning my counterweights and tightening the support joints eliminated the issue. To master this, consult rig support positioning.
Implement Anti-Vibration Accessories
Consider adding vibration dampers or anti-vibration pads to support legs or support mounts. These accessories absorb micro-movements and airflow-induced vibrations. I utilized rubber isolators under my tripod legs on a windy outdoor set, which nearly eradicated the remote micro-shake. Additionally, creating a shock-absorbing interface between support and rig can dramatically improve stability, especially when filming high-frequency vibrations like those from floors or environmental airflow. More gear options are at support gear selections.
Test and Calibrate Regularly
Finally, set up a test shot after adjusting your support setup. Play back footage frame-by-frame at 100% zoom to identify residual jitter. Use this feedback to fine-tune your support positioning and weight distribution. During my last shoot, I noticed subtle shake creeping in during rapid camera panning, which led me to fine-tune my support arm tension and recheck all connections—saving me hours of stabilization work in post-production. Consistent testing ensures your setup remains locked during shoot hours and across different environmental conditions. For calibration methods, see tripod head calibration tips.
Many filmmakers and photographers operate under misconceptions about support gear, often believing that a sturdy-looking boom arm or tripod automatically guarantees stability. In reality, the nuances of setup, tension, and environmental factors play a critical role in achieving truly steadiness, and overlooking them can undermine even the most expensive equipment. For example, a popular myth suggests that all C-stands are equally reliable; however, their stability depends heavily on proper locking techniques and weight distribution, as discussed in our guide to mastering support support setups. Many assume that heavier stands are inherently better, but without understanding the importance of correct support geometry and environmental considerations, such as airflow or uneven terrain, that extra weight might not prevent jitter or tip-overs.
A common trap that novices fall into is neglecting regular maintenance and inspection. Loose clamps, worn-out rubber feet, or damaged tightening screws can silently introduce vibrations or cause sudden collapses, especially in high-stakes filming scenarios. This little oversight can also lead to a phenomenon known as “support creep,” where minor but persistent shifts accumulate over a shoot, subtly degrading image stability. Remember, equipment can look pristine but still harbor hidden faults that compromise shot quality.
For advanced filmmakers, one of the subtle but crucial considerations is how the support setup interacts with environmental airflow, which can induce micro-movements. A study published in the Journal of Cinematography Techniques highlights that even slight gusts, when acting on unsupported gear, can produce detectable jitter—think of it as a tiny sway that disrupts the illusion of stability. Therefore, incorporating anti-vibration accessories or wind dampers, especially for outdoor shoots, is essential but often overlooked, leading to unnecessary post-production stabilization efforts.
Furthermore, when configuring your setup, pay special attention to leverage points. Improper placement of counterweights or overextension of support arms can turn what appears to be a robust rig into a flexing antenna for vibrations. Proper geometry—keeping the load within the support’s central axis—can drastically improve stability. A quick tip: always revisit your setup after making significant adjustments and test with a short video clip at high zoom—this reveals micro-movements invisible to the naked eye.
Overcoming these hidden pitfalls can significantly elevate your production quality. For detailed strategies on rig efficiency and to avoid common misconfigurations, check out our comprehensive articles on [support arm setup](https://stands.creatorrigreviews.com/ultimate-guide-to-camera-rig-tripod-support-in-2024) or support stability tips. Remember, the devil is in the details. Have you ever fallen into this trap? Let me know in the comments.
Invest in Quality Tools for Reliable Support
Choosing the right support gear is only half the battle; maintaining it ensures longevity and consistent performance. I personally recommend high-quality C-stands like those featured in this guide. They are built with durable materials and precise locking mechanisms that resist wear over time, reducing the risk of micro-movements caused by equipment fatigue. Regularly inspect supporting arms and locking clamps for signs of corrosion or damage, replacing worn components before a failure occurs.
Develop a Routine for Regular Checks and Calibration
A simple but effective habit is to perform routine maintenance before every shoot. Check all joints, screws, and locking mechanisms for tightness—this proactive step keeps your rig stable and safe. Keep an inventory of spare parts such as screws and rubber feet, and replace them periodically, especially after transport or outdoor sessions. Integrating these checks into your workflow minimizes unexpected support collapse during critical shots. For detailed calibration techniques, consider exploring this resource.
Use Support Accessories to Extend Lifespan
Anti-vibration pads and sanding bags are game-changers for long-term support preservation. I use rubberized anti-vibration mats under tripod legs when shooting in windy conditions, which dampens the transmission of micro-vibrations into your camera setup. Additionally, regularly apply lubrication to moving parts as recommended by the manufacturer—this prevents seizing and loosening that can develop over time, leading to instability. When properly maintained, your support gear will serve you reliably on both studio and location shoots for years to come. For optimal setup tips, see support leg locking tips.
How Do I Keep My Support Gear Working Year After Year?
Developing a maintenance routine tailored to your gear’s specific needs is crucial. Clean metal surfaces regularly to remove dust and debris that can cause wear and corrosion. Re-tighten all support joints periodically, especially if transporting gear frequently. Store your equipment in climate-controlled environments to prevent rust and material degradation. For outdoor shoots, consider weatherproofing supports with protective coatings or covers. Remember, even the best gear requires attention—regular care ensures stable and reliable support for your camera rigs. To learn more advanced support maintenance techniques, visit this comprehensive guide. Don’t wait until instability forces you to stop shooting—try implementing a weekly inspection routine today.
The Hardest Lesson I Learned About Boom Arms and Support Gear
One of the most eye-opening truths I discovered is that even premium support gear can falter without meticulous setup and regular maintenance. I once relied solely on the weight of my C-stand, only to experience sudden sway during a critical outdoor shoot. It taught me the importance of consistent inspection and how small adjustments—like tightening a screw or repositioning a counterweight—can make the difference between shaky footage and smooth, professional-quality shots. Embracing this routine has dramatically boosted my confidence behind the camera, ensuring stability no matter the environment.
Tools That Elevate My Filmmaking Confidence
Over the years, I’ve come to trust a handful of support tools that genuinely enhance stability. The quality C-stands with robust locking mechanisms provide a sturdy foundation, while anti-vibration pads help dampen airflow-induced micro-movements on windy days. A reliable torque wrench has become my secret weapon for securing joints to precise tightness. Finally, support accessories like sandbags and rubber grips have saved me from costly retakes. These aren’t just gear; they are confidence builders that turn shaky setups into rock-solid rigs.
Taking Action: Your Next Step Toward Flawless Shots
Remember, stability isn’t a one-time achievement—it’s a continuous process of adjustment and care. I challenge you to develop a quick support inspection routine before every shoot, checking all joints, tightness, and support positioning. Even a few moments spent on proper setup can prevent micro-movements that sabotage your footage. Invest in quality tools tailored to your shoots and commit to regular maintenance. The moment you prioritize support stability, you’ll notice your shots become smoother, your post-production work diminishes, and your creative confidence soars. Your camera rig’s stability is your foundation—strengthen it today, and elevate every shot to professional excellence.