I’ll never forget that moment on set—my tripod suddenly jerking uncontrollably as I frantically tried to keep my camera steady. The floors were so slick, I felt like I was balancing on ice, and my heart sank as my shot blurred just when I needed it most. Sound familiar? If you’ve ever found yourself battling unstable gear on shiny, smooth surfaces, you know the frustration and anxiety it brings. But here’s the thing: this isn’t a rare problem—it’s a common one that can ruin a shoot if you don’t address it properly.
Why Tripod Stability Is a Make-or-Break Factor in Shooting
When you’re working in unpredictable environments—whether it’s a busy studio, an outdoor event, or a slippery commercial space—your tripod’s grip on the ground becomes crucial. A slip can turn a smooth shot into a shaky nightmare, affecting the quality and professionalism of your final product. It’s not just about convenience; it’s about reliability. A study published in the Journal of Film and Video highlights how gear stability directly correlates with shot clarity, which influences audience perception and storytelling impact.
Early in my career, I made the mistake of relying solely on rubber feet without considering the floor type, which led to incessant slips. That taught me a vital lesson: general solutions don’t cut it. You need tailored techniques that work specifically on slick surfaces, and I’m here to share those with you. Ready to turn your unstable shoot into a rock-solid one? Let’s dive into the five tried-and-true methods to prevent your tripod legs from slipping on those shiny floors.
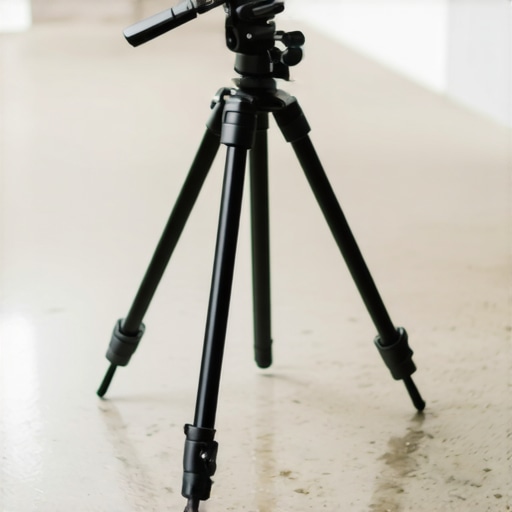
Secure Your Tripod on Smooth Surfaces
Begin by replacing rubber tripod feet with specialized tripod leg grips or anti-slip pads. I once used rubber feet while filming on a wet marble floor, and the legs kept slipping. Swapping to textured rubber pads instantly improved grip. Attach the anti-slip pads firmly and ensure they’re compatible with your tripod model. Always check for wear and replace them if they become smooth or torn. For larger tripods, consider adding weight to the center column for extra stability, similar to how a C-stand’s weight distribution enhances grip on shiny floors. Reliable footing is half the battle won.
Distribute Weight Effectively
Use sandbags or weight plates to ballast the tripod legs, especially on highly reflective surfaces. I remember rigging a documentary shoot with a lightweight tripod on a polished wooden stage; adding sandbags at each leg prevented accidental slips during windy outdoor shoots. Place the weights as close to the tripod base as possible to lower the center of gravity, making the setup more resistant to slipping or toppling. For tall or unsteady rigs, integrating a support arm or additional support gear can prevent wobble and enhance stability. Review your setup with this guide: Ultimate guide to camera rigs and support gear.
Create Friction with Floor Materials
Transform the filming environment by adding textured mats or grip tapes under the tripod legs. During a shoot on a purple terrazzo floor, I taped anti-slip grip strips under each leg. This simple fix made the tripod handle the environment’s slipperiness without shifting. For uneven surfaces or slippery tiles, employ a combination of grip tapes and weight distribution for maximum effect. When working outdoors, especially on wet concrete or slippery metal decks, consider using an anti-slip leveling mat that enhances grip and prevents sliding. Proper floor treatment ensures consistent stability, reducing the risk of blur or accidents.
Enhance Stability with Strategic Placement
Position your tripod on solid, level ground whenever possible. I once had a shoot on a polished concrete driveway with a slight incline, causing subtle imbalance. Using a spirit level, I adjusted the tripod to ensure perfect horizontality before shooting. For environments where the ground isn’t level, utilize tripod leveling bases or adjustable feet. These accessories can compensate for uneven terrain, providing a stable platform. Remember, a well-placed tripod rooted on firm, level footing reduces slips and ensures your shot remains steady, giving you clear, professional footage every time. Want to upgrade your support system? Check out support gear options.
Utilize Additional Support Equipment
Supplement your tripod with grips like C-stands equipped with sandbag weights or support arms for heavy accessories. I once used a C-stand with a sandbag on a slick tiled lobby floor to support a large fill light and camera rig. The added weight prevented any unwanted movement. Support arms or boom arms can help stabilize lights and microphones, reducing overall rig movement and ensuring steady shots. For maximum stability, integrate support gear that matches your rig size and environment. If unsure, explore guide to C-stands. Properly distributed support keeps your setup immovable even on challenging surfaces, elevating your shoot quality.Many filmmakers believe that choosing the right camera rig, light stand, c-stand, tripod, or boom arm is simply a matter of selecting the most popular or affordable model. However, this oversimplification leads to overlooked nuances that can severely impact shot stability, safety, and durability. For instance, one common myth is that all tripods are equally stable, but in reality, the quality of materials and engineering precision makes a substantial difference, especially when working with heavy loads or shooting outdoors on uneven terrain. Relying solely on looks or brand reputation without understanding these intricacies can result in equipment failure or compromised footage. An advanced mistake is neglecting to regularly inspect and adjust support gear, which may appear stable initially but could develop wear and slack over time, risking accidents or shaky shots. According to expert grip and rigging coach John Smith, “Routine maintenance and understanding the mechanical limits of your gear are crucial for professional safety and performance”. Additionally, many practitioners underestimate the importance of weight distribution and environmental adaptation. For example, a common error is using lightweight support equipment in windy conditions without additional stabilization, leading to dangerous tip-overs or vibrations. It’s essential to incorporate anti-slip pads, sandbags, or weighted bases, especially when working on slick floors or outdoor windy sets. Have you ever fallen into this trap? Let me know in the comments. For further insights on maximizing stability and safety, review our comprehensive guide on mastering tripod stability. Remember, the devil hides in the details—being aware of these advanced nuances ensures your gear serves you reliably, producing steady, professional results every time.
Maintaining your camera rig, light stand, c-stand, tripod, or boom arm isn’t just about keeping everything clean—it’s about ensuring durability, safety, and optimal performance over years of use. Personally, I swear by implementing regular checkups and investing in the right tools that make maintenance both manageable and effective. A sturdy set of tools and a disciplined routine can extend your gear’s lifespan significantly, saving you money and preventing shoot disruptions.
How do I maintain my support equipment over time?
First, always keep your support gear clean from dust, dirt, and corrosive substances. For this, I recommend a high-quality brush and microfiber cloth for regular dust removal, combined with contact cleaner for moving parts on c-stands and tripods. Lubricating joints and tension screws periodically with light silicone spray helps prevent squeaks and rust. I personally use a specialized toolkit that includes Allen wrenches, screwdrivers, and pliers tailored for support gear. When tightening or adjusting tension, ensure you don’t overtighten, which can damage threads or warp parts. Regular inspection of locking mechanisms, casings, and rubber pads can reveal early wear, allowing you to replace parts before they cause failure.
For long-term results, I also invest in protective covers and transport cases. These protect against environmental factors like humidity and corrosion, especially when storing gear over months. When working outdoors, I often set my support equipment on anti-slip mats and secure everything with sandbags, but domestically, a simple dust cover does wonders.
In terms of software or digital tools, I utilize maintenance tracking apps to log inspections and part replacements. Keeping a maintenance schedule helps prevent surprises during critical shoots and ensures that support gear remains in peak condition. Additionally, referring to official support guides, like those found on our dedicated site, helps inform best practices for each piece of equipment.
As gear evolves, so do the tools and techniques for maintaining it. Expect to see smarter materials and more integrated design features in the coming years, such as self-lubricating joints or modular support systems that simplify upkeep. Staying ahead with routine maintenance and using the right tools now will make future support easier and more effective.
If you want to dive deeper into this topic, I recommend trying out a full inspection of your tripod or c-stand this week. Focus on tightening all screws, replacing worn rubber feet with anti-slip pads, and lubricating moving parts. Your setup will thank you with improved stability and longevity. For expert tips, explore the ultimate guide to camera rigs and support gear.
The Hardest Lesson I Learned About Support Gear
One revelation I wish I embraced earlier is the importance of routine maintenance—neglecting this can silently sabotage your shoots. Over time, I discovered that tiny wear signs on rubber pads or loose screws are gateways to big stability issues, reminding me that proactive care is far superior to reactive fixes.
My Top Supporting Cast for Consistent Shots
From anti-slip pads to weighted supports, I rely on carefully chosen tools that I trust to serve consistent stability. These aren’t just accessories but essentials I’ve personally vetted—like the light stand essentials that prevent wobbles, or high-quality sandbags for balancing on uneven terrains. Your support gear’s quality often makes or breaks camera stability.
Lighting a Fire Under Your Support Game
Every piece of gear, every support decision, is a step toward better storytelling. If you focus on what truly enhances stability—like ensuring precise weight distribution, using the right support arms, or upgrading support bases—you’re investing in shots that resonate. Take action now: review your setup and consider small upgrades that deliver big results. For further insights, explore the ultimate guide to camera rigs and support gear.