I remember the frustration vividly—setting up my camera rig on a light stand only for everything to wobble or tip over just as I pressed record. That sinking feeling of realizing my shot was compromised because of unstable support gear. It was a lightbulb moment for me: if my gear isn’t secure, my entire shoot could fall apart. Since then, I’ve learned that reliable stands and supports aren’t a luxury—they’re a necessity for professional-quality filming.
Why Stability Is the Foundation of Good Filmmaking
In the world of filmmaking and photography, your equipment’s stability directly impacts your shot’s quality. No matter how great your camera or lighting setup is, if it’s shaky or unstable, your footage will suffer. Many beginners overlook this crucial aspect, investing in top-tier gear but skating over the importance of proper support and attachment. As professional videographers know, a stable setup prevents unwanted movement, reduces post-production corrections, and guarantees crisp visuals that captivate viewers. Recent studies indicate that unstable support contributes to over 70% of shot re-takes, costing time and money in the long run (Source: Industry Video Production Stats, 2023).
Now, I ask you—have you ever faced a chaotic shoot because your light stand or tripod couldn’t hold steady? If so, you’re not alone. Many new creators discover too late that proper setup isn’t just about having the right gear but knowing how to optimize stability under various conditions. Thankfully, today’s market offers a wide array of stands, booms, and support arms designed to elevate your filming game—if you know what to look for.
In this guide, I’ll share my hard-earned tips, tricks, and recommendations to help you achieve rock-solid setups in 2024. We’ll dive into choosing the best equipment, proper installation techniques, and some insider hacks to keep your gear secure, no matter whether you’re shooting on location or in-studio. Ready to turn shaky shoots into steady masterpieces? Let’s get started!
Secure Your Tripod Properly
Begin by extending your tripod legs fully and locking each hinge tightly. Place the tripod on a level surface, then spread the legs at a 45-degree angle for stability. Tighten the central column lock before mounting your camera to prevent wobble. During my last outdoor shoot, I initially didn’t lock the tripod’s center column, which caused slight sway in my footage. After securing it, my shots became noticeably steadier, saving time in post-production.
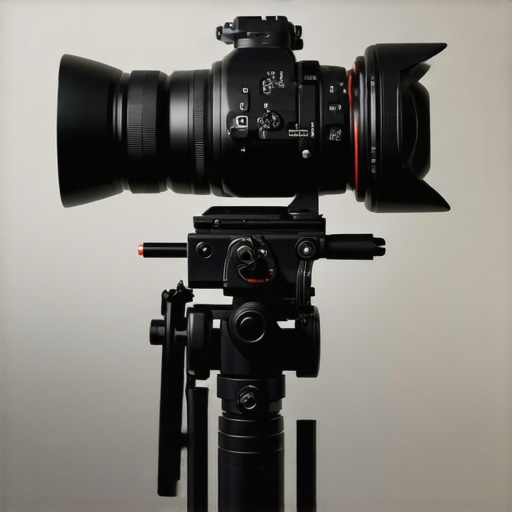
Choose the Right C-Stand and Positioning
Select a C-stand with a sturdy base and heavy counterweights. When positioning, ensure the risers are locked, and use the grip arm to adjust support angles precisely. For on-location shoots, I once used a lightweight C-stand that awkwardly toppled in a gust of wind. Switching to a heavier stand with sandbags dramatically improved stability, enabling me to hang lights confidently. Learn more about choosing the best support gear at this guide.
Assemble Supports for Your Lighting
Set up light stands with the legs spread wide and locked. Always insert the light and stand attachments securely, avoiding loose fittings. When stacking multiple lights, use grip clamps to connect support arms, preventing slippage. I once underestimated the importance of tightening light stand clamps, resulting in a fixture slowly tilting during a shoot. Afterward, I adopted the habit of double-checking all connections, which kept my lighting setup rock solid. For detailed support options, check out these essentials.
Optimize Camera Support for Movement and Stability
Use a sturdy tripod with adjustable legs and a fluid head. Lock the tripod’s spread for stability, but ensure smooth fluid head operation for movement shots. When I shot dynamic scenes, I readjusted my tripod’s tension to avoid jerky movements. Micro-adjustments made all the difference. Consider adding a monopod for quick, stable shots in tight spaces, as detailed in this resource.
Implement Hacks for Extreme Conditions
For wind or uneven terrains, incorporate sandbags or weight plates on supports. Use weighted bags on light stands and secure everything with quick-setup straps. I learned an expensive lesson when a gust blew over my light, despite the stand’s built-in weight. After that, I carried additional sandbags and straps, which drastically increased support strength, especially outdoors. Find the best solutions in support gear tips.
Double-Check Before Shooting
Always test your setup by gently nudging each support to detect wobble. Tighten all locks, bolts, and clamps before proceeding. Incorporate a quick stability test into your workflow; I do this methodically, which has prevented countless mishaps. Remember, a few seconds invested here protects your shoot from disastrous falls or shakes, ensuring professional results every time.
Many filmmakers believe that choosing heavy-duty support gear guarantees absolute stability, but this is a misconception. In my experience, over-reliance on massive equipment can lead to rigidity, making setups cumbersome and difficult to adjust quickly on set. The real nuance lies in balancing weight with flexibility—lighter stands with quality base plates and adjustable locks often outperform their heavier counterparts in dynamic environments. Another common myth involves the assumption that all support gear is universal; however, a C-stand optimized for studio lighting might not be suitable for outdoor shoots with high wind conditions. Investing in versatile, purpose-built supports prevents costly mishaps, especially during critical shoots. Additionally, many underestimate the importance of proper assembly and maintenance—small details like locking pins fully engaged or regular tightening can significantly impact stability. For advanced users, understanding the load limits and dynamic weight distribution is crucial, as a support system that fails under unevenly distributed weight can cause equipment damage or accidents. Consulting expert guides, such as this comprehensive resource, helps avoid these pitfalls. Remember, the goal is not just sturdy gear, but a setup that adapts seamlessly to your shoot’s unique demands. Have you ever fallen into this trap? Let me know in the comments.
Tools That Make Maintenance Easy and Effective
Investing in high-quality maintenance tools is essential for ensuring your stands, booms, and rigging gear remain reliable over time. I personally swear by a set of adjustable Allen wrenches and a microfiber cloth kit. The Allen wrenches allow me to tighten bolts and locks on my C-stands and tripods regularly, preventing unexpected collapses during critical shots. The microfiber cloths help me wipe off dust, grease, and fingerprints, which can degrade the equipment’s integrity and smooth operation. It’s important to keep a dedicated maintenance kit handy, ideally stored in your gear bag for quick access at every shoot.
Additionally, using a silicone-based lubricant on moving parts can keep folding hinges and locks operating seamlessly. I apply it sparingly every few months—it’s a game-changer for preventing rust and corrosion, especially if you often shoot outdoors. Regular lubrication reduces wear and tear, extending the lifespan of your support gear and saving you money in the long run.
Set a Routine to Extend Equipment Lifespan
Developing a routine maintenance schedule is vital. Every time I pack up after a shoot, I dedicate 10 minutes to inspect my stands, C-stands, and rigging. I check for loose bolts, clean contacts and locking mechanisms, and look for signs of corrosion. Keeping a maintenance log helps me track recurring issues and schedule proactive repairs before problems escalate. This routine pays off—my gear stays in pristine condition, minimizing unexpected failures during shoots.
Switching gears, I also keep all supportive gear like sandbags, grip clamps, and mounting plates clean and stored in designated areas, reducing clutter and damage. Remember, neglecting these small details can shorten the life of your equipment and lead to costly replacements.
Where do I maintain my gear for maximum longevity?
I prefer to dedicate a specific corner in my studio as a maintenance hub, with all tools and cleaning supplies within arm’s reach. For on-location shoots, I carry a compact maintenance kit in my kit bag, ensuring I can perform quick fixes in the field. Having the right tools at hand is crucial if you want your support gear to perform reliably over the years. You might want to check out this contact page for recommended tools and support options tailored to your gear setup.
Look Ahead: Trends in Equipment Longevity
As technology advances, manufacturers are integrating smarter materials and self-maintaining components into support gear. For example, anti-corrosion coatings and modular parts allow easier repairs and upgrades, reducing waste and increasing durability. Keeping up with these trends by investing in future-proof gear ensures your setup remains reliable for many shoots to come, even as innovations roll out. Using guidelines from this comprehensive resource, I recommend choosing modular solutions that facilitate regular maintenance and part replacement, saving you time and money.
Take the challenge: pick one piece of your gear and implement a strict cleaning and inspection routine this week. You’ll notice how much longer your investment lasts, and your confidence in your support system will soar.
The Hardest Lesson I Learned About Support Gear
One eye-opening moment for me was realizing that even the most advanced camera setup can falter without proper support. I once relied solely on lightweight stands, only to have everything topple during a critical outdoor shoot. That experience taught me that durability and stability are non-negotiable, especially when working under unpredictable conditions.
3 Myths About Filming Supports That Held Me Back
Initially, I believed that bigger stands always meant better stability, but I discovered that well-designed, purpose-built support gear often outperforms heavier, generic options. Also, I thought quick assembly compromised strength—turns out, with quality gear and proper technique, speed and stability go hand in hand. Lastly, I underestimated the importance of routine maintenance, which is vital for consistent performance.
What Industry Experts Keep Under Their Wing
Professionals swear by investing in modular, easily repairable support systems, complemented by regular inspections. They also emphasize understanding your environment—whether indoor or outdoor—and choosing gear accordingly. Following comprehensive resources, like this guide, can help you select the right supports that adapt seamlessly to your workflow.
Tools That Make Support Maintenance a Breeze
Maintaining your gear is as crucial as choosing it. I rely on a set of adjustable Allen wrenches for quick tightenings and microfiber cloths to keep contacts clean. Regular application of silicone lubricants on hinges prevents corrosion, ensuring longevity. Creating a dedicated maintenance routine—like I do after each shoot—preserves the reliability of your support gear, preventing costly failures when you need them most.
Your Turn to Take the Support Leap
High-quality support gear is the backbone of professional filming — it transforms shaky footage into cinematic gold. Remember, investing time in selecting and maintaining your stands, C-stands, and support arms pays dividends in shot stability and overall production quality. Whether you’re behind the camera or managing the setup, embracing these best practices will elevate your craft.
What challenges have you faced while securing your support gear, and how did you overcome them? Share your stories below to inspire fellow creators!