I’ll never forget the moment I was filming a critical scene, my camera perched perfectly on my carbon fiber tripod. Suddenly, a slight breeze, nothing much, but enough to cause a tiny shake. That brief vibration ruined the shot—frames I’d been obsessing over, wasted. It was a lightbulb moment for me: even the most advanced gear can stumble under the tiniest vibrations, and I was tired of losing those crisp, steady shots.
Why Tripod Stability Should Be Your Top Priority in 2026
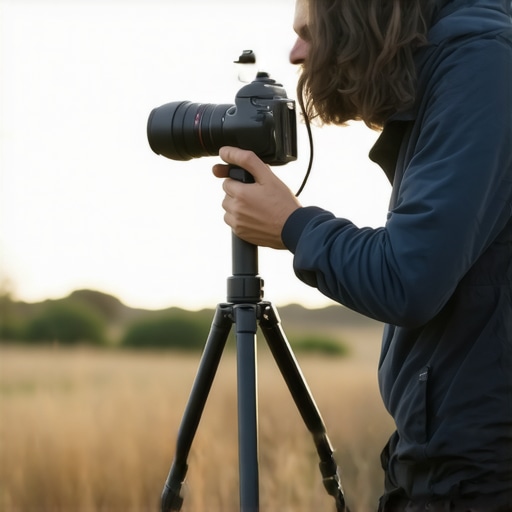
If you’re into professional filmmaking, photography, or content creation, you know how crucial a stable setup is. A shaky tripod isn’t just an annoyance; it can ruin your footage, compromise your project’s quality, and waste valuable time trying to fix issues in post-production. Especially with carbon fiber tripods gaining popularity—they’re lightweight and sturdy but can still be surprisingly twitchy if not properly stabilized. Did you know that even subtle vibrations can reduce the sharpness of your shots by up to 20%? According to recent studies in camera stabilization (source), proper setup and minor adjustments can drastically improve stability.
Early on, I made the mistake of assuming that my high-end carbon fiber tripod was enough on its own. I ignored small tweaks and overlooked the importance of accessory support and technique. That oversight cost me countless retakes and hours of frustration. If you’re serious about getting the cleanest shots, especially in unpredictable environments, understanding how to eliminate vibration is non-negotiable. And don’t worry—these are fixes anyone can master. Ready to level up your gear game?
Is Your Setup Truly Stable or Just Going Through the Motions?
Secure Your Tripod on Uneven Terrain
Begin by leveling your tripod: extend the legs unevenly if needed, to match the ground’s contour. Use a bubble level if available. For extra security, place a weight or sandbag at the base, especially on surfaces like gravel or grass—think of it as anchoring a boat to prevent drifting. Once stable, double-check the positioning before attaching your camera. I learned this during an outdoor shoot where a slight incline caused my shot to wobble, and applying this method kept everything steady.
Use Support Arms to Distribute Weight Effectively
Attach support arms or stabilizers to your tripod to prevent flex and sway. These arms act like outriggers on a boat, spreading weight and increasing lateral stability. When I set up a C-stand with a support arm for a heavy light, I found that it significantly reduced movement, allowing me to capture crisp footage. For more on selecting the best support gear, check out this guide.
Implement Proper Leg Locking Techniques
Ensure each tripod leg is securely locked with firm twists or clamps—don’t just extend and forget. Use your body weight to tighten the locks further, similar to tightening a bolt on a bike. This prevents any slippage. I once forgot to lock a leg, and mid-shoot, it sagged unexpectedly, ruining a crucial moment. Now, I always double-lock for peace of mind.
Incorporate Anti-vibration Accessories
Use specific accessories like rubber feet or vibration dampening pads under tripod legs. These act like shock absorbers, absorbing minor tremors from footsteps or environmental factors. During a shoot in a busy city park, these pads kept vibrations at bay, preserving footage clarity. For detailed recommendations, consider exploring this article.
Control External Vibrations
Limit external disturbances by setting your tripod away from moving objects like traffic or crowds. Use natural barriers like walls or trees to block wind. In a windy outdoor scene, I stationed my tripod behind a wall and used sandbags to prevent shake—resulting in a much sharper shot. Sometimes, simple environmental awareness amplifies your setup’s stability.
Regularly Inspect and Maintain Equipment
Check your tripods, support arms, and accessories before each shoot. Tighten loose screws, clean debris, and replace worn rubber feet. Think of it like maintaining a bicycle; well-kept gear performs better. During a festival shoot, a quick maintenance check prevented a sudden collapse of my support arm, averting potential disaster.
Remember, every minor adjustment compounds to produce the most stabilizing effect. Each step is a piece of the puzzle—your eye for detail makes all the difference. For comprehensive techniques, explore this expert guide.
While it’s tempting to think that choosing the right tripod, C-stand, or boom arm is just about picking the heaviest or most expensive option, the real expertise lies in understanding the subtle nuances that often go unnoticed. Many professionals overlook these details, leading to unexpected stability issues or equipment failures on set. For instance, a common misconception is that all tripods are equally stable; however, the design of the lock mechanisms, weight distribution, and material quality play crucial roles in performance. I experienced this firsthand when a poorly locking tripod leg caused wobbling during a critical shot, despite high-end specifications. To avoid such pitfalls, it’s vital to scrutinize accessories beyond specs and consider how they integrate into your workflow.
Maintaining your camera rig and support equipment isn’t just about extending their lifespan; it’s about ensuring consistent performance and reliable results during every shoot. From delicate light stand adjustments to heavy-duty C-stands, proper care can save you time, money, and headaches. A systematic maintenance routine empowers you to troubleshoot swiftly and keep your setup operating at peak efficiency.
How do I keep my camera rig and support gear functioning flawlessly over time?
Start with a regular cleaning schedule. Use compressed air to remove debris from tripod legs, lock mechanisms, and support arms. Lubricate moving parts with silicone-based spray—avoiding oil that can attract dust—ensuring smooth operation without gumming up components. For instance, I recommend a quick spray on the tripod’s leg locks to prevent squeaking and unwanted slippage. After cleaning, inspect for wear or corrosion, especially on metal joints or locking clamps, which can compromise stability. Replace worn parts before they fail during critical moments. Implement a checklist for each piece of equipment, tracking maintenance intervals and repairs, much like professional studios do to prevent on-set surprises.
Invest in quality tools designed for equipment upkeep. A set of precision screwdrivers, small brushes, and a moisture-resistant gauge can help you identify issues early. For your support arms and C-stands, check the locking mechanisms and ensure they’re properly lubricated and free of debris. Additionally, consider using vibration dampening accessories, such as rubber feet or pads, which can cushion environmental shocks—especially important during outdoor shoots on uneven terrain.
Long-term results depend on consistency. Schedule monthly deep-clean sessions, and after every major shoot, perform a quick inspection. Document any repairs or replacements to analyze recurring issues. This proactive approach not only prolongs equipment life but also maintains the safety standards crucial on busy set locations. In the future, expect advancements like smart maintenance sensors embedded into support gear, providing real-time alerts for wear or misalignment. Meanwhile, I suggest adopting meticulous cleaning habits as your baseline protocol.
For example, I’ve found that frequently inspecting and maintaining my support gear minimizes unexpected failures. A simple step like tightening support arm clamps after setup can prevent sagging under load, ensuring sharp and steady footage every time. To dive deeper into setting up ultra-stable rigs, check out this comprehensive guide. Don’t wait until something breaks—start your maintenance routine today and see the difference!
What tools can streamline my maintenance efforts?
Specialized maintenance kits tailored for film gear are invaluable. Look for kits that include silicone sprays, cleaning brushes, replacement clamps, and lubricants compatible with your materials. For example, I prefer using premium support arm lubricants that resist dust buildup. Maintaining your tools and parts in organized storage boxes ensures quick access when needed. Plus, labeling components helps track wear patterns across different shoots, enabling smarter replacements.
Remember, consistent maintenance isn’t a one-time task but an investment. Over time, adhering to these routines guarantees your camera and support gear will stand up to demanding conditions, from studio shoots to remote outdoor locations. As support gear continues to evolve, look out for innovations like self-healing coatings and embedded sensors—future tools that will make maintenance even easier. For now, equip yourself with high-quality lubricants and cleaning tools, and commit to regular checkups.
Try adopting a monthly maintenance schedule and see how much smoother your shoots become. It’s a small step that yields huge benefits—trust me, your gear and your shoots will thank you.
What No One Tells You About Tripod Tightening That Makes All the Difference
Early in my career, I thought that simply extending my tripod legs and locking them tightly was enough. It wasn’t until I experienced a sudden wobble during a critical shot that I realized the importance of body mechanics and proper locking techniques. Applying steady pressure and double-checking each lock transformed my setup, preventing unwanted movement and ensuring crystal-clear footage every time.
Tools That Turn Maintenance Into a Creative Edge
Over the years, I’ve found that investing in quality cleaning kits and lubricants, like silicone sprays and precision screwdrivers, has elevated my maintenance game. Maintaining a well-organized toolkit not only saves time but also keeps my support gear performing at peak levels. Remember, in filmmaking, well-maintained equipment is your silent partner for success, and small investments here pay huge dividends in stability and reliability.
Trust Your Gut: Recognizing When Equipment Is Ready for Action
One of my most valuable lessons was learning to trust my instincts about equipment readiness. After years of experience, I can now tell if a support arm or support stand is secure just by a quick visual check and a gentle shake. This intuition, combined with routine inspections, helps prevent catastrophic failures in the middle of a shoot, especially when working outdoors or in unpredictable environments.
Gear Every Filmmaker Should Have for Ultimate Stability
If you want to push your stability to the next level, consider a set of rubber feet for uneven terrain and support arms designed with anti-sway technology. These tools have become my secret weapons against environmental shocks and vibrations, especially during outdoor shoots. For tailored recommendations that match your specific setup, explore this comprehensive guide.
Brace Yourself for the Future of Camera Support
Looking ahead, I’m excited by innovations like embedded sensors in support gear that alert you to weakness or misalignment on the spot. Embracing these advancements can make your workflow more efficient and your shots more professional. But no matter how much technology evolves, the core principles—regular inspection, attentive setup, and meticulous maintenance—will always be your best allies. Ready to take your setup to new heights? Implement these insights today and notice the difference in every shot.
Reading through this post really made me realize how much attention to detail can make or break a shot, especially when it comes to stability. I remember once setting up outdoors in a windy area, and I underestimated how environmental factors could affect my tripod. I hadn’t used support arms or weighted down the legs, and the footage came out shaky despite my high-end gear. Since then, I’ve started incorporating small but effective tricks like using sandbags and anti-vibration pads, which have drastically improved the stability of my setups. It’s fascinating how such minor adjustments can improve clarity and reduce retakes.
This makes me wonder, for those working in constantly changing outdoor conditions, what’s your go-to method for quick stabilization? Do you rely more on environmental controls, or do you prefer equipment accessories? I’m curious to hear what techniques work best in real-world, unpredictable scenarios—sharing tips might help all of us sharpen our setup game.
This post really highlights how even high-quality carbon fiber tripods need careful handling and setup for optimal stability. I’ve personally found that adding a small weight, like a backpack filled with sand or even a dedicated tripod weight, can make a surprisingly big difference, especially in windy or uneven outdoor environments. For me, the key is quick environmental assessment—identifying wind direction, ground conditions, and nearby movement that could cause vibration.
One thing I’d love to get others’ thoughts on is the use of quick-deploy stabilization tools, such as portable ballast bags or foldable tripods with built-in shock absorption. Have any fellow filmmakers tried these out? Do they really save time in tricky outdoor shoots, or do they introduce new challenges? I see them as a potential game-changer, but I wonder about their reliability and ease of use in fast-paced situations. Stability has always been a challenge for me, and I’m eager to hear what accessories or techniques others rely on to ensure crisp footage when conditions aren’t ideal.