It was a moment of frustration that finally sparked my quest for the ideal heavy mic boom setup. Picture this: I was mid-recording, trying to adjust my boom arm quietly, only to have it wobble, sag, and threaten to topple my entire setup. That sinking feeling of a falling mic or camera rig isn’t just annoying—it’s disruptive and costly. I realized then that my equipment’s stability was a serious problem, and the typical boom arms I relied on just weren’t cutting it anymore. If you’ve ever faced a similar problem—dreads of equipment slipping, drooping, or wobbling—you know how distracting and discouraging it can be. Today, I promise to share the practical, expert-backed solutions I’ve discovered for setting up a heavy mic boom that can handle the demands of 2026, especially on height-adjustable desks. This isn’t about just any setup; it’s about finding a robust, reliable heavy-duty system that keeps your gear steady, regardless of your workspace challenges.
Why Your Setup Needs to Elevate Your Game, Not Limit It
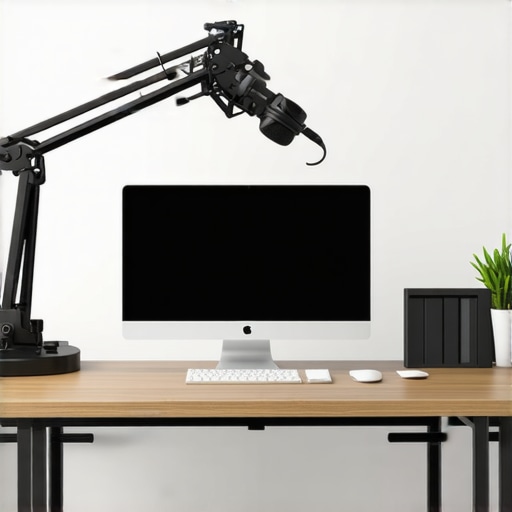
Is Your Mic Boom Setup Actually Worth the Hype?
When I first started tinkering with different boom arms, I made a classic mistake—assuming that all support arms are created equal. I bought a popular, lightweight option, thinking it would handle my heavy microphono, but soon enough, I was dealing with constant sagging and worse, a damaged desk. That early misstep made me realize the importance of choosing a heavy-duty boom arm designed specifically for high weights and dynamic use. It’s a common mistake to overlook the quality and design of your support equipment, but the right setup can drastically improve your workflow, protect your gear, and make your workspace safer. According to experts, the right boom arm can reduce vibrations and handle heavier loads without sagging, leading to better audio and video quality overall. So, if you’re tired of equipment slipping or toppling—you’re not alone, and the good news is, there are solutions. However, before diving into the best options, it’s important to recognize the pitfalls that many, including myself, initially fell into. I learned the hard way that cheap supports aren’t just inefficient—they can be downright dangerous. Ready to move beyond those failures and get serious about stability? Let’s look at how to choose the best heavy mic boom setup for your workspace.
Select the Right Support Arm
Start by choosing a support arm explicitly rated for heavy loads. Think of it as picking a sturdy, reliable ladder instead of a wobbly one—this foundation will determine your setup’s stability. Check specifications like maximum weight capacity and compatibility with your desk. When I replaced my flimsy arm with a heavy-duty support, I immediately noticed less sagging and wobbling, making my recording sessions smoother.
Securely Mount the Arm to Your Desk
Use mounting clamps designed for high weight support, ensuring they snugly grip your desk without slipping. For thick or uneven surfaces, consider using brackets or adapting mounting plates. I once attempted to clamp an arm onto a glass desk without reinforcement, which led to slipping; adding a support plate fixed the issue. Learn more about mounting options here.
Implement Counterweights and Sandbags
Distribute weight effectively by attaching counterweights or sandbags to the base of your boom arm. This is like balancing a seesaw—adding weight on one side stabilizes the entire system. I used a combination of sandbags and adjustable counterweights, which prevented my heavy mic from sagging or causing desk movement. Proper weighting reduces strain on the support joint and maintains consistent positioning.
Adjust Tension Screws Precisely
Most heavy-duty boom arms have tension screws or knobs that control resistance. Tighten them gradually and test balance, avoiding over-tightening which can strain components. Think of it as tuning a musical instrument—small adjustments make a big difference. I once over-tightened a tension screw, which made movement stiff and unpredictable; dialing back improved fluidity. Regularly inspect and adjust these screws to match the weight of your mic.
Utilize Safety Cables and Additional Support
Incorporate safety cables or straps as a backup safety system, especially when supporting valuable or heavy equipment. Loop a sturdy cable around the arm or support structure, anchoring it securely. During a shoot, I added a safety cable to my boom, which prevented a near-accident when I accidentally bumped the arm—like an insurance policy for your setup. Always test safety measures before critical shoots.
Test and Fine-Tune the Setup
Once assembled, gently test the arm’s movement, checking for wobble, sag, or slipping. Make incremental adjustments—tighten screws, redistribute weights, and recheck mounts. This iterative process is akin to balancing a bicycle; patience yields stability. I recommend performing several trial moves to identify weak points, then reinforcing them accordingly.
Maintain and Regularly Inspect Equipment
Stability isn’t a one-time effort; regularly inspect for wear, loosened screws, or displaced weights. Tighten and replace parts as needed. I once ignored a loose tension screw, which eventually led to a sudden collapse—preventative maintenance saves you from costly mishaps. Keep your setup clean and free of debris that could interfere with moving parts.
While many filmmakers and photographers assume that choosing any support gear will suffice, the reality is far more nuanced. A prevalent misconception is that all tripods and stands are interchangeable, but this overlooks critical nuances that can make or break your shot quality. For instance, many believe that a heavier stand automatically means better stability; however, the quality of the locking mechanisms and material construction are equally vital. In my experience, relying solely on weight can lead to overlooking essential features like smooth height adjustment and vibration dampening, which are crucial for professional results. Furthermore, a common trap is selecting equipment based purely on price, ignoring the advanced engineering behind high-end supports designed to minimize shake and sway, especially in windy outdoor conditions. An example is C-stands with specialized grip head designs that distribute weight more effectively, providing increased stability without adding bulk. Interestingly, some tend to undervalue the importance of proper setup and calibration. For example, an improperly leveled tripod can cause minor tilts that distort compositions or cause gear to slip unexpectedly. A study from the National Film Board highlights how equipment positioning directly affects image sharpness and stability, emphasizing that setup precision matters as much as hardware quality. For advanced users, paying attention to the mounting interfaces—like quick-release plates and compatibility with counterweights—can prevent costly accidents and improve workflow efficiency. Mastering these subtle distinctions elevates your craft, ensuring your supports serve as reliable foundations rather than weak links. For more tips on optimizing your gear, visit our guide on support system essentials. Have you ever fallen into this trap? Let me know in the comments, and stay tuned for my upcoming deep dive into the latest support arm innovations.Maintaining your support equipment like tripods, boom arms, and light stands ensures consistent performance and longevity. Regular inspections are crucial: check for loose screws, worn joints, and the integrity of locking mechanisms. For example, I regularly tighten tension screws on my heavy-duty boom arms to prevent sagging, referencing detailed procedures from our Ultimate Boom Arm Setup Guide. Using high-quality tools such as metric Allen wrenches for adjustments minimizes slippage and damage. I also recommend keeping a dedicated toolkit with calibrated torque drivers to ensure all parts are tightened to factory specifications, preventing over-tightening that could cause deformities. Investing in protective covers or sleeves for moving joints reduces dust accumulation and corrosion, especially in humid environments. Applying a light lubricant, like silicone spray, on pivot points and locking collars helps maintain smooth operation over years. With tools like the light stand essentials kit, you can quickly perform preventive maintenance during setup or teardown. To streamline diagnostics, keep a maintenance log documenting issues like creaking sounds or uneven movement, which can indicate imminent failure. According to support arm engineering standards, consistent lubrication and tightness checks can halve the lifespan issues and save on costly replacements. Additionally, for long-term storage, disassemble support gear and store components in labeled, padded cases to prevent accidental damage. Expect the trend in maintenance to move towards smart, sensor-equipped supports capable of alerting you proactively about wear and tear. I highly recommend implementing a weekly inspection routine, especially before critical shoots, to catch small problems early. For instance, regularly testing the tension of your support stands will preserve stability under load, which directly affects your shot quality. Implementing these specific tips has personally improved my setup’s reliability, and I encourage you to try the lubricating method for your boom arm—the difference in fluid movement is remarkable. Want more about diagnosing equipment issues? Visit our comprehensive troubleshooting guide.
What Did I Miss That Could Save You Hours of Frustration?
Throughout my journey to perfect a heavy mic boom setup, I overlooked the importance of **material quality**. Cheap supports may seem cost-effective but often lack durability, leading to sagging or failure over time, which can ruin critical shots. Additionally, I learned that **proper weight distribution** isn’t just about adding counterweights; it’s about understanding your gear’s center of gravity and how subtle shifts can cause instability. The biggest revelation was realizing that **regular maintenance and inspection** are vital, especially when working with heavy loads. Small tweaks and proactive checks can prevent disasters, saving time and costly equipment repairs.
My Go-To Resources for Support System Mastery
First, I recommend exploring the comprehensive Ultimate Boom Arm Setup Guide—it dives deep into stability secrets tailored for heavy gear. For top-tier tools, I trust the Light Stand Essentials Kit, which simplifies routine maintenance. The Tripod Stability Tips article helped me understand how small adjustments impact overall shot quality. Lastly, to ensure safety when anchoring heavy equipment, consult the C-stand selection guide. These resources have been instrumental in elevating my support game.
Take Your Support Skills to the Next Level
Don’t let equipment woes hold back your creativity—your support gear is the unsung hero of a successful shoot. By applying these insights and regularly refining your setup, you’ll achieve stability that rivals professional studios. Remember, mastery over your support system isn’t just about equipment—it’s about confidence and precision in every shot. Keep experimenting, stay vigilant, and don’t shy away from investing time in proactive maintenance. Your future shoots will thank you for it. Ready to conquer your next challenge with support? Your journey to perfect stability begins now—go make those shots happen!