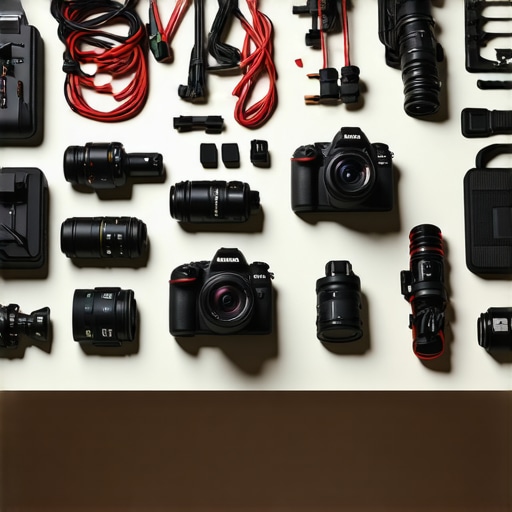
I’ll never forget the first time I had a shoot go sideways because of one simple thing: tangled cables. We were deep into the shoot, lights set, camera rolling, and suddenly, a cable snag sent a ripple through the entire setup. It was like watching a house of cards collapse—frustrating and unnecessary. That moment was my real lightbulb—cable management isn’t just a minor detail; it’s a make-or-break for smooth filming.
Fast forward to today, and I’ve learned some clever tricks—tricks that can save you from the same headaches. Today, I promise to share 5 of these hacks that tackle cable snags head-on, making your shoots safer, cleaner, and more professional. Whether you’re filming in a studio or on location, these tips can help you keep cables out of the way and prevent those pesky interruptions.
Why Cable Snags Are More Than Just Annoying
Have you ever experienced a cable yanking accidentally during a shot? Not only can it ruin your scene, but it can also pose safety risks or damage your gear. Early in my career, I ignored the importance of cable routing, assuming that cable clips and tape would do the job. Turns out, that was a critical mistake. Properly managing cables isn’t just good practice; it’s essential for safety and professionalism. According to industry standards, improper cable management can result in accidents, equipment damage, and compromised shot integrity (source: Creator Rig Reviews).
Is Cable Management Overhyped or Absolutely Necessary?
Early on, I believed that a few clips and some duct tape would suffice. Boy, was I mistaken. Neglecting proper cable organization can lead to tripping hazards, accidental unplugging, or worse. It’s a visual cue of your professionalism—cables running wild might suggest a rushed or careless setup. The good news? With some simple hacks, you can fix this without breaking the bank or sacrificing flexibility.
Let’s move beyond the basic tape job and get into some practical, effective solutions that will keep your cables in check—no matter the scene or setup. Ready? Let’s dive into those clever tricks that turn cable chaos into organized serenity.
Secure Your Tripod and Support Gear
Start by establishing a solid foundation. Use heavy-duty support arms and reliable stands, such as those highlighted in top tripods and supports. When setting up on uneven ground, attach rubber feet or secure the tripod legs with sandbags to prevent shifting during the shoot.
Plan Cable Routing Thoughtfully
Visualize your scene and identify all cables—power, HDMI, audio. Lay cables along the edges of your set, keeping them in the background or along walls whenever possible. For intricate setups, consider using color-coded cable ties to differentiate types and prevent accidental unplugging or confusion.
Use Cable Management Accessories Effectively
Employ cable clips, velcro wraps, and cable sleeves to bundle multiple cables together. Secure these bundles along support structures, such as boom arms or light stands, as shown in lighting stand techniques. For permanent fixtures, anchor cables with adhesive-backed clips that won’t damage surfaces or cause slippage.
Implement Tension and Slack Control
Avoid tight pinches that can stress cables, leading to potential damage. Leave sufficient slack near connectors and support points, ensuring that movement or tension doesn’t dislodge connections. Use cable sleeves to keep excess length tidy and prevent tripping hazards.
Set Up Secondary Safety Measures
For critical cables, add redundancy with additional clips or gaffer tape at stress points. At corners or high-traffic areas, place mats or cable protectors. During a shoot I managed recently, arranging cables behind a rolling cart with a tethered power strip kept everything organized and safe, avoiding a costly interruption.
Regularly Inspect and Maintain Cable Setup
Throughout the shoot, routinely check cable connections and securing points. Look for wear, fraying, or loose clips. Promptly replace damaged accessories to prevent accidents or gear failure. This habit not only ensures safety but prolongs the lifespan of your cables and equipment.
 While many filmmakers praise tripods, boom arms, light stands, C-stands, and camera rigs as straightforward tools, there’s often a lot of misunderstanding about their real capabilities and limitations. Let’s debunk some common myths and shed light on nuances that can make or break your next shoot.
One pervasive misconception is that all support gear is created equal. The truth is, not all tripods or C-stands are suitable for every situation. For instance, a basic tripod might suffice for quick interviews but will struggle in windy outdoor conditions or when supporting heavier camera setups. Investing in professional-grade equipment, like those highlighted in ultimate support guides, ensures stability and safety. Overlooking such nuances can lead to equipment failure mid-shoot or even safety hazards, which experts warn can cause serious injuries or expensive damages (source: source).
Many believe that lighter, cheaper gear is always more portable and easier to handle. However, this often comes with a trade-off—less durability and stability. For example, a lightweight support arm may be convenient but can droop under the weight of heavy accessories, leading to shaky footage or accidental falls. Recognizing the load capacity and build quality, as discussed in heavy-duty boom arms tips, is crucial for professionalism and safety.
Now, consider support gear placement—an aspect many overlook. Proper positioning not only secures equipment but also influences the shot’s quality. For example, elevating a light stand without considering wind resistance or base stability can cause slips or collapses. Seemingly minor details, such as securing sandbags or using a C-stand with adjustable height, can prevent wasted time and costly accidents. For detailed tips, see expert advice on C-stand selection.
Are Tripods and Support Gear Actually Built for Heavy-Duty Use?
One advanced topic worth considering is the actual load capacity versus the rated capacity of your gear. Many professionals overlook the importance of considering dynamic loads—especially when panning, tilting, or supporting heavier lenses and accessories. Studies on mechanical fatigue and support stability, such as those summarized in support gear strategies, show that equipment often performs differently under real-world conditions than manufacturer specs suggest. Selecting gear with a higher safety margin can prevent unexpected collapses or damage, saving you money and hassle in the long run.
In summary, understanding the nuances of support gear—its load capacity, construction quality, placement, and real-world performance—is vital for safe, professional filmmaking. Don’t fall for the myth that all gear is equal or that lighter is always better. Instead, invest time researching, testing, and choosing equipment designed for your specific needs. For tailored recommendations and support, consider reaching out through our contact page. Have you ever fallen into this trap? Let me know in the comments.
How do I keep my support gear running smoothly over time?
Investing in high-quality support gear like tripods, boom arms, light stands, C-stands, and camera rigs is just the beginning. Regular maintenance is essential to ensure longevity and consistent performance. I personally swear by a combination of routine inspections and proper cleaning, which have saved me countless setup frustrations.
One of my go-to methods is implementing a scheduled inspection routine before every shoot. I check for loose bolts, wear on rubber feet, and the integrity of locking mechanisms. For instance, I use a compact Allen wrench set to tighten any loose screws in my tripod heads and support arms, preventing unexpected collapses. Performing these quick preventative measures regularly means I avoid costly repairs and last-minute replacements.
Another crucial aspect involves proper cleaning, especially after outdoor shoots. Dirt, sand, or moisture can accelerate corrosion or damage moving parts. I recommend using a soft brush or compressed air to remove debris from joints and hinges. For metal components, a light application of lubricating oil—such as silicone spray—keeps moving parts smooth and prevents rust. Be cautious to avoid over-lubrication, which can attract dust or dirt over time. Applying lubricant during a dedicated maintenance session helps maintain optimal functionality.
Which tools will elevate your gear maintenance game?
Beyond the basics, I rely on specialized tools that make maintenance more efficient. For example, a digital torque wrench allows me to precisely tighten support stand bolts to manufacturer-recommended levels, ensuring safety without over-stressing components. For quick adjustments, a multi-tool with flat-head and Phillips screwdrivers becomes invaluable, especially when fine-tuning adjustments in tight spots.
Additionally, using a dedicated storage case or organizer helps keep all your maintenance tools accessible and organized. This prevents misplacing key items and ensures you’re always prepared for on-the-spot fixes. Over time, I’ve found that maintaining a maintenance checklist—covering inspection points, lubrication schedules, and cleaning routines—helps me stay consistent and prolongs the lifespan of my equipment.
Anticipate the future of gear upkeep
Looking ahead, I believe automation and sensor-based diagnostics could revolutionize how we maintain support gear. Imagine support stands with built-in wear sensors that alert you when lubrication is low or components need tightening. Such innovations could reduce downtime drastically and improve safety standards across the industry. As the technology develops, integrating smart maintenance practices will become increasingly crucial for professionals aiming to maximize their gear investment.
To keep your setup in top shape, I recommend adopting a thorough maintenance routine now. Begin by inspecting your gear before each shoot, tightening loose parts with a torque wrench, and cleaning components after outdoor use. For advanced tools, exploring a multi-tool or dedicated lubricants can make your maintenance faster and more effective. Don’t wait until a support stand collapses or a tripod wobbles—proactive care will save you time, money, and headaches in the long run. For tailored support tools and further advice, reach out through our contact page.
Lessons I Had to Unlearn About Support Gear
One of the toughest realizations was realizing that not all support gear is created equal—my initial belief that cheaper options could serve all needs was a costly mistake. Over time, I learned that investing in quality gear, like heavy-duty C-stands and robust support arms, is essential for safety and shot stability. I also discovered that the way you position and secure supports can either make or break your shot, a lesson that came from some hard-earned experience on set. Lastly, I understood that regular maintenance isn’t just a chore—it’s a lifeline that prolongs equipment life and ensures consistent performance, saving me future headaches.
The Brands and Resources That Elevate My Filmmaking
For reliable support gear, I trust support arms and C-stands from CreatorRig—their durability and safety features are unparalleled. When it comes to learning more about support gear setup and safety, their comprehensive guides have transformed my approach. For practical tools that make maintenance easier, I rely on light stand essentials—these help me keep my equipment in top shape. Additionally, the support gear strategies section offers insights into building a reliable support system tailored for professional filmmaking, which I highly recommend.
Your Next Step Beyond Basic Support Learning
Embrace the journey of continuous improvement by regularly inspecting and maintaining your support gear—it’s the difference between a shaky shot and professional stability. Reach out to experts or join forums to exchange tips and experiences—personal stories always bring invaluable lessons. Don’t just settle for basic gear; invest in quality, learn proper setup techniques, and prioritize safety. Remember, your support gear is the foundation of your shot—treat it with care, and it will serve your creative vision faithfully. Want personalized support recommendations or maintenance routines? Contact us here and elevate your filmmaking today.