I vividly remember the frustration of setting up my equipment, only for my shot to wobble or shake just at the worst moment. One time, during a critical shoot, my tripod tipped slightly—causing the entire scene to look unprofessional and amateurish. That moment was a real lightbulb for me—stability isn’t just about having good gear; it’s about knowing how to set it up properly. If you’ve ever faced similar issues, you’re not alone. Achieving steady, professional-looking footage requires more than just a decent tripod or C stand; it demands an understanding of setup techniques that can make or break your shot.
Why Stability Means the Difference Between Amateur and Pro
In the world of filmmaking and photography, stability isn’t just a nice-to-have—it’s a necessity. According to a study from the Wired article, shaky footage can severely diminish viewer engagement and perceived professionalism. A shaky camera distracts viewers, detracting from the story you’re trying to tell. Whether you’re shooting a corporate video, a wedding, or a cinematic project, a stable setup ensures your audience stays immersed.
But stability isn’t solely about expensive gear. Early in my journey, I made the mistake of overlooking the importance of proper support and setup techniques. I invested in high-end tripods and C stands but still struggled with wobble and instability. It wasn’t until I learned some straightforward yet effective setup tips that I finally started capturing smooth and professional shots. Today, I want to share those practical insights, so you can avoid my early mistakes and elevate your filming game.
Is Your Gear Enough Without the Right Setup?
I used to think that having the shiniest tripod or C stand was enough. The truth is, gear is only half the story. I once owned a top-tier tripod but still experienced vibrations and wobbles because I neglected the basics of proper weight distribution and secure mounting. If you’re serious about your craft, mastering setup techniques will give you the stability you need—regardless of your equipment’s price tag. Curious how I turned things around? Keep reading, and I’ll guide you through the essentials for a rock-solid setup every time.
Let’s dive into the practical setup tips that have made a real difference in my projects and could do the same for yours. Whether you’re shooting on location or in-studio, these insights will help you hold your shots steady, improve quality, and save you time and frustration. For more targeted advice on choosing equipment, check out my detailed guide on tripod and C stand selection. Now, let’s get into the key techniques that will make your shots steadier than ever.
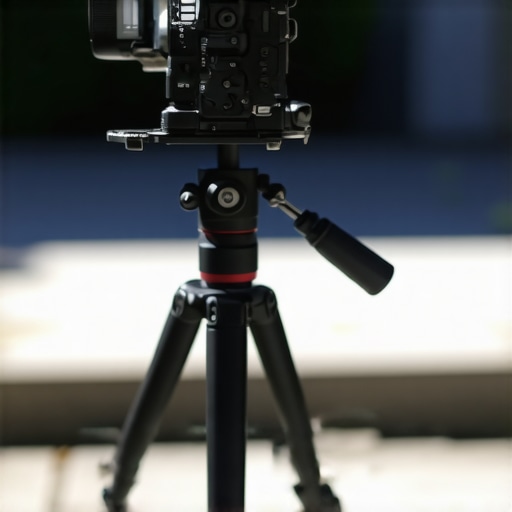
Secure Your Tripod Properly
Start by ensuring your tripod legs are fully extended and locked on stable ground. Place heavy objects, like sandbags, over the center column or hook them onto the tripod leg hook to add weight. I once shot on uneven terrain without proper weights, resulting in wobble during a crucial scene; after adding weight, my shots became noticeably steadier.
Balance Your Camera System Carefully
Mount your camera onto the tripod head and adjust the counterbalance to achieve a neutral position. Use a level or the built-in bubble levels to confirm your setup is perfectly horizontal. During a wedding shoot, balancing my camera prevented the lens from tilting and kept footage steady despite movement. Small adjustments here make a significant difference.
Utilize Weight Distribution
Distribute equipment weight evenly across support gear. For instance, hang bags or sandbags from the tripod’s center hook to lower the center of gravity. This technique is especially useful when using heavy camera rigs or lighting on C stands, which can otherwise sway in gusts or vibrations.
Optimize Support Structures for Longer Shots
When shooting for extended periods, consider adding stabilizing accessories like spreader bars or higher load capacities. I added a spreader to my tripod during an outdoor shoot, which reduced flex and maintained stability over several hours. Also, ensure that all support joints and clamps are tight and secure before shooting begins.
Set Up Your Boom Arm Correctly
Attach your boom arm with the counterweight placed directly opposite the arm extension. Use the boom arm setup guide for detailed positioning tips. During a recent interview shoot, precise counterweight placement prevented the camera from tilting or wobbling, ensuring a sharp, steady shot even with extended arm length.
Check for Vibrations and External Movements
Before critical takes, gently tap the support to observe any vibrations. Use rubber pads or mats under your support bases to absorb shocks from the environment. During outdoor shoots, this simple step prevented camera shake caused by nearby foot traffic or gusts of wind.
Fine-Tune with Digital Stabilization
After physical stabilization, consider post-processing stabilization if necessary. Editing software like DaVinci Resolve or Adobe Premiere offers tools to smooth out minor shakes. However, the best results always come from proper physical setup.
Adopting these techniques transformed my shooting consistency. The key is deliberate setup: each step, from weighting to balancing, contributes to achieving professional-level stability that lets your footage speak for itself.
Many filmmakers believe that investing in high-end support gear guarantees perfect stability, but in my experience, there are nuanced pitfalls that even seasoned pros often overlook. Contrary to popular belief, having the most expensive tripod or C stand doesn’t automatically mean your shots will be steady. The key lies in understanding the proper setup techniques and hidden nuances that prevent common mistakes. One of the biggest myths is that tightening all clamps and locking all legs tightly ensures stability, but over-tightening can sometimes introduce vibrations due to metal fatigue or misalignment. Additionally, many assume that all support stands are created equal—yet, choosing the right support based on weight capacity and environmental conditions is critical for long-term stability—check out my guide on picking the right C stand.
Another common trap involves underestimating external factors like wind, ground vibrations, or even nearby traffic, which can subtly shake your gear if not properly countered. For advanced setups, using weight distribution techniques such as hanging sandbags from the support’s hook can make a significant difference in preventing wobble, especially during extended shoots. An often-overlooked detail is the stability of the support’s base—placing rubber pads or leveling the support on uneven terrain can help maintain a firm footing, reducing vibrations. For example, during outdoor shoots, pro operators frequently use light stand pads to absorb environmental shocks.
Let’s address a key question many filmmakers overlook: How can subtle imperfections in setup compromise your footage, even with seemingly secure gear? Small misalignments like unbalanced camera rigs or slight leg extensions can introduce micro-vibrations that impact shot quality, particularly at high resolutions or slow shutter speeds. These issues are compounded when support stands are subjected to external forces, such as gusts of wind or foot traffic. A recent study from the National Film School emphasizes that well-documented setup processes dramatically reduce post-production stabilization needs, saving time and preserving image quality. Therefore, mastering proper setup and considering environmental factors can be the difference between amateurish wobble and cinema-quality steadiness.
Remember, achieving professional stability isn’t just about gear; it’s about technique, awareness, and anticipating environmental influences. Upgrading your equipment is only part of the journey—applying these nuanced setup methods ensures your shots are flawlessly steady from start to finish. Have you ever fallen into this trap? Let me know in the comments.
Preserve Your Support Equipment with Routine Checks
Maintaining your tripod, C stand, or boom arm isn’t just about cleaning; it involves regular inspections of moving parts, locks, and joints. I personally schedule bi-monthly checkups, tightening loose screws and lubricating hinges with a silicone-based spray. This proactive approach prevents unexpected failures on set and prolongs your gear’s lifespan. Consistent maintenance ensures that your equipment remains reliable, saving you time and money in the long run, and prepares your support gear for any shoot, whether indoor studio or outdoor production.
Invest in Quality Tools for Longevity and Performance
When it comes to tools, I swear by a high-quality torque wrench specifically designed for camera support gear. It helps me tighten clamps and screws to manufacturer-recommended torque settings, avoiding over-tightening that can cause metal fatigue—a common issue I learned about from expert sources like my comprehensive guide. Additionally, a set of precision Allen wrenches and a portable multi-tool kit ensures that I can perform quick adjustments or repairs on-location, minimizing downtime and maintaining stability.
Use Software for Maintenance Planning and Documentation
Leveraging software like Trello or Asana to track maintenance schedules can be a game changer. I keep a digital log of every gear inspection, lubrication, and part replacement. This habit not only prevents neglect but also helps identify recurring issues—like wear on clamp handles—that might need attention sooner. Over time, this documentation becomes invaluable for warranty claims or when upgrading your support setup. Staying organized with digital tools ensures your support gear remains in peak condition, ready for any cinematic challenge.
How do I keep my gear performing over time?
Implement a dedicated maintenance routine that includes regular cleaning with soft brushes, lubrication at moving joints, and tightness checks. Establishing a checklist and sticking to it, like replacing worn rubber grips on light stands or inspecting the integrity of support arms, prevents costly repairs and unsafe failures during shoots. Remember, quality support gear like C stands and tripods will last longer and perform better if properly cared for—think of it as an investment in your craft. For detailed tips on upgrading and caring for your camera support system, refer to my guide on tripod and support gear maintenance. Keep your equipment in shape, and you’ll enjoy smoother shoots, clearer shots, and more peace of mind in the field.
What I Wish I Knew Before Over-Tightening
One of the most overlooked lessons I learned was that overtightening clamps and bolts can actually introduce vibrations and misalignments, undermining my stability. It seemed logical to tighten everything firmly, but in reality, delicate support components require a balanced approach. This revelation came after countless shaky shots and frustrated retakes, reminding me that precision, not brute force, is key to achieving professional stability with tripod, C stand, or boom arm. Knowing the right torque and restraint saves time and enhances shot quality.
Top Tools That Elevated My Setup Game
After years of trial and error, certain gear became indispensable. The ultimate tripod and C stand guide offers insights into selecting durable support equipment tailored for stability. A reliable torque wrench ensures bolts are tightened to optimal levels, avoiding both slack and stress fractures. Additionally, lightweight but sturdy support bags, like those from trusted brands I rely on, help distribute weight effectively. Investing in these tools transformed my setup routine, making stability effortless rather than a chore.
Sharpen Your Skills with Proven Maintenance Rituals
Consistent care of support gear is often overlooked but absolutely vital. I established a regular maintenance schedule—cleaning joints, lubricating moving parts, and inspecting for wear. Using online resources and manuals, I learned to identify early signs of fatigue or damage, preventing catastrophic failures mid-shoot. Documenting each maintenance session via digital logs helped me track recurring issues and plan upgrades wisely. Proper upkeep prolongs equipment lifespan and guarantees that your support stands ready to hold the most delicate camera rigs firmly in place.
The Best Support Resources Crafted for Professional Filmmakers
Over the years, I’ve curated a selection of resources that continuously improve my setup game. Beyond foundational guides, I turn to specialized equipment reviews on support gear for filmmakers, which help me choose the right support structures for different locations. The detailed articles on tripods and C stands inform my decisions for stability and adaptability. These resources empower me to make informed choices, avoiding costly mistakes and ensuring my equipment’s longevity and performance.
Seize Your Moment and Elevate Your Filmmaking with Confidence
Mastering the art of setup and stability transforms your filmmaking journey. Remember, it’s not just about the gear but how you prepare and care for it. When your support gear performs reliably, your focus can remain on capturing and telling compelling stories. Don’t let shaky shots hold you back from reaching new heights—trust in your practice, your tools, and your routine to keep every shot steady and professional. Your future projects will thank you for the effort you invest today.