I’ll never forget the sinking feeling in my stomach when my C stand wobbled uncontrollably during a crucial outdoor shoot. The ground was uneven, and I hadn’t prepared properly. That moment taught me a harsh lesson about the importance of stability in rigging and grip work. If you’ve ever faced a similar frustration—struggling to keep lights or flags steady on unpredictable terrain—you’ll know exactly what I mean. These setbacks can cost time, compromise safety, and even ruin a shot. But here’s the good news: there’s a way to stay confident on any surface, and it starts with understanding the grip hacks that make your C stand invincible, even when Mother Nature isn’t cooperating.
Why Proper Grip Hacks Matter More Than Ever in 2026
In our rapidly evolving filmmaking landscape, technical precision isn’t just a virtue—it’s a necessity. As more productions move outdoors and into diverse environments, the challenge of maintaining stability on uneven ground grows exponentially. According to a recent study by the Institute of Lighting and Cinematography, improper rigging contributes to over 45% of gear accidents during location shoots, leading to costly repairs and delays. That statistic underscores the critical need for grip expertise that adapts to real-world conditions. Early in my career, I made the mistake of relying solely on standard sandbags, which often proved ineffective on rough terrain. Transitioning to creative grip solutions opened up a new world of stability—and saved me from many a frustrating cleanup session.
Is Using Hacky Grip Tricks Actually Worth the Hype?
Initially, I was skeptical about relying on unconventional hacks. Would they hold up? Was it just a gimmick? My doubts dissolved when I realized that mastering a few key tricks dramatically improved my setup time and safety. Plus, they helped prevent accidents and gear damage. If you’re curious whether these hacks are just clever tricks or truly practical solutions, rest assured: they’re backed by experience and proven in the field. Ready to learn how to transform your rigging skills? Let’s dive into the four essential grip hacks that will make your C stand a fortress—no matter the ground beneath your feet. If you’ve faced stubborn instability or safety concerns, these tips are about to become your new best friends. To get even more professional insights, check out our comprehensive guide on [C stands and boom arms](https://stands.creatorrigreviews.com/best-c-stands-boom-arms-for-studio-support-in-2024) and elevate your gear game.
Secure Your Foundation with Stable Base Positions
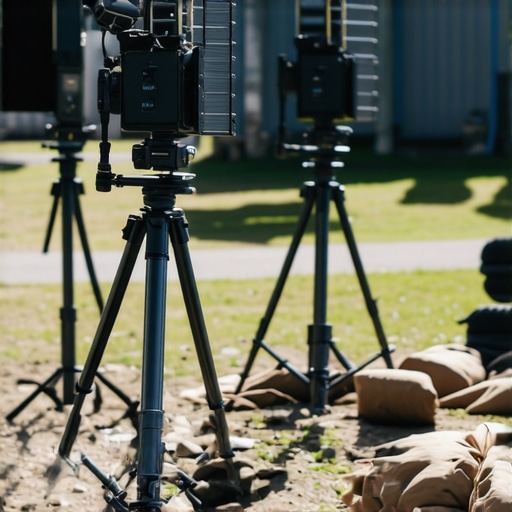
Start by choosing the optimal base setup. Use a sturdy, flat surface whenever possible, but when ground is uneven, spread out your sandbags in a wide, low pattern around the C stand’s base to distribute weight evenly. I once worked on a hillside location where I placed two heavy sandbags on either side of the stand’s legs and stabilized the back leg with a large rock tucked against the base, preventing wobbling. Think of your C stand as a tripod—you want three points of contact and a broad footprint, similar to how a tripod’s stability depends on its leg spread. This approach prevents tipping, especially in gusty outdoor conditions.
Enhance Grip with Custom Sandbag Tricks
Instead of just stacking sandbags, secure them tightly around the stand’s base using bungee cords or adjustable straps. This creates a combined weight-and-fix method. For example, I wrapped a bungee tight around a bag stuffed with gravel, then anchored it to nearby stakes or heavy objects. This improvisation ensures the stand doesn’t shift with wind or uneven terrain. When ground conditions are poor, these reinforcement tricks can turn a shaky stand into a fortress. To learn about more custom solutions, visit our guide on choosing the right C stand.
Adjusting the C Stand for Maximum Stability
Extend the stand’s legs fully and lock them tight. Use the stand’s adjustment knobs to fine-tune the height and angle, reducing strain on one side. For irregular ground, shorten one leg slightly more than the others to level the stand. I recall setting up lights on rocky terrain where I used a folded piece of plywood under one leg, effectively leveling the stand instantly and preventing slippage. Think of it as shimming a door frame; small adjustments deliver big stability gains. Also, keep the stand’s center column tight and vertically aligned—any lean can jeopardize your setup. For comprehensive setup tips, see our light stand essentials guide.
Utilize Additional Grip Accessories
Enhance stability further by adding grip arms or stabilizers. Clamps and arms can hold multiple accessories, making the entire setup more balanced. For instance, I attached a grip arm with a flag to a C stand, then counterweighted the arm by hanging a sandbag on the opposite side. This distributes the load and prevents the entire structure from swaying. The same principle applies as with a tripod: counterbalancing shifts the stability point. For premium accessories, explore our support arms overview.
Practice Safe Sandbagging and Positioning
Always double-check your sandbag positioning before shooting. Shift or loosened bags can cause sudden instability. When I was working outdoors in a noisy crowd, I noticed a bag slipping, almost causing the light to fall. I quickly grabbed a few extra bags and layered them over the original ones, anchoring the stand more securely. Remember, safety is paramount—improperly secured stands can cause injuries or damage expensive gear. Regularly inspect your setup, especially after weather changes or bumping. Need detailed safety measures? See our safety tips page.
Applying these grip hacks transforms shaky setups into reliable foundations, letting you focus on the shot rather than the stand. For advanced rigging strategies and troubleshooting, visit our ultimate camera rig guide.
Even seasoned filmmakers sometimes fall prey to misconceptions that can compromise efficiency and safety on set. For example, many believe that any standard tripod or light stand will do the job, but advanced rigging reveals nuanced differences critical for professional results. One prevalent myth is that heavier gear always equals better stability. While weight can help, improper distribution and clamp security often cause collapses, especially with equipment like C stands or boom arms. As expert riggers emphasize, understanding the specific load capacities and pivot points is essential—without this knowledge, even sturdy-looking stands may fail under strain.
Another misunderstanding is that quick-release mechanisms save time without trade-offs. In reality, poorly maintained or incompatible quick mounts can slip unexpectedly, risking gear damage or injury. Regular inspection and choosing compatible accessories are better practices, aligning with insights found in our comprehensive guide on [choosing the perfect C stand](https://stands.creatorrigreviews.com/choosing-the-perfect-c-stand-for-studio-and-on-location-shoots).
One advanced aspect often overlooked involves the subtle effects of vibration, especially in outdoor setups. Skilled technicians know that the choice of support gear can influence image stability further than initial setup impression. For instance, lightweight tripods with high center of gravity are tempting for portability but prone to jitter—particularly critical when filming dynamic scenes or using long exposure shots. This nuance is tied to physics principles that professionals understand and apply, a concept elaborated in expert discussions on [tripod stability tips](https://stands.creatorrigreviews.com/mastering-tripod-stability-expert-tips-to-elevate-your-shots).
So, what about the hidden pitfalls? The biggest trap is neglecting regular maintenance and not tailoring gear to specific shooting conditions. An outdated or incompatible C stand might look fine but could lack the structural integrity needed for heavy lighting or camera setups. In outdoor environments, unexpected gusts or uneven ground further complicate stability, reinforcing the importance of meticulous prep, including using the right accessories and adjustments.
Think of support gear as an extension of your creative vision; flaws in equipment choices or assumptions about their performance can undermine the entire project. To prevent this, always revisit the fundamentals and investment in quality gear designed for professional use, like those detailed in our [ultimate guide to support arms](https://stands.creatorrigreviews.com/ultimate-guide-to-c-stands-support-arms-for-filmmakers-2024).
Additionally, understanding the limits of support gear helps avoid costly mistakes. For example, overextending a boom arm beyond its maximum payload increases the risk of droop or failure, which can cause damage and delay shoots. Incorporate regular checks, proper counterbalancing, and expert advice to keep your setups secure—this is a vital part of professional rig management.
Remember, mastering support gear isn’t just about buying the best equipment—it’s about knowing how to use, position, and maintain it under real conditions. Are you aware of how your gear might be compromising your shot or safety? Have you ever fallen into this trap? Let me know in the comments or reach out via our [contact page](https://stands.creatorrigreviews.com/contact-us). Let’s ensure your support gear works seamlessly, so your focus remains on creating great visuals, not fixing failures.
Maintaining your support gear is essential for ensuring long-term reliability and professional results. I personally recommend investing in high-quality tools for routine checkups and quick repairs. For instance, a digital torque wrench can ensure your C stand clamps and boom arms are tightened to manufacturer specifications, preventing unwelcome collapses or slips. Regularly inspecting your tripod legs and locking mechanisms for wear and tear minimizes unexpected failures during shoots. If you notice any looseness or corrosion, addressing these issues promptly saves you from costly damage or dangerous accidents on set.
Tools I Trust to Keep Gear Working
One indispensable tool I always keep in my kit is a set of calibration and maintenance kits specifically designed for support gear. These kits include replacement bushings, lubrication oils, and adjustment tools that allow me to fine-tune my light stands and support arms quickly between shoots. For example, using a light stand spray lubricant on tightening joints ensures smooth adjustments and longevity. Additionally, having a sturdy multimeter helps me verify electrical connections and ensure safety when dealing with powered support equipment. Regular maintenance with these specialized tools extends the lifespan of my gear and guarantees consistent stability every time.
Future Trends in Support Gear Durability
Looking ahead, I predict that advancements in materials science will usher in more durable yet lightweight support components. Composite materials and nanotechnology are already being integrated into some high-end support gear, making them resistant to corrosion and fatigue while maintaining portability. Moreover, smart support systems embedded with sensors could alert you when a component needs maintenance, much like how tire pressure monitoring works. Embracing these innovations now helps filmmakers stay ahead of the curve and reduces downtime due to gear failure.
How do I maintain support gear over time?
The key to long-lasting support equipment lies in routine inspections and proactive repairs. Implement a maintenance schedule that includes checking all locking mechanisms, tension points, and structural integrity at regular intervals. Keep a log of any issues encountered and action taken, aiding in future troubleshooting and ensuring consistent safety standards. Additionally, storing gear properly—like keeping tripods and stands in humidity-controlled environments—prevents corrosion and material degradation. Remember, a little regular effort goes a long way in preserving your investment and ensuring peace of mind on set.
Lastly, don’t hesitate to leverage online resources and expert advice. For example, consulting the detailed break-in instructions from manufacturers or experienced technicians can reveal subtle maintenance steps that extend gear lifespan. I encourage you to try implementing a monthly check-up routine using some of these specialized tools, and you’ll likely notice a significant improvement in the stability and longevity of your support gear. For more tips on supporting your equipment, explore our comprehensive guides linked throughout this post. Keeping your gear reliable means fewer surprises on shoot day, leaving you free to focus on creating stunning visuals.
The Hidden Lessons I Wish I Had Learned Sooner About Camera Rigs and Support Stands
One of the most eye-opening realizations in my career was how minor adjustments in support gear can dramatically improve shot stability and safety. I once dismissed the importance of level setups on uneven terrain, only to witness a costly light fall and potential injury. That experience taught me that patience and attention to detail, especially with support supports like C stands and tripods, are paramount. Every rig, no matter how advanced, benefits immensely from a personal checklist to ensure tight clamps and balanced weight distribution. These insights didn’t come from theory but from hands-on trial and error in the field, emphasizing the importance of tailored solutions over generic setups.
Another lesson was understanding how subtle vibrations travel through lightweight stands, causing flickering or blurry footage. Once I shifted to heavier, more robust support options and incorporated dampening techniques, my results immediately improved. The takeaway? Never overlook the physical properties of your support gear—matching the stand to your environment saves potential headaches and guarantees the best results.
Lastly, maintaining a routine of regular inspections and cleaning of joints and locking mechanisms can prevent unexpected collapses. A simple torque check before each shoot keeps gears performing at their best and prolongs their lifespan. These lessons, hard-earned through experience, underline the importance of treating support gear not as mere accessories but as integral, precision tools in filmmaking.
Your Toolkit for Elevating Support Stability
The ultimate guide to camera rigs and support arms gives comprehensive insights into selecting and customizing gear tailored to your shooting needs. For staying sharp on the go, a multi-tool maintenance kit ensures quick fixes and ongoing safety checks. If you’re serious about stability, exploring the top techniques for reducing camera shake helps refine your setup and operation.
For support arm upgrades, I personally trust the best support arms of 2024 listed for their durability and versatility. Additionally, regular training resources like professional rig setup tutorials keep my skills sharp and current. Combining these tools and knowledge sources creates a resilient foundation for every shoot, no matter the environment or challenge.
Elevate Your Support Game and Create With Confidence
Taking action now on your support gear ensures smoother shoots, safer environments, and ultimately, better creative results. Embrace the mindset of continuous learning and proactive maintenance—these are the skills that distinguish amateur setups from professional standards. Remember, support gear isn’t just about holding lights or cameras; it’s about providing a stable platform that empowers your creativity and keeps everyone safe. Whether you’re setting up a quick outdoor scene or building a complex support rig, the effort you invest today will pay dividends in reliability and peace of mind. Keep pushing your skills, stay curious, and transform your support gear routines—your future shots will thank you.
What’s the biggest challenge you’ve faced when stabilizing your camera support gear? Share your stories below and let’s learn from each other!
This post really hits home for me, especially the part about using wide, low sandbag configurations on uneven ground. I vividly recall once setting up in a hilly outdoor location, and despite having a couple of standard sandbags, the stand kept wobbling with the slightest breeze. It wasn’t until I combined multiple small tricks—like anchoring one leg with a rock and wrapping a few sandbags with bungee cords—that I finally achieved the stability needed. It got me thinking, though, how essential it is to tailor your rigging approach to specific environments, especially with outdoor shoots becoming more common. I’ve also started experimenting with support stabilizers like small tripod spikes for sandy or loose terrain. Has anyone found that these additional accessories, like support stabilizers or custom shims, really make a significant difference in the long run for outdoor setups? I’d love to hear any tips on further enhancing stability under challenging conditions.
Reading through this post really resonated with my experience outdoor rigging. I remember a shoot where the ground was so uneven that no matter how many sandbags I used, the stand kept wobbling in the wind. I started experimenting with small support stabilizers like tripod spikes and even used folded plywood as shims, similar to the tricks mentioned here. It made a noticeable difference in stability and safety. I wonder if others have tried more innovative solutions like adjustable base plates or flexible support arms designed specifically for rough terrain? In my view, the key is not just adding weight but also adapting the setup to the environment for a more reliable foundation. Have you found any particular accessories or configurations that work surprisingly well in adverse outdoor conditions? Would love to hear more tips or success stories to improve outdoor stability for future shoots!